Introduction
This guide will walk you through the steps of replacing the optical drive on the HP Pavilion 15-e043cl laptop.
The optical drive is responsible for loading, unloading, and reading disks inserted into it. You may be experiencing symptoms such as the disk tray not opening or disks not being read properly.
If you have any of these symptoms, you may want to follow this guide to replace your optical drive with a new one.
What you need
-
-
-
Unscrew the single Phillips #0 captive screw that was previously hidden by the battery.
-
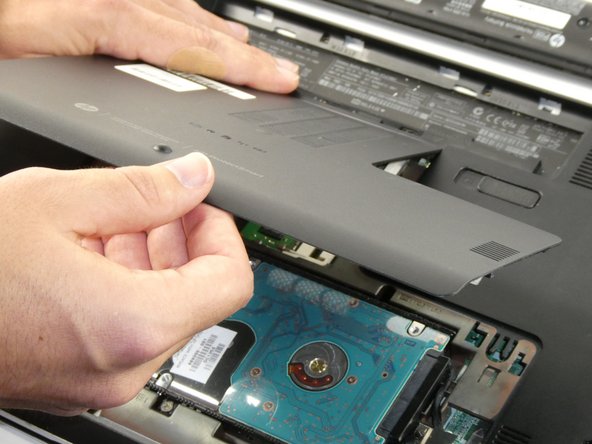
Slide the maintenance panel away from the battery compartment to release it.
-
-
-
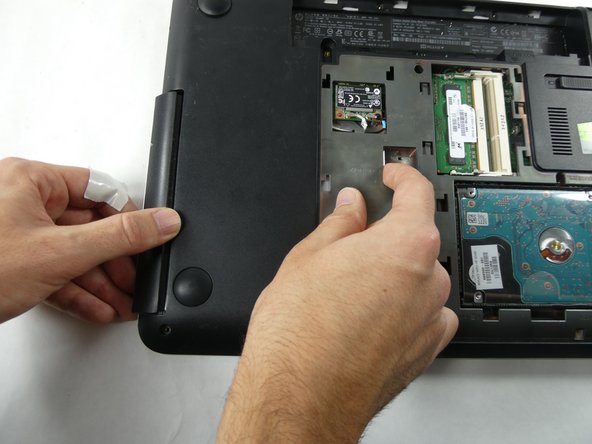
Remove the black screw nearby to the disk tray.
-
Push the disk tray out of the laptop near the stamp that says "RELEASE."
-


To reassemble your device, follow these instructions in reverse order.
To reassemble your device, follow these instructions in reverse order.
Team

UMass Dartmouth, Team 4-5, Sinclaire Fall 2022 Member of UMass Dartmouth, Team 4-5, Sinclaire Fall 2022
UMASSD-SINCLAIRE-F22S4G5
5 Members
7 Guides authored