
HP Pavilion 15-cc561st Keyboard Assembly Replacement

What you need

  1. HP Pavilion 15-cc561st Keyboard Assembly Replacement, Bottom Cover: step 1, image 1 of 3 HP Pavilion 15-cc561st Keyboard Assembly Replacement, Bottom Cover: step 1, image 2 of 3 HP Pavilion 15-cc561st Keyboard Assembly Replacement, Bottom Cover: step 1, image 3 of 3
    Tool used on this step:
    Magnetic Project Mat
    $19.95
    Buy
    • Before you begin to remove the bottom cover, shut down the computer. Disconnect all external devices and unplug the AC adapter. Flip the laptop upside down.

    • Use a Phillips #0 screwdriver to remove five screws from the bottom cover:

    • Two 5.6 mm screws

    • Each of these screws are beneath the two rubber feet on the rear side of the laptop (near the display hinges). You do not have to completely remove the rubber feet to remove the screws; simply peel the top of the feet to reveal the screws.

    • Three 5.8 mm screws

    • Throughout this repair, keep track of each screw size and location to avoid damaging your device.

  2. HP Pavilion 15-cc561st Keyboard Assembly Replacement: step 2, image 1 of 2 HP Pavilion 15-cc561st Keyboard Assembly Replacement: step 2, image 2 of 2
    • Insert an opening tool into the space between the display hinges and the bottom cover.

    • Firmly push the opening tool upwards to separate the bottom cover from these areas.

  3. HP Pavilion 15-cc561st Keyboard Assembly Replacement: step 3, image 1 of 3 HP Pavilion 15-cc561st Keyboard Assembly Replacement: step 3, image 2 of 3 HP Pavilion 15-cc561st Keyboard Assembly Replacement: step 3, image 3 of 3
    • Insert your opening tool and firmly push the tool upwards along the rear edge.

  4. HP Pavilion 15-cc561st Keyboard Assembly Replacement: step 4, image 1 of 3 HP Pavilion 15-cc561st Keyboard Assembly Replacement: step 4, image 2 of 3 HP Pavilion 15-cc561st Keyboard Assembly Replacement: step 4, image 3 of 3
    • Use the opening tool again on the left and right sides.

    • Start prying at the areas closer to the rear of the laptop (near the display hinges) before moving towards areas that are closer to the front of the laptop (away from the display hinges).

    • Pry a little bit on the left side, then pry a little bit on the right side before prying more on the left side again. Working on both sides in this incremental fashion is easier than completely prying one side before starting the other side.

  5. HP Pavilion 15-cc561st Keyboard Assembly Replacement: step 5, image 1 of 1
    • Lift the bottom cover upwards to remove it.

  6. HP Pavilion 15-cc561st Keyboard Assembly Replacement, Battery: step 6, image 1 of 1
    • Use a Phillips #0 screwdriver to remove the five 5.7 mm screws that secure the battery.

  7. HP Pavilion 15-cc561st Keyboard Assembly Replacement: step 7, image 1 of 3 HP Pavilion 15-cc561st Keyboard Assembly Replacement: step 7, image 2 of 3 HP Pavilion 15-cc561st Keyboard Assembly Replacement: step 7, image 3 of 3
    • Pull the battery towards the front edge of the laptop to disconnect it from the 8-pin battery connector.

    • Lift the disconnected battery upwards to remove it.

    • Calibrate a newly-installed battery to help your laptop get an accurate battery percentage reading.

  8. HP Pavilion 15-cc561st Keyboard Assembly Replacement, Fan: step 8, image 1 of 1
    • Disconnect the fan cable from the motherboard.

    • Handle the cable by the connector. Avoid pulling on the cables themselves to avoid damaging the cables.

  9. HP Pavilion 15-cc561st Keyboard Assembly Replacement: step 9, image 1 of 1
    • Use a Phillips #0 screwdriver to remove the three 5.8 mm screws that secure the fan.

  10. HP Pavilion 15-cc561st Keyboard Assembly Replacement: step 10, image 1 of 1
    • Lift the fan upwards to remove it.

  11. HP Pavilion 15-cc561st Keyboard Assembly Replacement, Heat Sink: step 11, image 1 of 1
    • Use a Phillips #0 screwdriver to remove the four 3.0 mm screws that secure the heat sink.

  12. HP Pavilion 15-cc561st Keyboard Assembly Replacement: step 12, image 1 of 3 HP Pavilion 15-cc561st Keyboard Assembly Replacement: step 12, image 2 of 3 HP Pavilion 15-cc561st Keyboard Assembly Replacement: step 12, image 3 of 3
    • Lift the heat sink upwards to remove it.

    • Thermal paste must be thoroughly cleaned from the surfaces of both the heat sink and the processor each time the heat sink is removed. Apply new thermal paste before reinstalling the heat sink.

  13. HP Pavilion 15-cc561st Keyboard Assembly Replacement, I/O Board: step 13, image 1 of 3 HP Pavilion 15-cc561st Keyboard Assembly Replacement, I/O Board: step 13, image 2 of 3 HP Pavilion 15-cc561st Keyboard Assembly Replacement, I/O Board: step 13, image 3 of 3
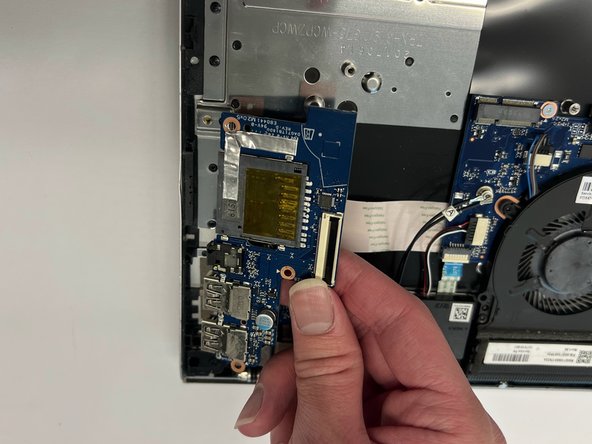
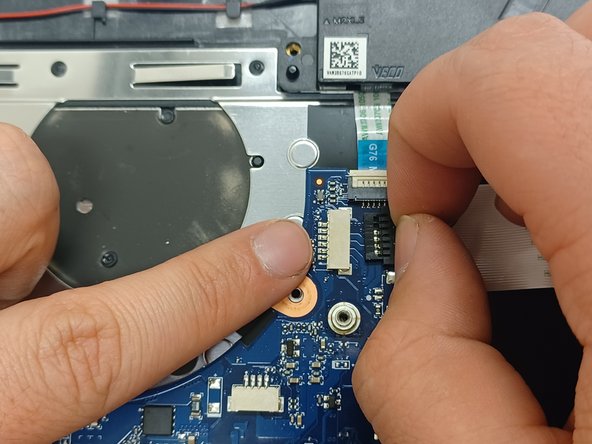
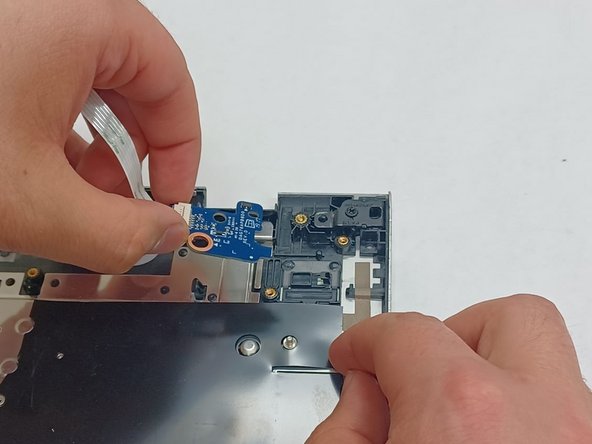
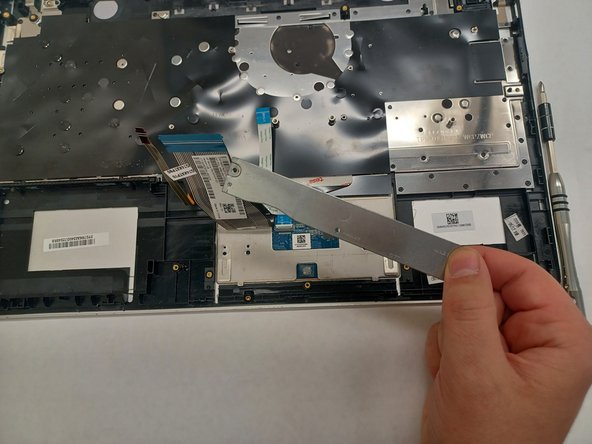
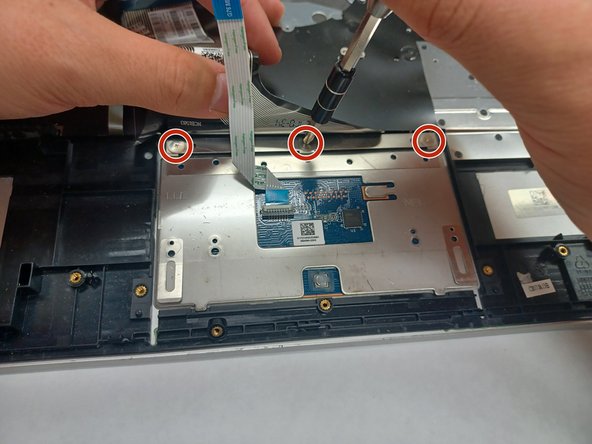
    • Gently release the slider of the ZIF connector that the USB port board is connected to.

    • Gently lift the Flat Flexible Cable away from the ZIF connector to disconnect the cable from the USB port board.

  14. HP Pavilion 15-cc561st Keyboard Assembly Replacement: step 14, image 1 of 1
    • Use a Phillips #0 screwdriver to remove the two 5.8 mm screws that secure the USB port board.

  15. HP Pavilion 15-cc561st Keyboard Assembly Replacement: step 15, image 1 of 2 HP Pavilion 15-cc561st Keyboard Assembly Replacement: step 15, image 2 of 2
    • Lift the USB port board upwards to remove it.

  16. HP Pavilion 15-cc561st Keyboard Assembly Replacement, WLAN Module: step 16, image 1 of 1
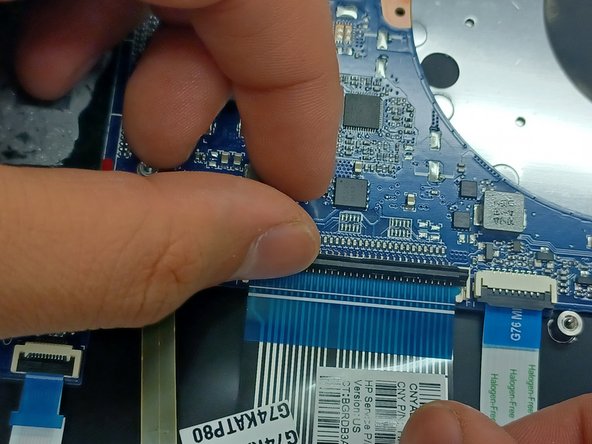
    • Disconnect the WLAN antenna cables from the terminals on the WLAN module:

    • Cable labeled "1/AUX" which connects to the "Aux" terminal

    • Cable labeled "2/MAIN" which connects to the "Main" terminal

  17. HP Pavilion 15-cc561st Keyboard Assembly Replacement: step 17, image 1 of 2 HP Pavilion 15-cc561st Keyboard Assembly Replacement: step 17, image 2 of 2
    • Use a Phillips #0 screwdriver to remove the 3.0 mm screw that secures the WLAN module.

    • Removing this screw will cause the WLAN module to tilt up.

  18. HP Pavilion 15-cc561st Keyboard Assembly Replacement: step 18, image 1 of 1
    • Pull the WLAN module away from the slot at the angle it rises from.

    • Line up the notches on a new memory module with the slot. These notches are designed to prevent incorrect insertion.

  19. HP Pavilion 15-cc561st Keyboard Assembly Replacement, Speakers: step 19, image 1 of 2 HP Pavilion 15-cc561st Keyboard Assembly Replacement, Speakers: step 19, image 2 of 2
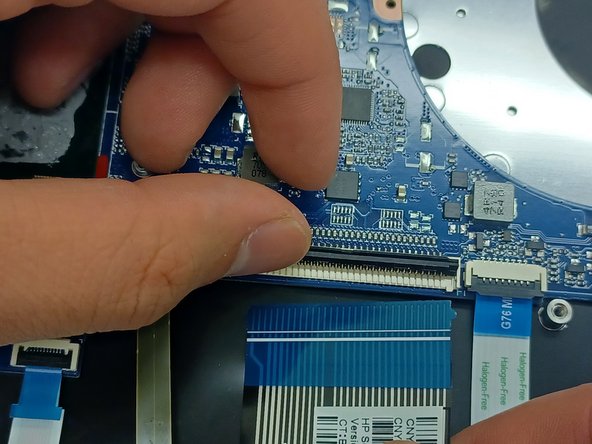
    • Remove the bundled cable connector from the terminal by pulling it horizontally out of its socket.

  20. HP Pavilion 15-cc561st Keyboard Assembly Replacement: step 20, image 1 of 2 HP Pavilion 15-cc561st Keyboard Assembly Replacement: step 20, image 2 of 2
    • Remove the ZIF ribbon cable by pulling it gently.

  21. HP Pavilion 15-cc561st Keyboard Assembly Replacement: step 21, image 1 of 1
    • Use a Phillips #0 screwdriver to remove the 5.8 mm screw on the right speaker.

  22. HP Pavilion 15-cc561st Keyboard Assembly Replacement: step 22, image 1 of 2 HP Pavilion 15-cc561st Keyboard Assembly Replacement: step 22, image 2 of 2
    • Remove 3 silver 2.95 mm screws with a Phillips #0 screwdriver

    • Remove the 4 black 5.65 mm screws with a Phillips #0 screwdriver.

  23. HP Pavilion 15-cc561st Keyboard Assembly Replacement: step 23, image 1 of 1
    • Remove the power supply female connector by lifting it up via the black stick spudger.

  24. HP Pavilion 15-cc561st Keyboard Assembly Replacement: step 24, image 1 of 3 HP Pavilion 15-cc561st Keyboard Assembly Replacement: step 24, image 2 of 3 HP Pavilion 15-cc561st Keyboard Assembly Replacement: step 24, image 3 of 3
    • To remove the ZIF ribbons, pull up on the tab and gently pull away from the connector. Repeat for all 6 ZIF ribbons shown.

  25. HP Pavilion 15-cc561st Keyboard Assembly Replacement: step 25, image 1 of 1
    • Remove the motherboard

  26. HP Pavilion 15-cc561st Keyboard Assembly Replacement: step 26, image 1 of 1
    • Unhook the wires of the speaker from the retaining tabs.

    • Remove the speakers.

  27. HP Pavilion 15-cc561st Keyboard Assembly Replacement, Keyboard Assembly: step 27, image 1 of 2 HP Pavilion 15-cc561st Keyboard Assembly Replacement, Keyboard Assembly: step 27, image 2 of 2
    • Use a Phillips #00 screwdriver to remove the 2.22 mm silver screw that secures the power button PCB.

    • Lift to remove the power button PCB.

  28. HP Pavilion 15-cc561st Keyboard Assembly Replacement: step 28, image 1 of 2 HP Pavilion 15-cc561st Keyboard Assembly Replacement: step 28, image 2 of 2
    • Use a Phillips #1 screwdriver remove the three 2.8 mm screws from the touchpad bracket.

    • Remove the touchpad bracket.

  29. HP Pavilion 15-cc561st Keyboard Assembly Replacement: step 29, image 1 of 3 HP Pavilion 15-cc561st Keyboard Assembly Replacement: step 29, image 2 of 3 HP Pavilion 15-cc561st Keyboard Assembly Replacement: step 29, image 3 of 3
    • Lift up the keyboard ZIF Ribbon to reveal the 3 screws holding in the trackpad.

    • Remove the three 2.3 mm screws using a #1 Phillips Screwdriver.

    • Lift up on the trackpad to remove it.

    • You may need to push on the trackpad from the front of the keyboard assembly

    • What remains is the keyboard assembly to be replaced.

Conclusion

To reassemble your device, follow these instructions in reverse order.

Bhargav Patel

Member since: 03/27/23

385 Reputation

3 Guides authored

Team

IUPUI, Team 1-1, Harley Spring 2023 Member of IUPUI, Team 1-1, Harley Spring 2023

IUPUI-HARLEY-S23S1G1

3 Members

3 Guides authored

0 Comments

Add Comment

View Statistics:

Past 24 Hours: 0

Past 7 Days: 0

Past 30 Days: 2

All Time: 84