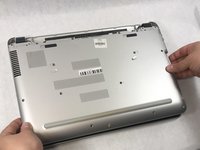
HP Pavilion 15-AB153NR Bottom Case Cover Replacement

What you need

  1. HP Pavilion 15-AB153NR Bottom Case Cover  Replacement, Battery: step 1, image 1 of 1
    • Ensure computer is turned off and unplugged.

    • Slide the battery lock latch on the left to unlock. Slide from left to right to unlock.

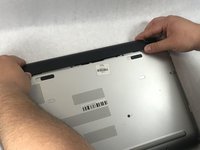
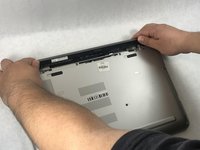
  2. HP Pavilion 15-AB153NR Bottom Case Cover  Replacement: step 2, image 1 of 2 HP Pavilion 15-AB153NR Bottom Case Cover  Replacement: step 2, image 2 of 2
    • Slide the battery release latch on the right with continuous force from right to left.

    • Once battery pops, you may release latch.

  3. HP Pavilion 15-AB153NR Bottom Case Cover  Replacement: step 3, image 1 of 2 HP Pavilion 15-AB153NR Bottom Case Cover  Replacement: step 3, image 2 of 2
    • Grab the battery, rotating upwards and away from you. This will remove the battery.

  4. HP Pavilion 15-AB153NR Bottom Case Cover  Replacement, CD/DVD Drive: step 4, image 1 of 1
    • Make sure computer is powered off and unplugged.

    • Flip computer over so that the bottom is facing the ceiling and the hinges are farthest from you.

  5. HP Pavilion 15-AB153NR Bottom Case Cover  Replacement: step 5, image 1 of 1
    • Using the Phillips #000 screwdriver, remove the 7 mm screw on the middle right.

    • There is an icon that looks like a CD stamped into the back panel near this screw.

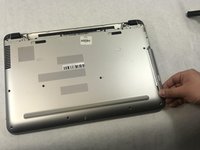
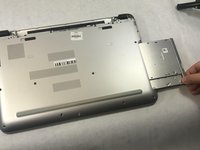
  6. HP Pavilion 15-AB153NR Bottom Case Cover  Replacement: step 6, image 1 of 2 HP Pavilion 15-AB153NR Bottom Case Cover  Replacement: step 6, image 2 of 2
    • Slide the drive out from the right side of the device.

  7. HP Pavilion 15-AB153NR Bottom Case Cover  Replacement, Bottom Case Cover: step 7, image 1 of 1
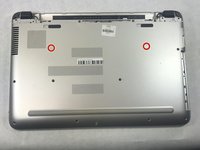
    • Using the Phillips #1 screwdriver, remove the two 12mm screws located on the hinge covers.

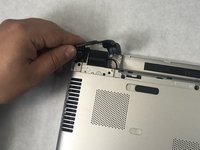
  8. HP Pavilion 15-AB153NR Bottom Case Cover  Replacement: step 8, image 1 of 2 HP Pavilion 15-AB153NR Bottom Case Cover  Replacement: step 8, image 2 of 2
    • Lift the corner covers off of the computer using a prying tool.

  9. HP Pavilion 15-AB153NR Bottom Case Cover  Replacement: step 9, image 1 of 1
    • Remove the six 6.5mm screws using a Phillips #1 screwdriver that are located near the top of the laptop.

  10. HP Pavilion 15-AB153NR Bottom Case Cover  Replacement: step 10, image 1 of 1
    • Remove the remaining seven 6.5mm screws using a Phillips #1 screwdriver that are securing the back cover.

  11. HP Pavilion 15-AB153NR Bottom Case Cover  Replacement: step 11, image 1 of 1
    • Use the Phillips #0 screwdriver to remove the two 2mm screws.

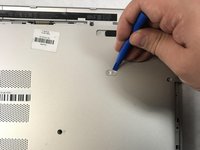
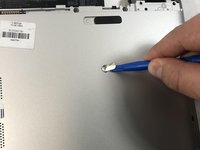
  12. HP Pavilion 15-AB153NR Bottom Case Cover  Replacement: step 12, image 1 of 3 HP Pavilion 15-AB153NR Bottom Case Cover  Replacement: step 12, image 2 of 3 HP Pavilion 15-AB153NR Bottom Case Cover  Replacement: step 12, image 3 of 3
    • Use prying tools to pry the covers off of the screwholes.

    • Using the Phillips #1 screwdriver, remove the two 6.5mm screws.

  13. HP Pavilion 15-AB153NR Bottom Case Cover  Replacement: step 13, image 1 of 1
    • Be mindful of sharp edges on computer while using prying tools.

    • Flip computer over and open so that the screen is facing you.

    • Starting at the bottom right corner, insert the prying tool and lift upwards to loosen the back panel.

    • Continue down all sides and corners of the device.

  14. HP Pavilion 15-AB153NR Bottom Case Cover  Replacement: step 14, image 1 of 2 HP Pavilion 15-AB153NR Bottom Case Cover  Replacement: step 14, image 2 of 2
    • Flip laptop back over so that the bottom is facing up

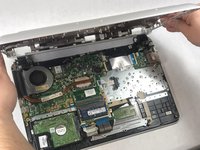
    • After all sides are loosened, remove the back panel from the device.

Conclusion

To reassemble your device, follow these instructions in reverse order.

2 other people completed this guide.

Nicole Vachon

Member since: 03/21/19

926 Reputation

7 Guides authored

Team

0 Comments

Add Comment

View Statistics:

Past 24 Hours: 0

Past 7 Days: 3

Past 30 Days: 11

All Time: 1,123