Introduction
If your HP Envy x360 m Convertible (Model 15m-cn0012dx) isn’t holding a charge or won’t charge, use this guide to replace the battery.
A faulty battery does not charge the computer or does not hold a charge for long. If the battery is dead, the computer might not even turn on.
Before starting, make sure all external connections are unplugged and the computer is turned off.
What you need
-
-
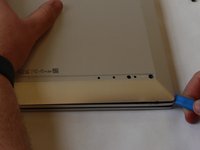
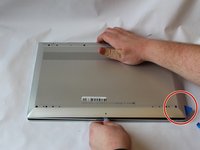
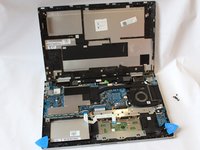
Set the laptop face down.
-
Peel back the grey screw guards, along the top and bottom edge of the back case. It may be helpful to use a spudger to get started.
-
-


To reassemble your device, follow these instructions in reverse order.
Cancel: I did not complete this guide.
7 other people completed this guide.

Team

UW Stout, Team S1-G3, Schneider-Bateman Spring 2020 Member of UW Stout, Team S1-G3, Schneider-Bateman Spring 2020
UWSTOUT-SCHNEIDER-BATEMAN-S20S1G3
3 Members
5 Guides authored
6 Guide Comments
Great photos and annotations!
One additional tip too for why we should bother pulling the rubber slowly is to also avoid stretching too which will actually change the length of the rubber and have it no longer sit flush on the adhesive like it once did.
Another gotcha too is to note the (+) and (-) terminals on the battery as originally installed. The bad thing about this battery design is that it is symmetric in space which makes it possible to insert it the wrong way! Very dangerous. Take a silver marker and really amplify the terminal pins and note how they are meant to align into the battery slot. Don't get it wrong or you'll short things.
Also worth mentioning since you got the unit open to blow it with compressed air and do any cleaning you can take care of with certain parts easily accessible, eg get that fan cleaned out, etc.
happy fixing folks, good luck!
My front center screw holding the base appears to be a VERY small TORX screw. Any idea what size bit is required?
Mine is too… can’t find anything small enough to take it out
If I recall correctly it’s a T5.