Free Shipping on Domestic Orders $75+

HP Elite X2 1013 G3 Fan Replacement

What you need

  1. HP Elite X2 1013 G3 Fan Replacement, Screen: step 1, image 1 of 1
    • Flip the device over so the base is facing the ceiling.

    • Lift up the tablet stand.

    • Remove the four 2 mm screws from the tablet using a T5 Torx screwdriver.

    Ask FixBot

    Add Comment

  2. HP Elite X2 1013 G3 Fan Replacement: step 2, image 1 of 2 HP Elite X2 1013 G3 Fan Replacement: step 2, image 2 of 2
    • Flip the tablet over with the screen facing upwards.

    • Place the suction handle in the center of the screen and slowly lift off the screen until it is at a 30 degree angle, starting by gently prying up the bottom.

    • Do not pull the screen beyond a 30 degree angle. Additional internal components must be disconnected first.

    Ask FixBot

    Add Comment

  3. HP Elite X2 1013 G3 Fan Replacement: step 3, image 1 of 2 HP Elite X2 1013 G3 Fan Replacement: step 3, image 2 of 2
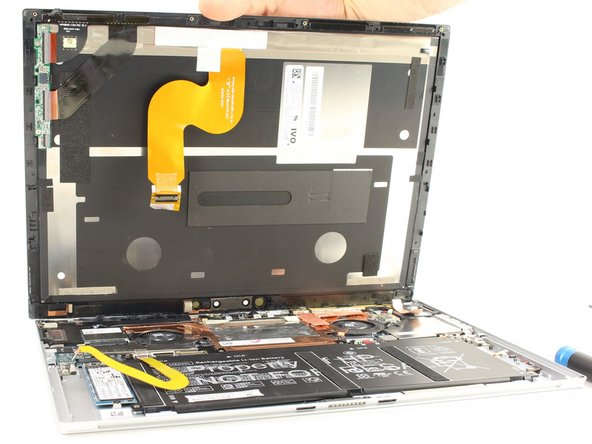
    • With the screen lifted at a 30 degree angle, gently disconnect the yellow ribbon cable at the end connected to the screen.

    • Gently disconnect the orange ribbon cable at the end connected to the bottom plate.

    Ask FixBot

    Add Comment

  4. HP Elite X2 1013 G3 Fan Replacement: step 4, image 1 of 2 HP Elite X2 1013 G3 Fan Replacement: step 4, image 2 of 2
    • Remove the screen from the tablet.

    Ask FixBot

    Add Comment

  5. HP Elite X2 1013 G3 Fan Replacement, Battery: step 5, image 1 of 1
    • Use the Phillips #00 screwdriver to remove the six 2 mm screws.

    • Gently disconnect the two connectors.

    Ask FixBot

    Add Comment

  6. HP Elite X2 1013 G3 Fan Replacement: step 6, image 1 of 1
    • Lift the battery out of the housing.

    Ask FixBot

    Add Comment

  7. HP Elite X2 1013 G3 Fan Replacement, Fan: step 7, image 1 of 1
    • Undo the two small connectors by pulling gently.

    Ask FixBot

    Add Comment

  8. HP Elite X2 1013 G3 Fan Replacement: step 8, image 1 of 1
    • Gently peel up three copper pieces of tape as shown.

    • Do not pull off completely.

    Ask FixBot

    Add Comment

  9. HP Elite X2 1013 G3 Fan Replacement: step 9, image 1 of 1
    Tool used on this step:
    Tweezers
    $4.99
    Buy
    • Use tweezers or your fingers to carefully undo the indicated five connectors.

    • There will be a number of loose components after disconnecting the five connectors. If any are completely detached, set them aside.

    Ask FixBot

    Add Comment

  10. HP Elite X2 1013 G3 Fan Replacement: step 10, image 1 of 2 HP Elite X2 1013 G3 Fan Replacement: step 10, image 2 of 2
    • Using tweezers or your fingers, lift up and remove the plastic covering and set it aside.

    Ask FixBot

    Add Comment

  11. HP Elite X2 1013 G3 Fan Replacement: step 11, image 1 of 1
    • Unscrew the two speaker/antenna module mounting 2mm screws using a Phillips #00 Screwdriver.

    Ask FixBot

    Add Comment

  12. HP Elite X2 1013 G3 Fan Replacement: step 12, image 1 of 3 HP Elite X2 1013 G3 Fan Replacement: step 12, image 2 of 3 HP Elite X2 1013 G3 Fan Replacement: step 12, image 3 of 3
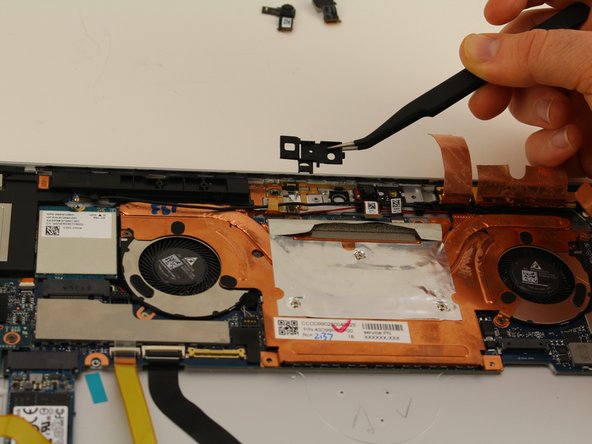
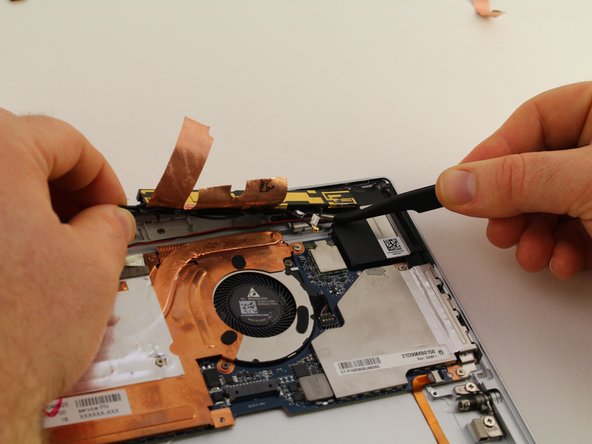
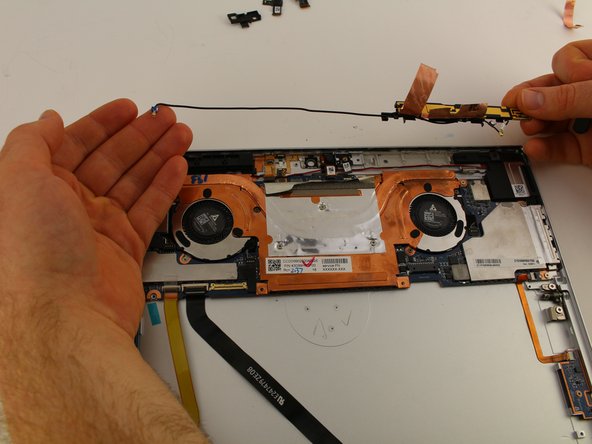
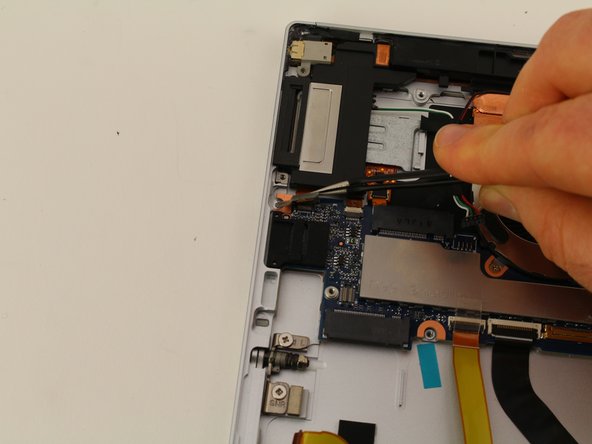
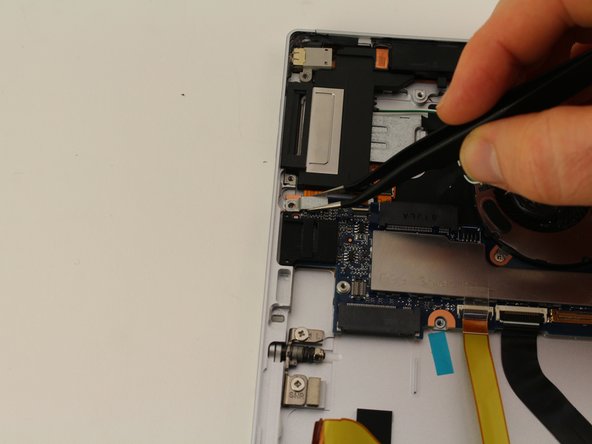
    • Use tweezers or your finger to unclasp and remove the upper right module with the copper tape and wire. Start by popping up the left side of the module.

    • Continue to pry up the module toward the right.

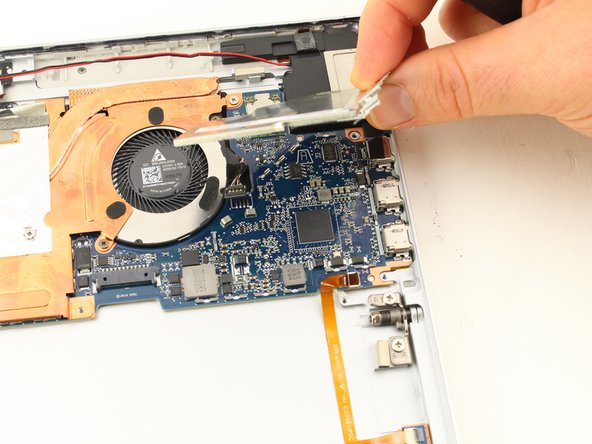
    • At this point, all connectors have been undone in previous steps, but if you notice any wires securing the module, do not keep pulling! Gently undo any connectors before proceeding.

    • Gently lift the whole module out, including the trailing wire.

    Ask FixBot

    Add Comment

  13. HP Elite X2 1013 G3 Fan Replacement: step 13, image 1 of 3 HP Elite X2 1013 G3 Fan Replacement: step 13, image 2 of 3 HP Elite X2 1013 G3 Fan Replacement: step 13, image 3 of 3
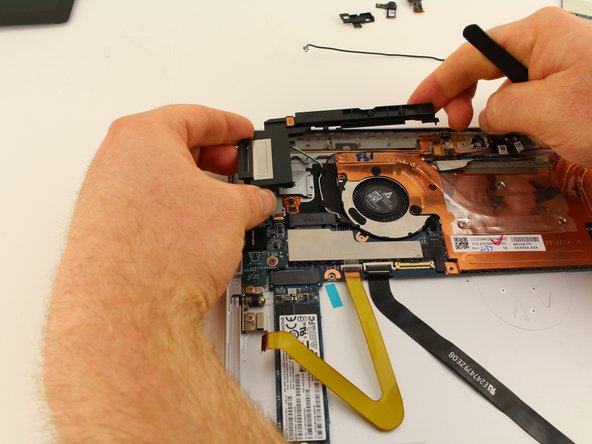
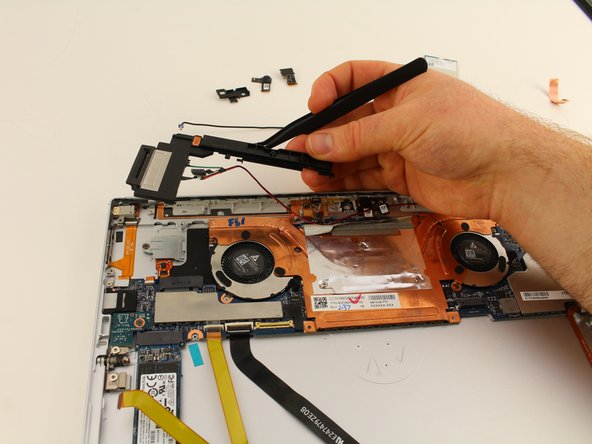
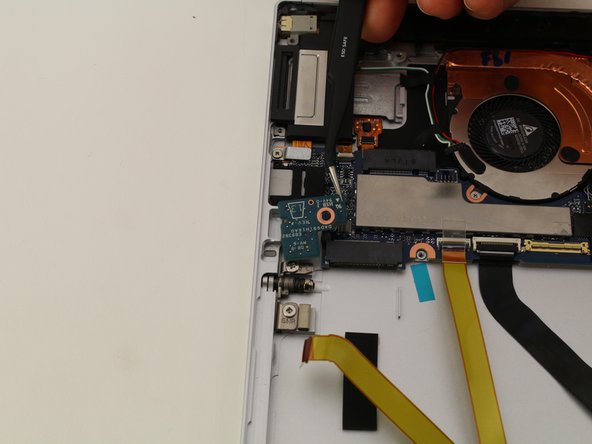
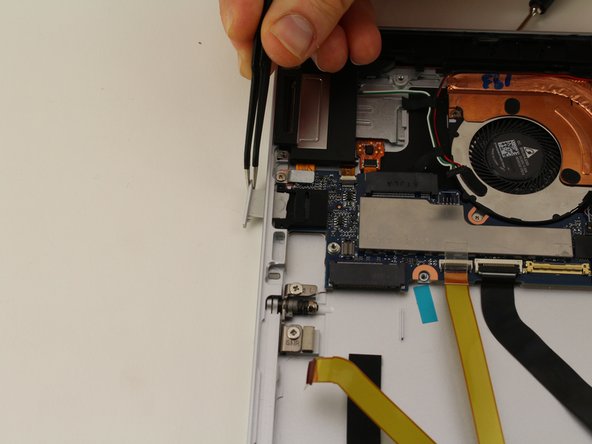
    • Using a spudger, pry the left black plastic speaker/antenna module off of the frame as pictured. Start by lifting up the right side of the module, then slowly work your way down the module towards the right.

    • The slight cracking sound you will hear is the sounds of plastic clasps.

    Ask FixBot

    Add Comment

  14. HP Elite X2 1013 G3 Fan Replacement: step 14, image 1 of 1
    • Undo the two indicated connectors near the fan using your fingers or tweezers.

    Ask FixBot

    Add Comment

  15. HP Elite X2 1013 G3 Fan Replacement: step 15, image 1 of 1
    • Use the Phillips #00 Screwdriver to remove the eight 2 mm screws.

    Ask FixBot

    Add Comment

  16. HP Elite X2 1013 G3 Fan Replacement: step 16, image 1 of 2 HP Elite X2 1013 G3 Fan Replacement: step 16, image 2 of 2
    • Unscrew the single 2mm screw from the peripheral board with the same screwdriver, and remove the peripheral board from the motherboard.

    Ask FixBot

    Add Comment

  17. HP Elite X2 1013 G3 Fan Replacement: step 17, image 1 of 2 HP Elite X2 1013 G3 Fan Replacement: step 17, image 2 of 2
    • Remove the SD Card holder from the motherboard.

    Ask FixBot

    Add Comment

  18. HP Elite X2 1013 G3 Fan Replacement: step 18, image 1 of 3 HP Elite X2 1013 G3 Fan Replacement: step 18, image 2 of 3 HP Elite X2 1013 G3 Fan Replacement: step 18, image 3 of 3
    • Using the Phillips 00 Screwdriver, remove the 2mm screw from the ribbon cable bracket.

    • Lift the ribbon cable bracket and connector off of the motherboard.

    Ask FixBot

    Add Comment

  19. HP Elite X2 1013 G3 Fan Replacement: step 19, image 1 of 1
    • Undo the indicated ribbon connector.

    Ask FixBot

    Add Comment

  20. HP Elite X2 1013 G3 Fan Replacement: step 20, image 1 of 2 HP Elite X2 1013 G3 Fan Replacement: step 20, image 2 of 2
    • Lift up the flap on the right of the indicated plate, and lift the whole covering off.

    Ask FixBot

    Add Comment

  21. HP Elite X2 1013 G3 Fan Replacement: step 21, image 1 of 1
    • Use tweezers or your fingers to undo the black ribbon connector.

    Ask FixBot

    Add Comment

  22. HP Elite X2 1013 G3 Fan Replacement: step 22, image 1 of 1
    • Remove the whole assembly, granting access to the fans.

    Ask FixBot

    Add Comment

  23. HP Elite X2 1013 G3 Fan Replacement: step 23, image 1 of 1
    • Use the Phillips #00 Screwdriver to remove the four 2mm screws.

    • If you are only removing one fan, remove the screws securing only that fan.

    Ask FixBot

    Add Comment

  24. HP Elite X2 1013 G3 Fan Replacement: step 24, image 1 of 1
    • Lift the fan out.

    Ask FixBot

    Add Comment

Conclusion

To reassemble your device, follow these instructions in reverse order.

Cancel: I did not complete this guide.

Hunter Baird-Wise

Member since: 04/18/19

447 Reputation

2 Guides authored

Team

Cal Poly, Team S9-G12, Maness Spring 2019 Member of Cal Poly, Team S9-G12, Maness Spring 2019

CPSU-MANESS-S19S9G12

4 Members

6 Guides authored

0 Guide Comments

Add Comment

View Statistics:

Past 24 Hours: 4

Past 7 Days: 10

Past 30 Days: 30

All Time: 1,729