Introduction
If you are noticing your HP ENVY x360 laptop - 15-cn0003ca running hotter than usual or experiencing frequent overheating issues, it might be time to replace the cooling fan. Over time, dust and wear can impair the performance of the fan, leading to inefficient cooling and potential damage to the laptop's internal components. Replacing the fan can help restore proper cooling, prevent overheating, and extend the life of your laptop.
This guide will walk you through the step-by-step process of replacing the fan inside your HP ENVY x360 laptop. While it's a task that requires careful handling and attention to detail, with the right tools and patience, you can successfully replace the fan and keep your laptop running smoothly. Before you begin, make sure to power off the laptop, disconnect it from any power sources, and prepare a clean, static-free workspace. Let's get started!
What you need
-
Tool used on this step:Anti-Static Wrist Strap$7.16
-
Static-Free Environment: Your workspace should be static-free. Static electricity can cause damage to sensitive electronic components, such as the motherboard, memory modules, or the fan itself.
-
Put on the anti-static wrist strap and nitrile gloves.
-
-
-
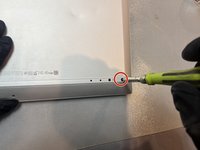
Removing the Back Panel: Flip the laptop onto its top, and remove the six 5.1mm screws using a Phillips #00 screwdriver.
-
Using a T5 Torx screwdriver, take out the one 4.3mm screw located in the central bottom area of the back cover.
-
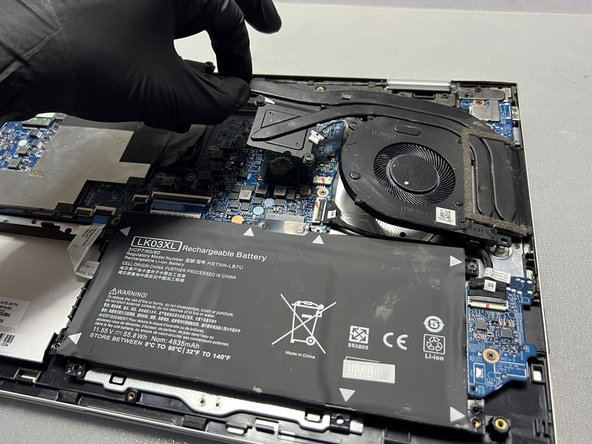
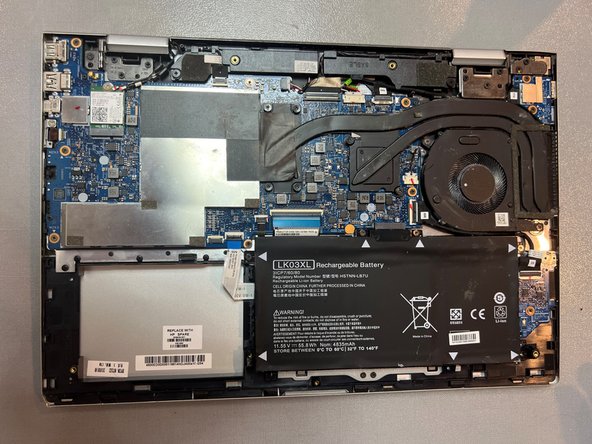
Wedge the iFixit opening tool between the bottom panel and the laptop chassis. Pull upwards to remove the bottom panel.
-
-
-
-
Attaching the Replacement Fan: Position the replacement fan so that it aligns correctly with the screw holes and fits snugly into place. The fan should sit flush with the housing and not have any loose or uneven parts.
-
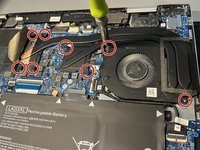
Using the appropriate screws (provided with the replacement fan), fasten the new fan securely to the laptop's internal structure. Tighten the screws evenly.
-
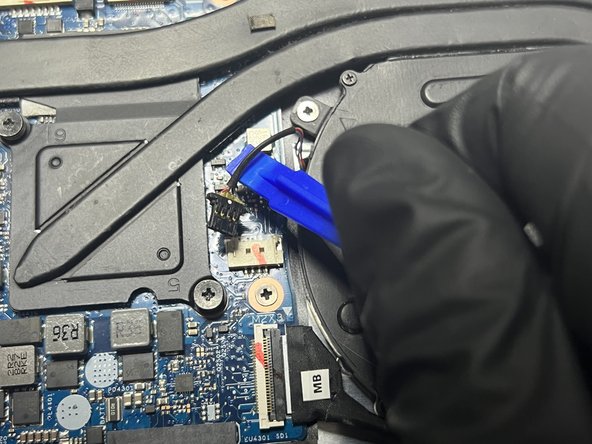
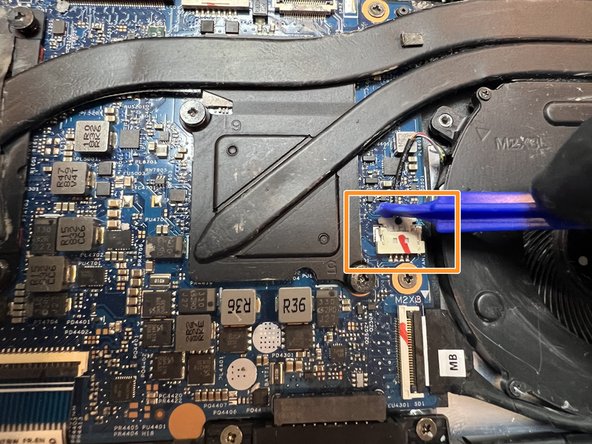
Reconnecting Power: Locate the power connector. This is a small, multi-pin connector. Align the connector with the corresponding socket and push in.
-
-
-
Positioning the Bottom Panel: Position the laptop's bottom panel back in place over the internal components. Ensure that it aligns correctly with the laptop's chassis.
-
Using the six 5.1mm and one 4.3mm screws you removed earlier, start screwing them back into their respective holes (refer to step 2 if necessary). Start with one corner and gradually move around the edges to ensure even attachment.
-
Checking for Proper Alignment: Double-check the alignment of the bottom panel. Gently press down on different areas of the bottom panel to ensure there are no bulges or parts that are not fitting correctly.
-
-
-
Test and Verify: Power on the laptop and ensure that the new fan is functioning correctly
-
Listen closely to the area where the fan is located. You should hear the fan's operation, which typically sounds like a soft humming or whirring noise.
-
Pay attention to the laptop's temperature as the new fan should help regulate it. You can use software tools or the BIOS settings to monitor the CPU and GPU temperatures and ensure they are within safe operating ranges.
-
Final Verification: If you find that the fan is functioning correctly, you can consider the fan replacement a success.
-


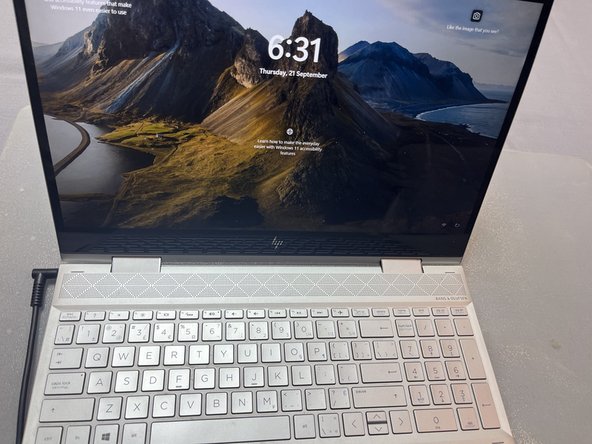


By following these steps, you can verify that the new fan in your HP ENVY x360 laptop is functioning correctly and effectively cooling the laptop's internal components. Ensuring proper fan operation is crucial to maintaining the laptop's performance and preventing overheating-related issues.

Team

York University, Team C-18, O'Regan Fall 2023 Member of York University, Team C-18, O'Regan Fall 2023
YORK-O'REGAN-F23SCG18
1 Member
1 Guide authored