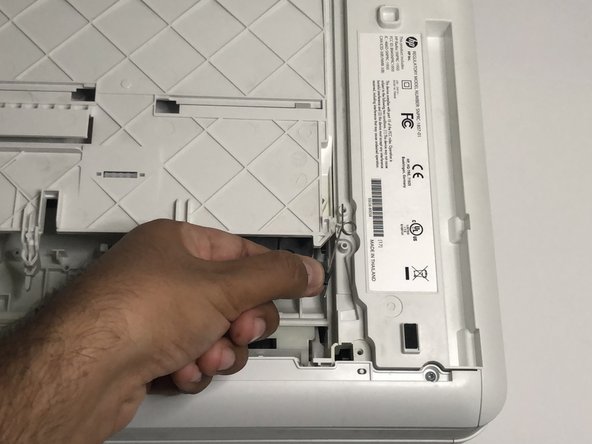
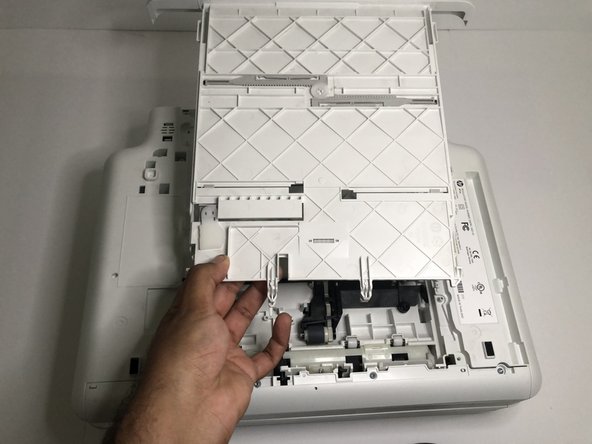
HP ENVY 6055e Input Tray Replacement

What you need

  1. HP ENVY 6055e Input Tray Replacement, Input Tray: step 1, image 1 of 3 HP ENVY 6055e Input Tray Replacement, Input Tray: step 1, image 2 of 3 HP ENVY 6055e Input Tray Replacement, Input Tray: step 1, image 3 of 3
    • Flip the printer upside down.

  2. HP ENVY 6055e Input Tray Replacement: step 2, image 1 of 2 HP ENVY 6055e Input Tray Replacement: step 2, image 2 of 2
    • Slide the input tray open.

  3. HP ENVY 6055e Input Tray Replacement: step 3, image 1 of 1
    • Remove the six T3 Torx screws.

  4. HP ENVY 6055e Input Tray Replacement: step 4, image 1 of 2 HP ENVY 6055e Input Tray Replacement: step 4, image 2 of 2
    • Remove the right piece by lifting it up.

  5. HP ENVY 6055e Input Tray Replacement: step 5, image 1 of 3 HP ENVY 6055e Input Tray Replacement: step 5, image 2 of 3 HP ENVY 6055e Input Tray Replacement: step 5, image 3 of 3
    • Remove the left piece by lifting it with both hands.

    • The left piece has a small hook in the middle, so be careful not to break it.

  6. HP ENVY 6055e Input Tray Replacement: step 6, image 1 of 1
    • Locate two springs that are in the lower part of the printer.

  7. HP ENVY 6055e Input Tray Replacement: step 7, image 1 of 3 HP ENVY 6055e Input Tray Replacement: step 7, image 2 of 3 HP ENVY 6055e Input Tray Replacement: step 7, image 3 of 3
    • Remove the right spring by lifting from the black plastic piece.

    • Make sure the input tray is in the original closed place when putting back this piece.

  8. HP ENVY 6055e Input Tray Replacement: step 8, image 1 of 3 HP ENVY 6055e Input Tray Replacement: step 8, image 2 of 3 HP ENVY 6055e Input Tray Replacement: step 8, image 3 of 3
    • Remove the left spring by lifting from the black plastic piece.

    • Make sure the input tray is in the original closed place when putting back this piece.

  9. HP ENVY 6055e Input Tray Replacement: step 9, image 1 of 3 HP ENVY 6055e Input Tray Replacement: step 9, image 2 of 3 HP ENVY 6055e Input Tray Replacement: step 9, image 3 of 3
    • Remove the defective input tray.

Conclusion

To reassemble your device, follow these instructions in reverse order.

2 other people completed this guide.

Brian Mojica

Member since: 08/29/22

196 Reputation

1 Guide authored

Team

0 Comments

Add Comment

View Statistics:

Past 24 Hours: 2

Past 7 Days: 11

Past 30 Days: 55

All Time: 1,080