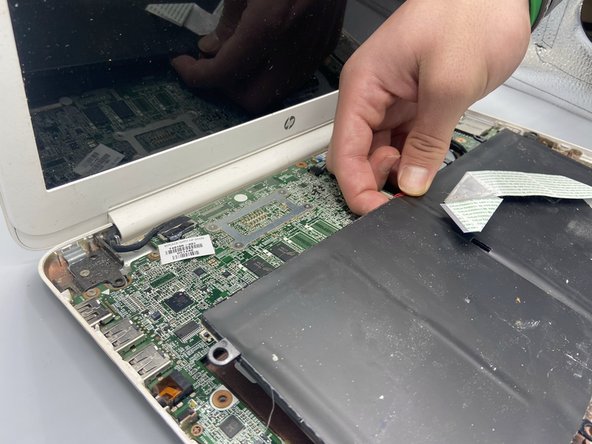
HP Chromebook 14-q010nr Motherboard Replacement

What you need

  1. HP Chromebook 14-q010nr Motherboard Replacement, Battery: step 1, image 1 of 1
    • Begin by turning the Chromebook onto its back.

    • Remove the 15 screws with a Phillips #0 screwdriver.

    • Four screws will be located underneath the device's rubber foot pads.

  2. HP Chromebook 14-q010nr Motherboard Replacement: step 2, image 1 of 3 HP Chromebook 14-q010nr Motherboard Replacement: step 2, image 2 of 3 HP Chromebook 14-q010nr Motherboard Replacement: step 2, image 3 of 3
    • Remove the keyboard from the base plate with an opening pick to pry it open from both sides of the keyboard.

    • Beginning from the corners closest to the computer screen may result in easier disconnection.

  3. HP Chromebook 14-q010nr Motherboard Replacement: step 3, image 1 of 1
    • Use a Phillips #0 screwdriver to remove the seven screws securing the battery.

  4. HP Chromebook 14-q010nr Motherboard Replacement: step 4, image 1 of 1
    • Gently disconnect the battery's motherboard connection by pinching the white attachment and pulling the plug directly out of the port.

  5. HP Chromebook 14-q010nr Motherboard Replacement: step 5, image 1 of 2 HP Chromebook 14-q010nr Motherboard Replacement: step 5, image 2 of 2
    • Before removing the battery, gently lift the white ribbon cable taped to the battery.

    • Gently pull up from the back of the battery to remove it.

  6. HP Chromebook 14-q010nr Motherboard Replacement, Motherboard: step 6, image 1 of 1
    • Remove the eleven motherboard screws with a 2mm Phillips screwdriver.

  7. HP Chromebook 14-q010nr Motherboard Replacement: step 7, image 1 of 1
    • Remove the white ribbon cable from the motherboard by lifting the black ZIF connector.

  8. HP Chromebook 14-q010nr Motherboard Replacement: step 8, image 1 of 1
    • Remove the five screws attached to the connector plate.

    • Remove the monitor connector by lifting it gently upward.

  9. HP Chromebook 14-q010nr Motherboard Replacement: step 9, image 1 of 1
    • Remove the antenna cables on the right side of the motherboard.

    • Carefully lift the motherboard up to remove it. Use a spudger for ease.

Conclusion

To reassemble your device, follow these instructions in reverse order.

Julian Knight

Member since: 09/22/22

159 Reputation

1 Guide authored

0 Comments

Add Comment

View Statistics:

Past 24 Hours: 0

Past 7 Days: 0

Past 30 Days: 4

All Time: 152