
HP Chromebook 11a-nb0013dx Battery Replacement

What you need

  1. HP Chromebook 11a-nb0013dx Battery Replacement, Battery: step 1, image 1 of 2 HP Chromebook 11a-nb0013dx Battery Replacement, Battery: step 1, image 2 of 2
    • Position your closed computer on a flat surface, with the back facing up.

    • Remove all eight 8 mm Philips #0 screws from the bottom cover.

  2. HP Chromebook 11a-nb0013dx Battery Replacement: step 2, image 1 of 2 HP Chromebook 11a-nb0013dx Battery Replacement: step 2, image 2 of 2
    • Remove the 4 rubber feet with a nylon spudger or an opening tool.

  3. HP Chromebook 11a-nb0013dx Battery Replacement: step 3, image 1 of 1
    • Flip over your computer and open it.

    • Using a plastic pick, level up the edges of the keyboard by sliding the pick along the gap.

    • Apply downward pressure to separate the bottom of the Chromebook and the keyboard.

    • Do the same for all 4 sides of the keyboard until it starts to lift.

    • You should hear popping sounds as you slide the plastic pick along the edge.

  4. HP Chromebook 11a-nb0013dx Battery Replacement: step 4, image 1 of 1
    • Gently lift up the keyboard from the bottom.

  5. HP Chromebook 11a-nb0013dx Battery Replacement: step 5, image 1 of 2 HP Chromebook 11a-nb0013dx Battery Replacement: step 5, image 2 of 2
    • Identify the zero insertion force (ZIF) connector.

    • Now, disconnect the cable by using the tip of the iFixit opening tool or your fingernail to flip up the small locking flap.

    • You can now gently pull out the cable.

    • No force is needed to plug in or remove the cable.

  6. HP Chromebook 11a-nb0013dx Battery Replacement: step 6, image 1 of 2 HP Chromebook 11a-nb0013dx Battery Replacement: step 6, image 2 of 2
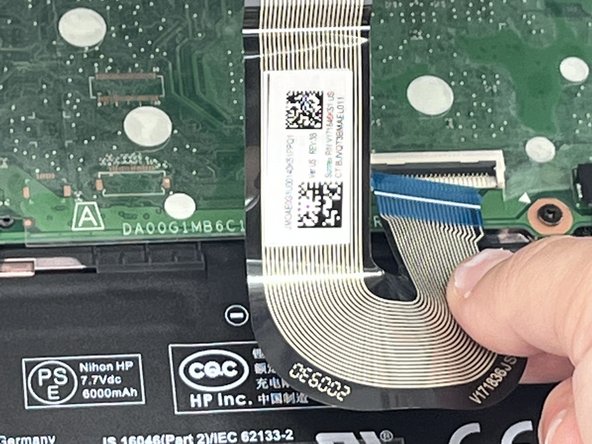
    • Identify the second cable and the ZIF connector attatching the cable to the motherboard. Then, unclip it with the iFixit opening tool.

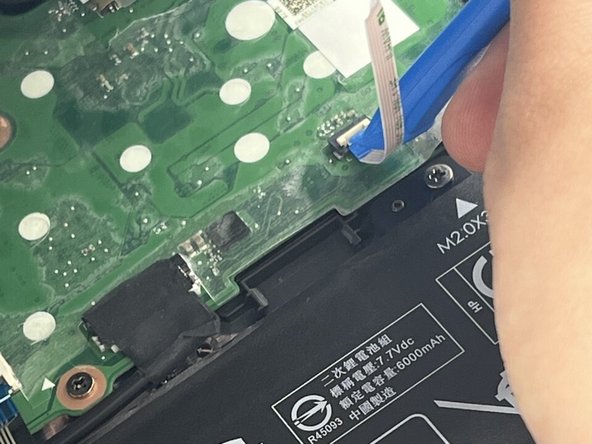
    • To do this, use the iFixit opening tool to flip up the small locking flap located on the ZIF connector.

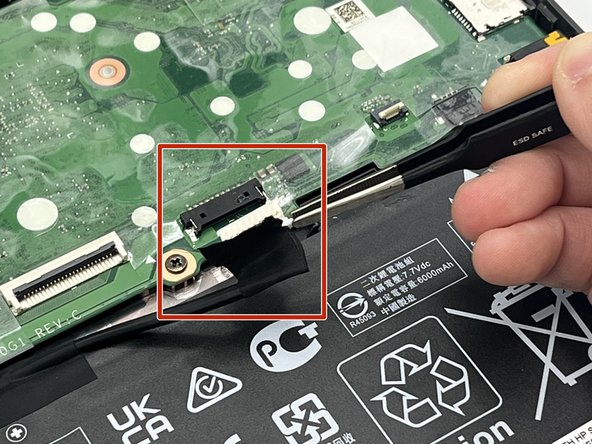
    • Proceed by gently pulling the cable straight out of the connector to disconnect the cable.

    • Be careful, the cord is very fragile!

  7. HP Chromebook 11a-nb0013dx Battery Replacement: step 7, image 1 of 1
    • Once the white cord is removed, this is what it should look like. At this point, you should be able to completely take off the keyboard.

  8. HP Chromebook 11a-nb0013dx Battery Replacement: step 8, image 1 of 2 HP Chromebook 11a-nb0013dx Battery Replacement: step 8, image 2 of 2
    • Lift up the adhesive holding the battery connector.

    • Then, pull the battery connector straight towards you.

    • It is important to pull of the battery connector straight towards you to avoid breaking the vord.

  9. HP Chromebook 11a-nb0013dx Battery Replacement: step 9, image 1 of 2 HP Chromebook 11a-nb0013dx Battery Replacement: step 9, image 2 of 2
    • Remove the four 4 mm Philips #00 screws.

  10. HP Chromebook 11a-nb0013dx Battery Replacement: step 10, image 1 of 2 HP Chromebook 11a-nb0013dx Battery Replacement: step 10, image 2 of 2
    • Gently lift the battery by holding the top.

Conclusion

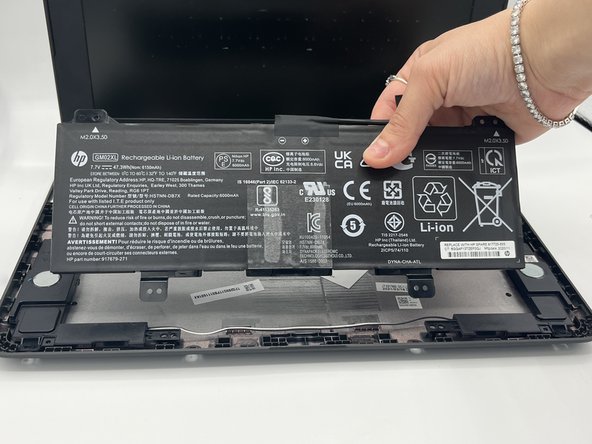
To reassemble your device, follow these instructions in reverse order.

0 Comments

Add Comment

View Statistics:

Past 24 Hours: 0

Past 7 Days: 0

Past 30 Days: 10

All Time: 177