Introduction
This guide will enable you to remove and replace the cameras on your HP 7 Plus. This involves taking the rear cover off the tablet and opening it up to disconnect and remove the cameras. It's pretty straightforward but this guide will escort you through the process even if you've never worked with electronics before. You will, however, need to have access to the tools listed below.
*In order to access the camera, please refer to the HP 7 Plus 1302 Back Cover Removal Guide
Relevant Parts
What you need
-
-
-
Using the T5 Torx Screwdriver, remove the T5x3mm screws located in all 4 corners.
 Ask FixBot
-
-
-
Use the plastic opening tool to push in between the front and the back of the tablet.
-
Slide the plastic opening tool around all 4 sides of the tablet to separate the back cover.
-
-
-
Continue sliding the plastic opening tool around the tablet until all 4 sides are separated from each other.
-
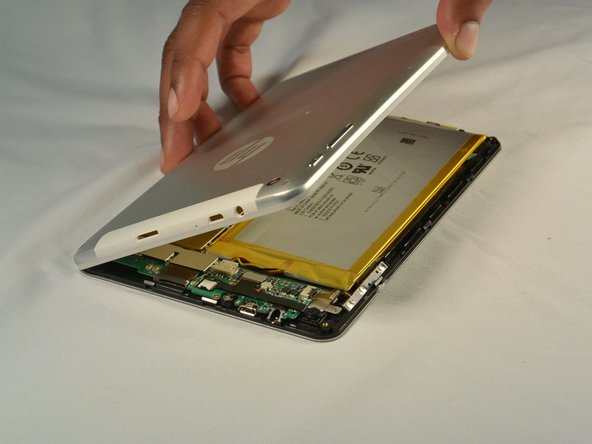
Remove the back cover.
-
-
-
-
-
-
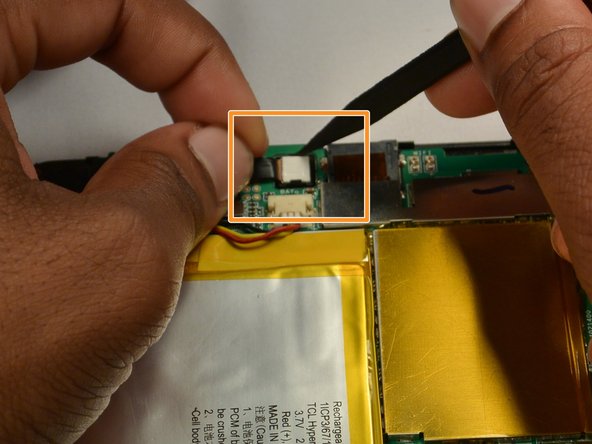
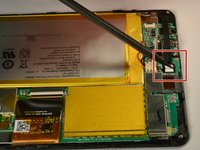
Locate the small grey connector near the top of the device. Using the Spudger tool, gently pull it away from the device until it releases its connection.
-
-
-
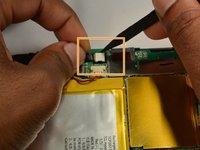
Next move to front facing camera. Using the plastic spudger, push the small tabs out of the way while lightly pulling up on the camera.
-
Then gently pull the camera up and away from the device.
-
-
Tool used on this step:Tweezers$4.99
-
Using the tweezers, gently pry the rear facing camera up out of its socket.
-
-






To reassemble your device, follow these instructions in reverse order.
Cancel: I did not complete this guide.
One other person completed this guide.

Team

IUPUI, Team 1-2, Renguette SU 2015 Member of IUPUI, Team 1-2, Renguette SU 2015
IUPUI-RENGUETTE-SU15S1G2
5 Members
48 Guides authored
