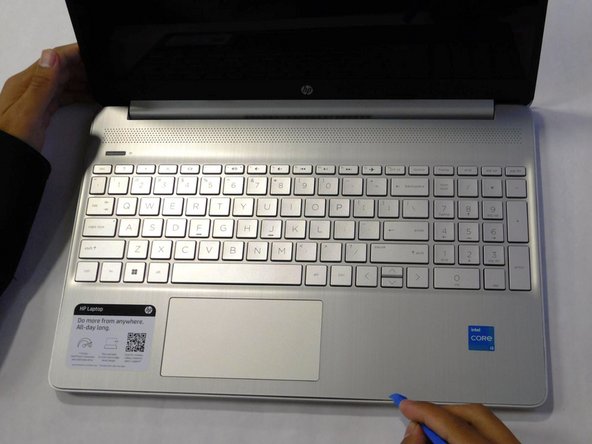
HP 15-dy2702dx Keyboard Replacement

What you need

  1. HP 15-dy2702dx Keyboard Replacement, Lower Case: step 1, image 1 of 1
    • Remove both of the rubber strips to uncover the hidden screws.

    • You can use a prying tool to help lift an end.

  2. HP 15-dy2702dx Keyboard Replacement: step 2, image 1 of 1
    • Unscrew all 8 Phillips #0 screws on the bottom panel:

    • Two M2.5x6

    • Six M2x6

  3. HP 15-dy2702dx Keyboard Replacement: step 3, image 1 of 2 HP 15-dy2702dx Keyboard Replacement: step 3, image 2 of 2
    • Flip the laptop over and open the lid.

    • Separate the bottom panel from the main body by using the iFixit opening tool.

    • Ensure that the bottom panel is completely separated along the edges.

  4. HP 15-dy2702dx Keyboard Replacement: step 4, image 1 of 2 HP 15-dy2702dx Keyboard Replacement: step 4, image 2 of 2
    • If you can lift the laptop like shown in the first picture, the bottom panel is nearly separated.

    • Close the laptop to allow the back edges to fully separate

  5. HP 15-dy2702dx Keyboard Replacement: step 5, image 1 of 3 HP 15-dy2702dx Keyboard Replacement: step 5, image 2 of 3 HP 15-dy2702dx Keyboard Replacement: step 5, image 3 of 3
    • Flip the laptop over and carefully remove the lower case.

  6. HP 15-dy2702dx Keyboard Replacement, Battery: step 6, image 1 of 2 HP 15-dy2702dx Keyboard Replacement, Battery: step 6, image 2 of 2
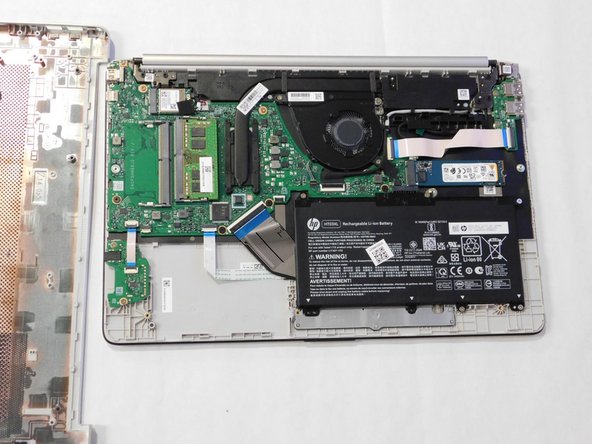
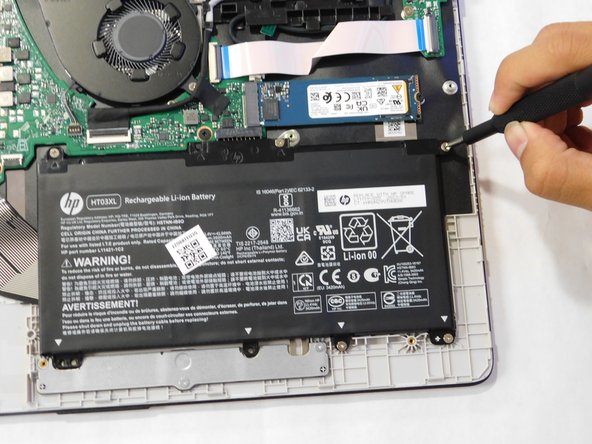
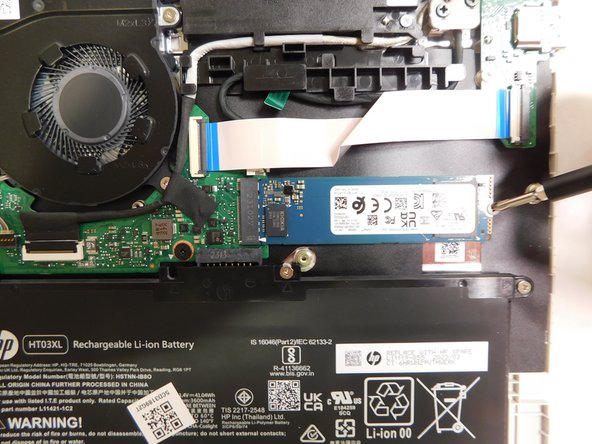
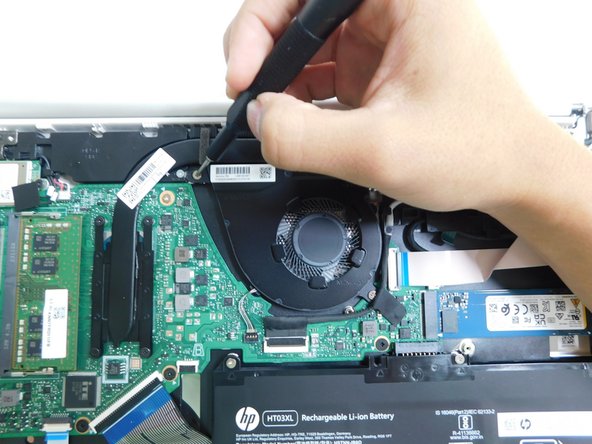
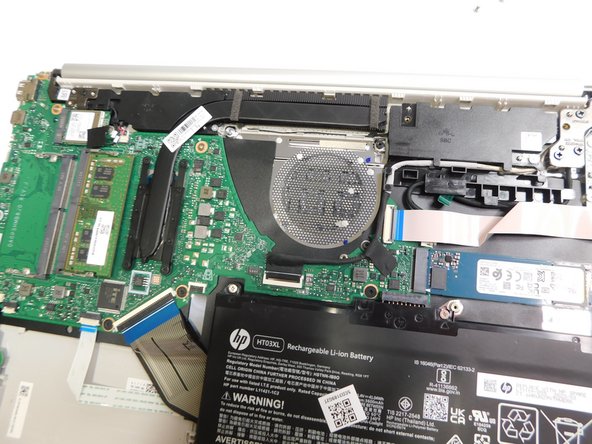
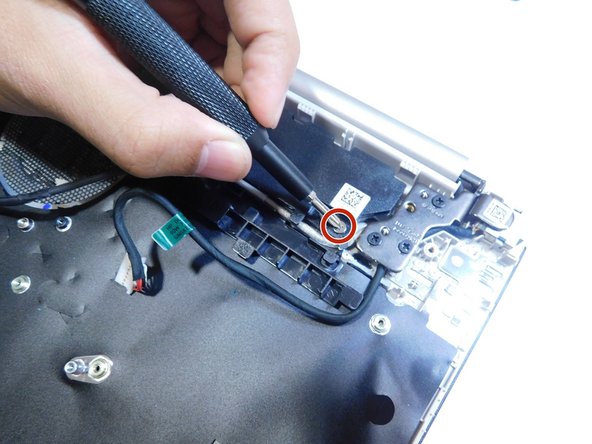
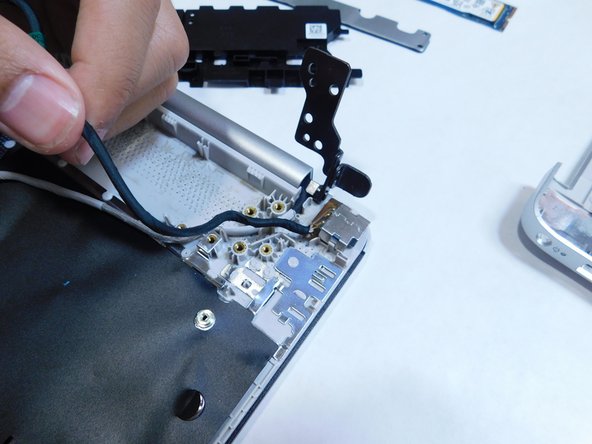
    • Remove the five M2x6 screws that secure the battery with a Phillips #0 screwdriver.

  7. HP 15-dy2702dx Keyboard Replacement: step 7, image 1 of 3 HP 15-dy2702dx Keyboard Replacement: step 7, image 2 of 3 HP 15-dy2702dx Keyboard Replacement: step 7, image 3 of 3
    • Grab the sides of the battery and gently pull the battery until it disconnects from the connector on motherboard.

    • Lift the battery up and out.

  8. HP 15-dy2702dx Keyboard Replacement, Trackpad: step 8, image 1 of 1
    • Find the trackpad.

  9. HP 15-dy2702dx Keyboard Replacement: step 9, image 1 of 3 HP 15-dy2702dx Keyboard Replacement: step 9, image 2 of 3 HP 15-dy2702dx Keyboard Replacement: step 9, image 3 of 3
    • Unscrew the two M2x6 Phillips screws securing the trackpad.

  10. HP 15-dy2702dx Keyboard Replacement: step 10, image 1 of 2 HP 15-dy2702dx Keyboard Replacement: step 10, image 2 of 2
    • Remove the metal bracket.

  11. HP 15-dy2702dx Keyboard Replacement: step 11, image 1 of 3 HP 15-dy2702dx Keyboard Replacement: step 11, image 2 of 3 HP 15-dy2702dx Keyboard Replacement: step 11, image 3 of 3
    • Lift the black ribbon covering the screws.

    • Unscrew the top three M2x3 Phillips screws.

  12. HP 15-dy2702dx Keyboard Replacement: step 12, image 1 of 3 HP 15-dy2702dx Keyboard Replacement: step 12, image 2 of 3 HP 15-dy2702dx Keyboard Replacement: step 12, image 3 of 3
    • Flip up the locking flap holding the trackpad ribbon in place.

    • Pull the ribbon straight out of its socket.

  13. HP 15-dy2702dx Keyboard Replacement: step 13, image 1 of 2 HP 15-dy2702dx Keyboard Replacement: step 13, image 2 of 2
    • Peel back the sticky black strip holding the trackpad in place.

  14. HP 15-dy2702dx Keyboard Replacement: step 14, image 1 of 2 HP 15-dy2702dx Keyboard Replacement: step 14, image 2 of 2
    • Remove the trackpad from the laptop.

  15. HP 15-dy2702dx Keyboard Replacement, SSD: step 15, image 1 of 3 HP 15-dy2702dx Keyboard Replacement, SSD: step 15, image 2 of 3 HP 15-dy2702dx Keyboard Replacement, SSD: step 15, image 3 of 3
    • Locate the storage drive.

    • Unscrew the single screw holding the drive in place.

    • The screw is a M2x3 mm Phillips head screw.

  16. HP 15-dy2702dx Keyboard Replacement: step 16, image 1 of 3 HP 15-dy2702dx Keyboard Replacement: step 16, image 2 of 3 HP 15-dy2702dx Keyboard Replacement: step 16, image 3 of 3
    • Grab the drive by its side and gently pull it out.

  17. HP 15-dy2702dx Keyboard Replacement, Fan: step 17, image 1 of 3 HP 15-dy2702dx Keyboard Replacement, Fan: step 17, image 2 of 3 HP 15-dy2702dx Keyboard Replacement, Fan: step 17, image 3 of 3
    • Use a Phillips #0 screwdriver to unscrew the three screws that secure the fan.

    • These screws sizes are M2x6.

  18. HP 15-dy2702dx Keyboard Replacement: step 18, image 1 of 1
    • Grip the cord that connects the fan to the motherboard and gently pull out to disconnect the cable from the connector.

    • Alternatively, we recommend using a tool to push the connector out of its socket to avoid damaging the wires.

  19. HP 15-dy2702dx Keyboard Replacement: step 19, image 1 of 2 HP 15-dy2702dx Keyboard Replacement: step 19, image 2 of 2
    • Gently lift the fan to remove it from the case.

  20. HP 15-dy2702dx Keyboard Replacement, Keyboard Assembly: step 20, image 1 of 3 HP 15-dy2702dx Keyboard Replacement, Keyboard Assembly: step 20, image 2 of 3 HP 15-dy2702dx Keyboard Replacement, Keyboard Assembly: step 20, image 3 of 3
    • Disconnect all the ribbon cables from the motherboard.

    • Ensure to flip up the locking flaps before attempting to pull the ribbon out.

  21. HP 15-dy2702dx Keyboard Replacement: step 21, image 1 of 2 HP 15-dy2702dx Keyboard Replacement: step 21, image 2 of 2
    • Continue disconnecting the ribbon cables.

  22. HP 15-dy2702dx Keyboard Replacement: step 22, image 1 of 2 HP 15-dy2702dx Keyboard Replacement: step 22, image 2 of 2
    • Continue disconnecting the remaining ribbons.

  23. HP 15-dy2702dx Keyboard Replacement: step 23, image 1 of 2 HP 15-dy2702dx Keyboard Replacement: step 23, image 2 of 2
    • Disconnect the connector.

  24. HP 15-dy2702dx Keyboard Replacement: step 24, image 1 of 3 HP 15-dy2702dx Keyboard Replacement: step 24, image 2 of 3 HP 15-dy2702dx Keyboard Replacement: step 24, image 3 of 3
    • Peel off the black sticker covering the silver connectors near the top of the motherboard.

    • Remove the two silver colored round connector from the motherboard by pulling them up.

    • The connector should have a tag on them with number 1 and 2 on them.

  25. HP 15-dy2702dx Keyboard Replacement: step 25, image 1 of 2 HP 15-dy2702dx Keyboard Replacement: step 25, image 2 of 2
    • Pull up on the last connector on the motherboard next to the connectors removed in the previous step.

  26. HP 15-dy2702dx Keyboard Replacement: step 26, image 1 of 3 HP 15-dy2702dx Keyboard Replacement: step 26, image 2 of 3 HP 15-dy2702dx Keyboard Replacement: step 26, image 3 of 3
    • Unscrew all M2x3 Phillips screws holding the motherboard in place.

  27. HP 15-dy2702dx Keyboard Replacement: step 27, image 1 of 2 HP 15-dy2702dx Keyboard Replacement: step 27, image 2 of 2
    • Remove the motherboard from the case.

  28. HP 15-dy2702dx Keyboard Replacement: step 28, image 1 of 2 HP 15-dy2702dx Keyboard Replacement: step 28, image 2 of 2
    • Unscrew the two M2x3 Phillips screws.

    • Remove the I/O board from the case.

  29. HP 15-dy2702dx Keyboard Replacement: step 29, image 1 of 3 HP 15-dy2702dx Keyboard Replacement: step 29, image 2 of 3 HP 15-dy2702dx Keyboard Replacement: step 29, image 3 of 3
    • Unscrew the three M2x6 Phillips screws from the left metal hinge.

    • Lift the hinge.

  30. HP 15-dy2702dx Keyboard Replacement: step 30, image 1 of 2 HP 15-dy2702dx Keyboard Replacement: step 30, image 2 of 2
    • Unscrew the two Phillips screws.

    • One is on the left side near where the fan was removed.

    • The other is near the right laptop metal hinge.

  31. HP 15-dy2702dx Keyboard Replacement: step 31, image 1 of 2 HP 15-dy2702dx Keyboard Replacement: step 31, image 2 of 2
    • Remove the black boxes from the case.

    • Disconnect the power cable (white cable with a black flag at the end).

    • The black boxes is still connected to the case through a black wire, do not attempt to remove the wire.

  32. HP 15-dy2702dx Keyboard Replacement: step 32, image 1 of 3 HP 15-dy2702dx Keyboard Replacement: step 32, image 2 of 3 HP 15-dy2702dx Keyboard Replacement: step 32, image 3 of 3
    • Unscrew the three screws on the right-side metal hinge.

    • Lift the hinge.

  33. HP 15-dy2702dx Keyboard Replacement: step 33, image 1 of 1
    • Remove the power port from the case by pulling it straight up.

  34. HP 15-dy2702dx Keyboard Replacement: step 34, image 1 of 3 HP 15-dy2702dx Keyboard Replacement: step 34, image 2 of 3 HP 15-dy2702dx Keyboard Replacement: step 34, image 3 of 3
    • Remove the keyboard from the laptop.

    • The keyboard is a type where it is directly integrated into the frame so you will need to replace the whole frame.

Conclusion

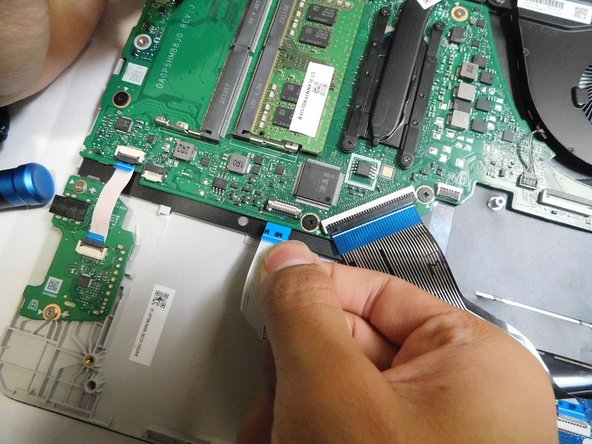
To reassemble your device, follow these instructions in reverse order.

Zander Herbold

Member since: 09/05/23

643 Reputation

4 Guides authored

Team

Gateway, Team 1-4, Pee Fall 2023 Member of Gateway, Team 1-4, Pee Fall 2023

GCC-PEE-F23S1G4

4 Members

8 Guides authored

0 Comments

Add Comment

View Statistics:

Past 24 Hours: 0

Past 7 Days: 6

Past 30 Days: 31

All Time: 151