
HP 15-ba0709dx RAM Replacement

Reece Marr and 3 other contributors
Last updated on May 26, 2017
Views: 1.2K
View statistics:
- Past 24 Hours:
- 1
- Past 7 Days:
- 16
- Past 30 Days:
- 77
- All Time:
- 1,170
Comments: 0
No one has left comments on this guide. Will you be first?
Go to guide commentsCompleted: 2 3
2 people have marked this guide "completed." Will you be next?
3 people have marked this guide "completed." Including you — great job!
Favorites: 1 2
1 person has favorited (and subscribed to) this guide. Will you be next?
2 people have favorited (and subscribed to) this guide — including you!
Needs Better Images
Better photos will improve this guide. Help out by taking, editing, or uploading new ones!
Markup Mishap
This guide needs better markups. Help out by correcting or making some markup annotations.
Introduction
Go to step 1 ↓This guide will show you how to find your RAM and how to remove it properly.
What you need
Tools


-
-
-
Flip the device over and locate the battery compartment.
-
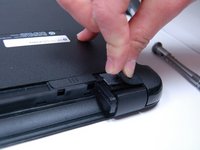
Slide the battery release latch on the left and right side until the battery is detached from its slot.
-
A noticeable pop will be heard when the battery is fully released.
 Ask FixBot
-
-
-
-
-
Place the laptop on a clean, flat surface with the bottom side facing up.
-
-
-
Using a Phillips Head Screwdriver, remove the screws anchoring the bottom casing.
-
-
-
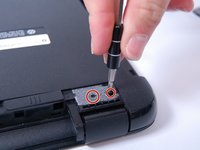
Locate the screws about 1 inch from the battery release tabs and use a Phillips Head Screwdriver to remove these screws.
-
-
-
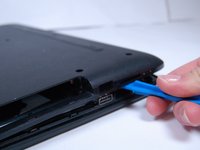
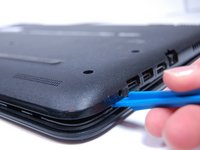
Locate the rubber friction pads on the top corners of the laptop. Pry the pads from the laptop and place them off to the side
-
Removing the friction pads will reveal two more anchoring screws.
-
-
-
-
-
-
Ensure your computer is shut down.
-
Remove any power adapters and cords connected to the laptop body.
-
Turn the computer over so the bottom is facing up.
-
Follow our guide on how to remove the backcover.
-
-
-
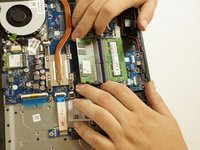
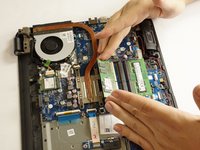
Push the two metal tabs on the side of the RAM module outwards, towards the battery and CMOS compartments (up and down).
-
-






To reassemble your device, follow these instructions in reverse order.
Cancel: I did not complete this guide.
2 other people completed this guide.

Team

Texas Tech, Team S13-G3, Bennett Spring 2017 Member of Texas Tech, Team S13-G3, Bennett Spring 2017
TTU-BENNETT-S17S13G3
5 Members
60 Guides authored
