Introduction
The Optical Drive allows your notebook to use CD's and DVD's to listen to music and watch movies. Sometimes optical drives can be used to write your own personal data onto CD's. Make sure your notebook is unplugged and turned off.
What you need
-
-
Using a small Phillips screwdriver, remove the Phillips screw in the middle of the bottom of the computer.
-
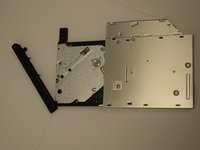
Pull the CD/DVD drive outward to slide it away from the computer.
 Ask FixBot
-
-
-
-
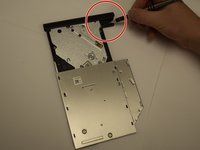
To open the drive use an unbent paperclip and press it into the small hole until the disc tray releases.
-
Pull the disc tray out from the front until it is as far as it will go out of the optical drive.
-
-
-
To remove excess parts from the optical drive press down on the plastic tab behind the tray's bezel.
-
Gently pry the bezel from the face of the optical drive.
-
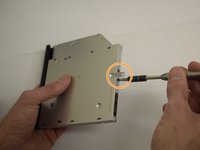
With a smaller phillips head screwdriver, remove the screws on the back of the drive, then remove the small metal bracket.
-


To reassemble your device, follow these instructions in reverse order.
Cancel: I did not complete this guide.
One other person completed this guide.
Team

Cal Poly, Team S6-G2, Banghart Fall 2017 Member of Cal Poly, Team S6-G2, Banghart Fall 2017
CPSU-BANGHART-F17S6G2
5 Members
6 Guides authored