
HP 14-dq0051dx Keyboard Replacement

What you need

  1. HP 14-dq0051dx Keyboard Replacement, Keyboard: step 1, image 1 of 2 HP 14-dq0051dx Keyboard Replacement, Keyboard: step 1, image 2 of 2
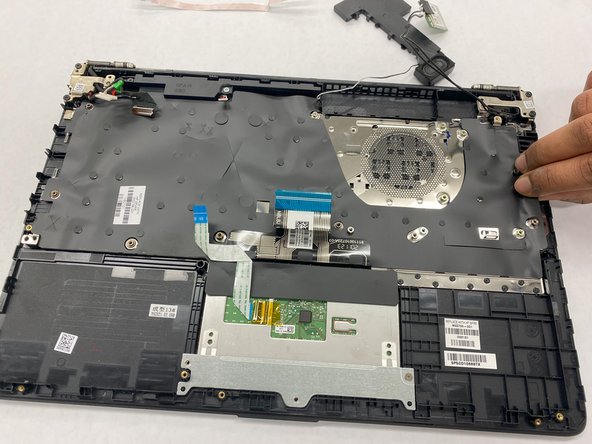
    • Turn the laptop upside down so the backside is facing up.

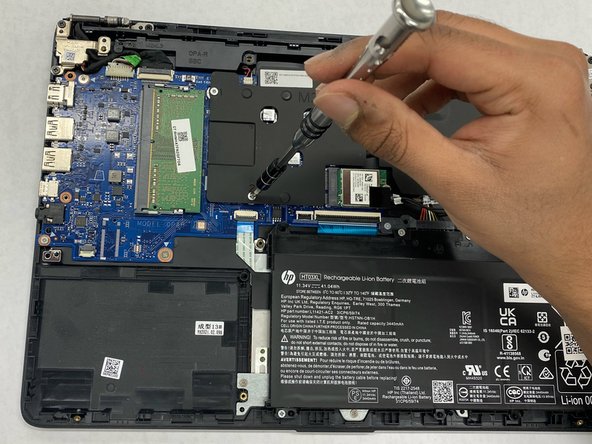
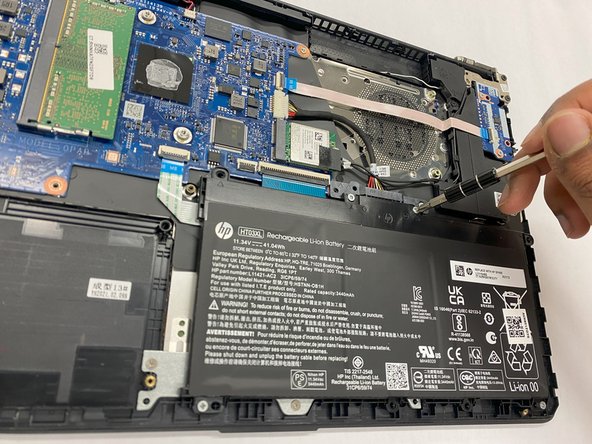
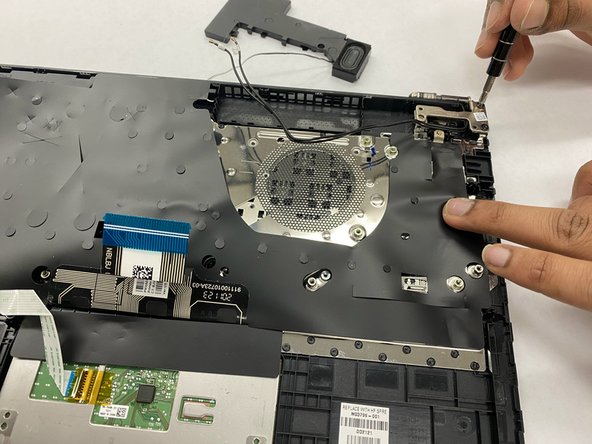
    • Use a Phillips #1 screwdriver to remove eight 2.5mm screws from the back case.

  2. HP 14-dq0051dx Keyboard Replacement: step 2, image 1 of 1
    • Turn the laptop over and open the screen.

    • Insert the opening tool into the seam between the bottom panel and the keyboard.

    • Run the opening tool along the entire seam to separate the bottom panel.

    • You may hear clicking as you release the taps that secure the case.

  3. HP 14-dq0051dx Keyboard Replacement: step 3, image 1 of 1
    • Once the bottom panel is separated from the laptop, carefully close the laptop and turn it upside down.

    • Place both your hands on opposite ends of the bottom panel, and lift up and remove the panel.

  4. HP 14-dq0051dx Keyboard Replacement: step 4, image 1 of 3 HP 14-dq0051dx Keyboard Replacement: step 4, image 2 of 3 HP 14-dq0051dx Keyboard Replacement: step 4, image 3 of 3
    • Use a Phillips #1 screwdriver to remove the five 2.5 mm screws that secure the motherboard cover.

    • Remove the motherboard cover from the laptop.

  5. HP 14-dq0051dx Keyboard Replacement: step 5, image 1 of 3 HP 14-dq0051dx Keyboard Replacement: step 5, image 2 of 3 HP 14-dq0051dx Keyboard Replacement: step 5, image 3 of 3
    • Use a Phillips #1 screwdriver to remove the four 2.5 mm screws that secure the battery.

    • Remove the battery from the laptop.

  6. HP 14-dq0051dx Keyboard Replacement: step 6, image 1 of 3 HP 14-dq0051dx Keyboard Replacement: step 6, image 2 of 3 HP 14-dq0051dx Keyboard Replacement: step 6, image 3 of 3
    • Use the blue opening tool to flip up the small locking flap from the ZIF connector that attaches the touchpad cable to the motherboard.

    • Gently pull the ribbon cable out from the connector.

    • Ensure that the connector is pulled out gently as this is connector is very easy to damage

  7. HP 14-dq0051dx Keyboard Replacement: step 7, image 1 of 2 HP 14-dq0051dx Keyboard Replacement: step 7, image 2 of 2
    • Gently unplug the keyboard connector from the motherboard.

  8. HP 14-dq0051dx Keyboard Replacement: step 8, image 1 of 3 HP 14-dq0051dx Keyboard Replacement: step 8, image 2 of 3 HP 14-dq0051dx Keyboard Replacement: step 8, image 3 of 3
    • Lift up the small compartment with your finger.

    • Pull the flat cable out of the connector.

  9. HP 14-dq0051dx Keyboard Replacement: step 9, image 1 of 3 HP 14-dq0051dx Keyboard Replacement: step 9, image 2 of 3 HP 14-dq0051dx Keyboard Replacement: step 9, image 3 of 3
    • Use a Phillips #0 screwdriver to remove the single 1 mm screw that secure the WiFi card.

    • Pull the WiFi card out of its slot

    • Pull the WiFi card out slowly and gently as to not damage the card or the slot

  10. HP 14-dq0051dx Keyboard Replacement: step 10, image 1 of 2 HP 14-dq0051dx Keyboard Replacement: step 10, image 2 of 2
    • Pull the charging port cable away from the connector in the same direction as the individual wires to unplug the charge port connector.

    • Remove the charging port.

  11. HP 14-dq0051dx Keyboard Replacement: step 11, image 1 of 2 HP 14-dq0051dx Keyboard Replacement: step 11, image 2 of 2
    • Lift up the port using the blue opening tool.

    • Continue to lift up until it is unplugged from the motherboard.

  12. HP 14-dq0051dx Keyboard Replacement: step 12, image 1 of 2 HP 14-dq0051dx Keyboard Replacement: step 12, image 2 of 2
    • Place both hands on opposite corners of the motherboard and carefully lift it up to remove it from the laptop.

    • Now the motherboard has been successfully removed and is ready to be replaced!

  13. HP 14-dq0051dx Keyboard Replacement: step 13, image 1 of 3 HP 14-dq0051dx Keyboard Replacement: step 13, image 2 of 3 HP 14-dq0051dx Keyboard Replacement: step 13, image 3 of 3
    • Remove the two 2.5 mm screws that secure the motherboard cover using a Phillips #1 screwdriver.

    • Gently pull the component out of the laptop

  14. HP 14-dq0051dx Keyboard Replacement: step 14, image 1 of 3 HP 14-dq0051dx Keyboard Replacement: step 14, image 2 of 3 HP 14-dq0051dx Keyboard Replacement: step 14, image 3 of 3
    • Remove the signle 2 mm screws that secure the side cover using a Phillips #0 screwdriver.

    • Pull the side cover off gently

  15. HP 14-dq0051dx Keyboard Replacement: step 15, image 1 of 3 HP 14-dq0051dx Keyboard Replacement: step 15, image 2 of 3 HP 14-dq0051dx Keyboard Replacement: step 15, image 3 of 3
    • Remove the six 2.5 mm screws that secure the keyboard to its hinges using a Phillips #1 screwdriver.

    • Once unscrewed, pull the hinge tabs upward gently using your hands

  16. HP 14-dq0051dx Keyboard Replacement: step 16, image 1 of 1
    • Place both hands on opposite corners of the keyboard and carefully lift it off the laptop

Conclusion

To reassemble your device, follow these instructions in reverse order.

Akash

Member since: 11/09/23

601 Reputation

3 Guides authored

Team

IUPUI, Team 2-4, Harley Fall 2023 Member of IUPUI, Team 2-4, Harley Fall 2023

IUPUI-HARLEY-F23S2G4

3 Members

3 Guides authored

0 Comments

Add Comment

View Statistics:

Past 24 Hours: 0

Past 7 Days: 3

Past 30 Days: 11

All Time: 67