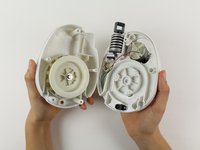
GravityLight Mounting Post Replacement and Spring Replacement

What you need

  1. GravityLight Mounting Post Replacement and Spring Replacement, Removing the Front Panel: step 1, image 1 of 2 GravityLight Mounting Post Replacement and Spring Replacement, Removing the Front Panel: step 1, image 2 of 2
    • Flip the GravityLight on its back and place it on a sturdy surface.

    • Unscrew the three 2cm Phillips #00 screws on the back of the GravityLight’s body.

  2. GravityLight Mounting Post Replacement and Spring Replacement, Opening the Device Housing: step 2, image 1 of 1
    • Some of the internal pieces may loosen or fall out during disassembly.

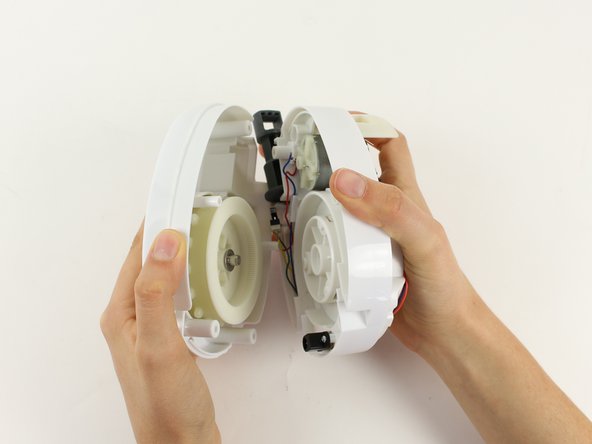
    • Firmly grasp both parts of the GravityLight body and pull them apart.

  3. GravityLight Mounting Post Replacement and Spring Replacement, Removing the Back Panel Screws: step 3, image 1 of 1
    • Place the back panel, the larger of the two pieces, on a sturdy surface with its back down.

    • Unscrew the two 2cm Phillips 00 screws on the inside of the back panel.

  4. GravityLight Mounting Post Replacement and Spring Replacement, Separating the Back Panel Housing: step 4, image 1 of 3 GravityLight Mounting Post Replacement and Spring Replacement, Separating the Back Panel Housing: step 4, image 2 of 3 GravityLight Mounting Post Replacement and Spring Replacement, Separating the Back Panel Housing: step 4, image 3 of 3
    • Some of the internal pieces may loosen or fall out during disassembly.

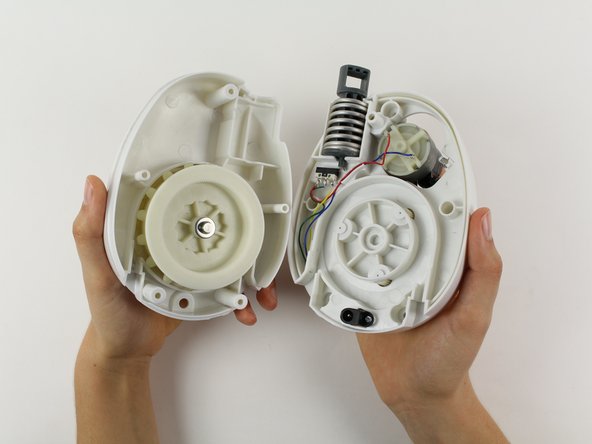
    • Firmly grasp both parts of the back panel and pull them apart.

  5. GravityLight Mounting Post Replacement and Spring Replacement, Orienting the Middle Section: step 5, image 1 of 1
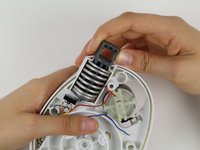
    • Place the middle section on a sturdy surface.

    • Move any wires in front of the mounting post.

  6. GravityLight Mounting Post Replacement and Spring Replacement, Removing the Mounting Post from the Middle Section.: step 6, image 1 of 2 GravityLight Mounting Post Replacement and Spring Replacement, Removing the Mounting Post from the Middle Section.: step 6, image 2 of 2
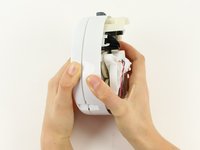
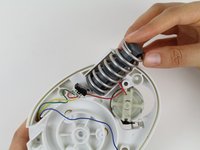
    • Push down on the spring.

    • The spring is very stiff. Compressing the spring requires a moderate amount of force.

    • Push the spring and the mounting post away from the middle section and remove them from the pocket.

  7. GravityLight Mounting Post Replacement and Spring Replacement, Separate Mounting Post and Spring: step 7, image 1 of 2 GravityLight Mounting Post Replacement and Spring Replacement, Separate Mounting Post and Spring: step 7, image 2 of 2
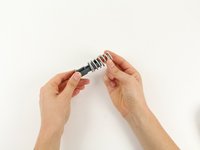
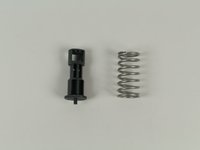
    • Pull the mounting post out of the inside of the spring

Conclusion

To reassemble your device, follow these instructions in reverse order.

Jamie Forslin

Member since: 09/26/14

143 Reputation

1 Guide authored

Team

Cal Poly, Team 12-2, Forte Fall 2014 Member of Cal Poly, Team 12-2, Forte Fall 2014

CPSU-FORTE-F14S12G2

5 Members

7 Guides authored

0 Comments

Add Comment

View Statistics:

Past 24 Hours: 0

Past 7 Days: 0

Past 30 Days: 3

All Time: 684