Introduction
This is to replace an LCD Panel for No Video issue.
First, try doing a factory reset on your device. If that doesn't work, you may try replacing the part. Your issue could be caused by a faulty LCD Panel, or a Faulty Motherboard. I have listed the part numbers for everything. No soldering is involved. Best of luck!
What you need
-
-
Remove (2) screws (14 mm) with a PH1 screwdriver on the device.
-
There is one screw on the back left, and another just below it on the bottom of the device.
-
-
-
Use a plastic spudger to remove the front preset selection buttons.
-
Gently reach underneath and pull off the mesh speaker cover. It only clips in so don't worry about breaking anything.
-
-
-
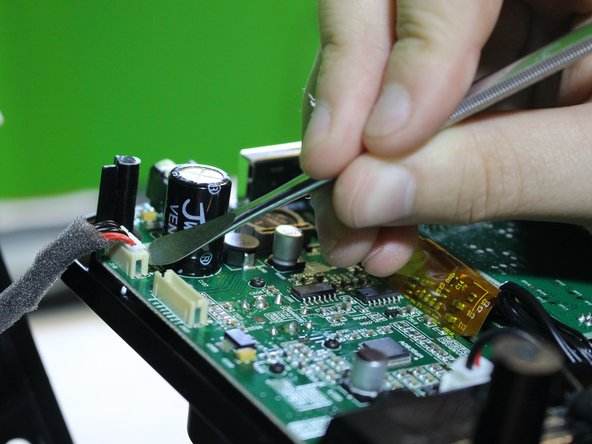
Detach a pin connector at the top of the device using a metal spudger to open up the inner components.
-
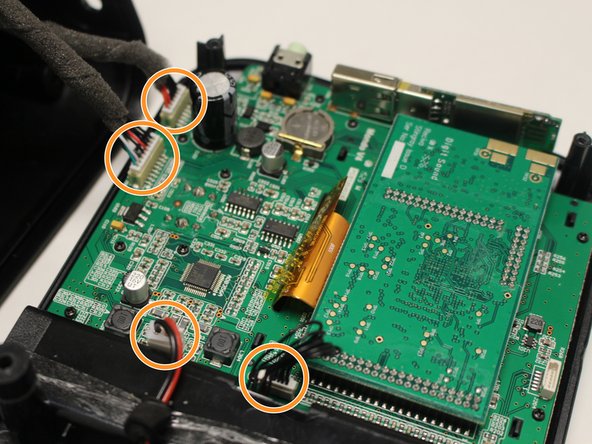
Detach (4) pin connectors inside using a metal spudger to separate the front panel from the rest of the device.
-
-
-
-
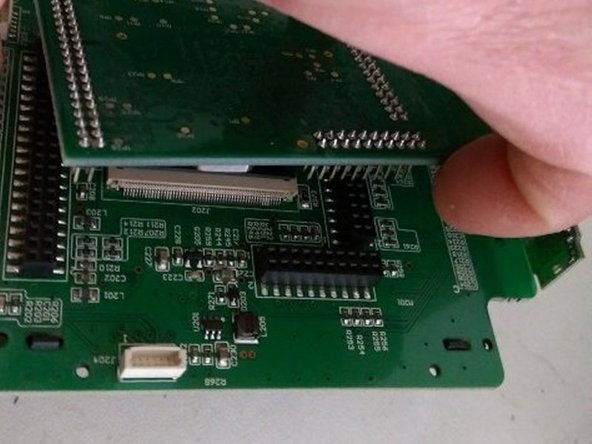
Remove the motherboard from the front panel.
Above in “Parts” you don’t mention motherboard. Since you are replacing the motherboard, woultn’t logic dictate this as a necessary part? And speaking of necessary parts, where would one purchase a motherboard for this referenced device?
-
-
-
First - Follow the steps in the previous guide to remove the motherboard.
-
**I found the removal of the front knob to be stubborn - but it will pull straight out with a little encouragement.
-
-
-
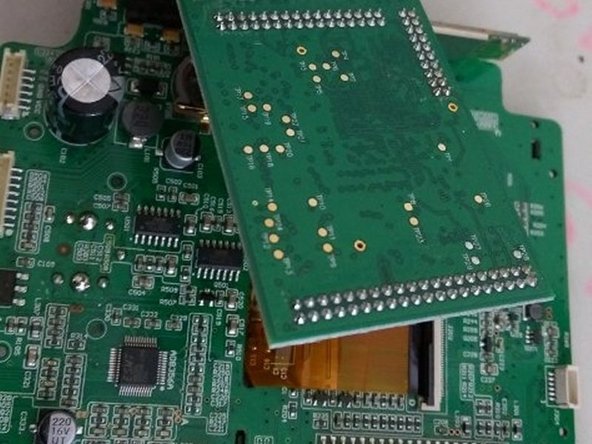
At this point, you can see the motherboard with the daughter board (Audio Controller?) and the LCD Cable running under it.
-
Gently pull upward on the daughter board to remove it from the motherboard and access the LCD cable. Be careful not to bend any pins.
-
-
-
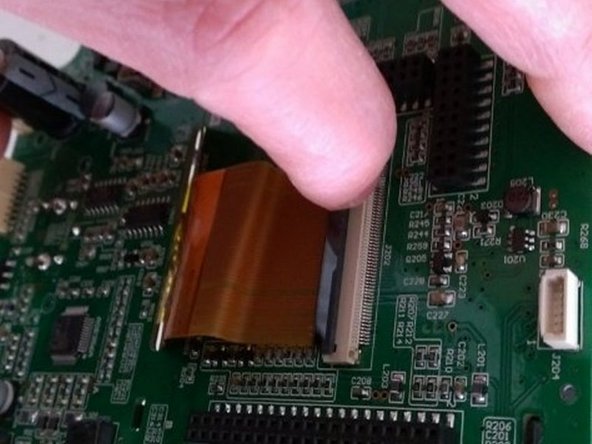
Carefully lift the black tab on the LCD Connector to release the LCD Cable.
-
There are 4 black clips holding the LCD Display to the other side of the mother board. Gently release the clips by pressing down on each one, so they pop through the other side.
-
Thread the LCD Cable outward, through the slot on the motherboard.
-
-
-
You now have the LCD Panel, but it is still in a protective casing, which must be removed to replace the LCD.
-
The LCD Panel is attached with a little adhesive. Simply use gentle pressure at the bottom of the LCD, near the cable, to push it out of the casing.
-
-
-
That's it! Now for the part numbers.
-
First we have the LCD Panel #LQ035NC111
-
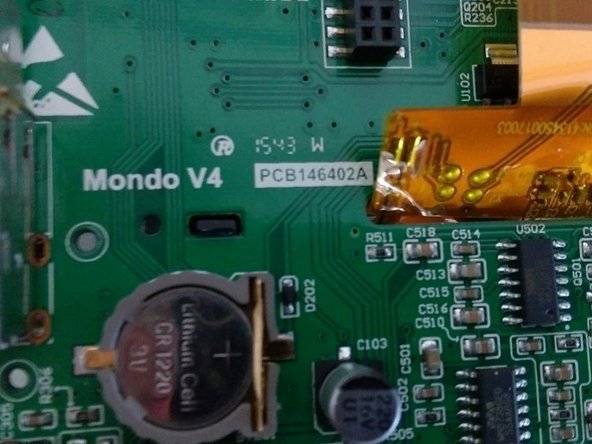
Next the Motherboard part number is Mondo V4 PCB146402A
-
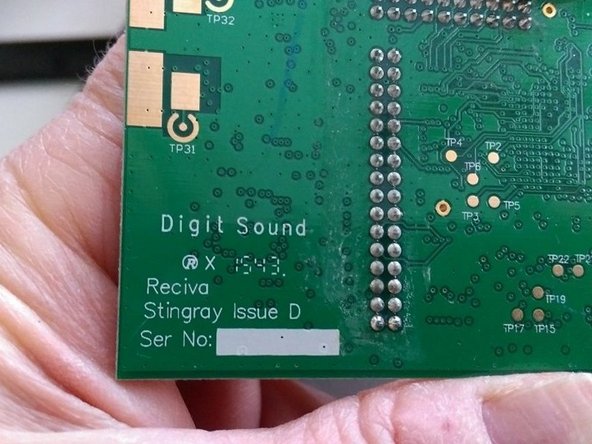
Next, the daughter board (Audio Controller?) which only says: Digit Sound Reciva Stingray Issue D
-
-
-
Last Part Number - I believe this is the wifi adapter. It appears to be glued into a usb port. I believe it could be pulled free without much trouble, but I didn't try it.
-
BL-LWXX
-
Best of luck! I went through these steps due to a Display Issue. The radio has audio, but I cannot see anything on the screen. I don't know, for certain, whether the LCD Display is faulty or the controller (motherboard). Any feedback would be appreciated.
здравствуйте! проблема в маленькой микросхеме, которая обеспечивает подсветку дисплея, u201
-


To reassemble your device, follow these instructions in reverse order.
To reassemble your device, follow these instructions in reverse order.
Cancel: I did not complete this guide.
3 other people completed this guide.
Team

7 Comments
When prying the front panel apart , after all the screws were removed, it helps if you use a heat gun, or blow drier to heat up both surfaces around the edge of the speaker section to soften the glue. it will be very difficult to not damage the edges if the glue is cold, or room temperature. It will open very easy if you heat it just enough. Don't melt anything in the process, keep moving the heat around, don't leave it in one spot too long.
How would I go about getting a Grace radio Mondo motherboard.I have no backlight but can see the images with a flash light.Radio still receives a signal and I can choose my channels.I was told at Grace radio, they do not service this model any more.
My unit stopped working, it became dead after a power surge. How do I fix this? what should I do to resolve this? Thanks
I opened up my Grace Digital Mondo ELITE to see if the screen in there is the same/similar. I have image on my LCD but the backlight is toast so it's near impossible to see. It disassembles mostly the same, so that's helpful. Unfortunately the LCD screen part # is different and the ribbon cable looks different so I highly doubt it would work. And I can't find any hits when searching for this panel:
Ribbon cable is stamped with: SGCCTECH / SGCC_035_IPS / PN:320R003
Back of the display is stamped with: SGCC035IPS23C 200720 and then what is probably a date code: BH2020-09-10
I also managed to break the pins of one of the 6-wire ports off the motherboard, the one going to the volume / snooze board. It was just barely held in place. I could probably resolder it but without a replacement LCD, this thing is probably going to e-waste. :(