
Google Pixel C Headphone Jack Replacement

What you need

  1. Google Pixel C Headphone Jack Replacement, Screen: step 1, image 1 of 1
    • Ensure that the device is completely powered down before beginning to take it apart

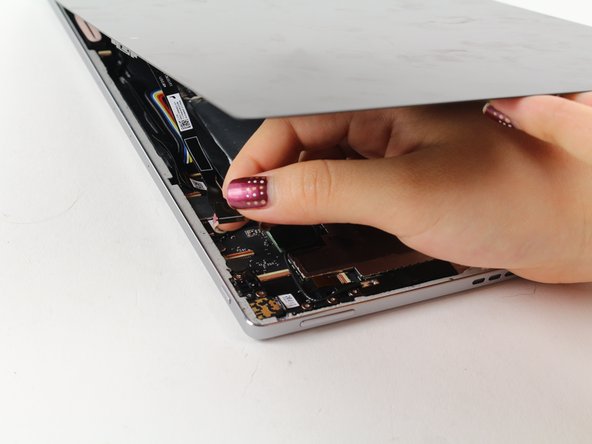
    • Use a heat gun to melt the adhesive that holds the screen to the device

    • Move the heat gun around the edge of the screen for approximately 1 minute, or until the screen can be lifted off in the next step.

    • Make sure not to heat the screen for too long because too much can damage other components inside the tablet.

  2. Google Pixel C Headphone Jack Replacement: step 2, image 1 of 2 Google Pixel C Headphone Jack Replacement: step 2, image 2 of 2
    • Use a suction cup to assist in lifting the screen while prying around its edges with a plastic spudger.

    • If necessary use a metal spudger to pry the screen up, taking care not to scratch the device.

    • Be careful not to pull the screen too far off. It will still be attached to the device by a cable for the front facing camera and the wide display data cable.

    • Reattaching the screen will require adhesive to ensure that it stays in place.

  3. Google Pixel C Headphone Jack Replacement: step 3, image 1 of 2 Google Pixel C Headphone Jack Replacement: step 3, image 2 of 2
    • Detach the cables for the camera by lifting the small flap using the tip of your fingernail or a spudger. Gently pull the ribbon cable out.

  4. Google Pixel C Headphone Jack Replacement: step 4, image 1 of 2 Google Pixel C Headphone Jack Replacement: step 4, image 2 of 2
    • Follow the same removal procedure to detach the wide gold cable.

    • When reattaching cables, it is helpful to use tweezers to slide the cable in before securing it down with the flap.

    • This device is missing a battery, so the device that you are working on may appear slightly different inside.

  5. Google Pixel C Headphone Jack Replacement, Headphone Jack: step 5, image 1 of 1
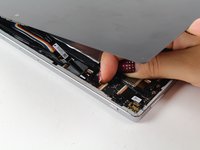
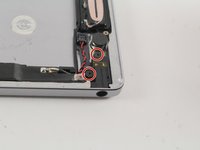
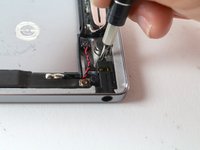
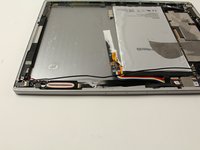
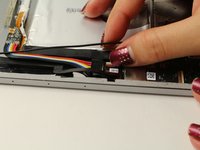
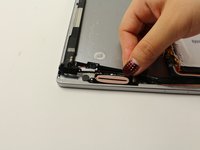
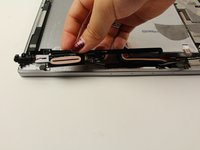
    • Orient the device so that the headphone jack is in the bottom right corner.

  6. Google Pixel C Headphone Jack Replacement: step 6, image 1 of 2 Google Pixel C Headphone Jack Replacement: step 6, image 2 of 2
    • Remove the two 3.5mm Phillips #000 screws.

  7. Google Pixel C Headphone Jack Replacement: step 7, image 1 of 1
    • Locate and remove the two 2.5mm Phillips #000 screws on either side of the wire coil.

  8. Google Pixel C Headphone Jack Replacement: step 8, image 1 of 2 Google Pixel C Headphone Jack Replacement: step 8, image 2 of 2
    • Detach the red and black cable using a narrow spudger.

  9. Google Pixel C Headphone Jack Replacement: step 9, image 1 of 2 Google Pixel C Headphone Jack Replacement: step 9, image 2 of 2
    • Detach the cable connecting to the headphone jack.

  10. Google Pixel C Headphone Jack Replacement: step 10, image 1 of 2 Google Pixel C Headphone Jack Replacement: step 10, image 2 of 2
    • Lift the headphone jack, coiled wire, and cable, peeling the adhesive back.

    • Reassembly will require adhesive to ensure that the components are secured to the device.

Conclusion

To reassemble your device, follow these instructions in reverse order.

Deborah Iwakiri

Member since: 04/25/17

522 Reputation

2 Guides authored

Team

Cal Poly, Team S21-G4, Livingston Spring 2017 Member of Cal Poly, Team S21-G4, Livingston Spring 2017

CPSU-LIVINGSTON-S17S21G4

4 Members

11 Guides authored

0 Comments

Add Comment

View Statistics:

Past 24 Hours: 0

Past 7 Days: 0

Past 30 Days: 4

All Time: 953