Free Shipping on Domestic Orders $75+

Google Pixel 9a Ultrawide Camera Removal

Prerequisite Only
This is a prerequisite-only guide! This guide is part of another procedure and isn’t meant to be used alone.

What you need

    1. Google Pixel 9a Ultrawide Camera Removal, Safety precautions: step 1, image 1 of 2 Google Pixel 9a Ultrawide Camera Removal, Safety precautions: step 1, image 2 of 2
      • Let your Pixel's battery drain below 25% before starting this repair. A charged lithium‑ion battery may catch fire if damaged.

      • Unplug all cables and completely power down your phone.

      Ask FixBot

      Add Comment

    1. Google Pixel 9a Ultrawide Camera Removal, Remove the SIM card tray: step 2, image 1 of 3 Google Pixel 9a Ultrawide Camera Removal, Remove the SIM card tray: step 2, image 2 of 3 Google Pixel 9a Ultrawide Camera Removal, Remove the SIM card tray: step 2, image 3 of 3
      • Firmly press a SIM eject tool, bit, or straightened paper clip into the SIM card tray hole on the bottom edge of your phone until the tray ejects.

      • A small mic hole is next to the SIM tray—don't confuse the two!

      • Remove the SIM card tray.

      Ask FixBot
      Add Comment

    1. Google Pixel 9a Ultrawide Camera Removal, Heat the rear cover: step 3, image 1 of 3 Google Pixel 9a Ultrawide Camera Removal, Heat the rear cover: step 3, image 2 of 3 Google Pixel 9a Ultrawide Camera Removal, Heat the rear cover: step 3, image 3 of 3
      • Adhesive secures the rear cover to the frame. Heating the cover softens the adhesive, making it easier to separate.

      • Use a hair dryer to heat the entire rear cover.

      • Only heat your phone so it's just hot to the touch. Extreme heat can damage the rear cover, screen, or battery.

      Ask FixBot

      Add Comment

    2. Google Pixel 9a Ultrawide Camera Removal, Apply a suction handle: step 4, image 1 of 2 Google Pixel 9a Ultrawide Camera Removal, Apply a suction handle: step 4, image 2 of 2
      • Apply a suction handle near the center of the rear cover's right edge, as close to the edge as possible.

      Ask FixBot

      Add Comment

    3. Google Pixel 9a Ultrawide Camera Removal, Insert an opening pick: step 5, image 1 of 3 Google Pixel 9a Ultrawide Camera Removal, Insert an opening pick: step 5, image 2 of 3 Google Pixel 9a Ultrawide Camera Removal, Insert an opening pick: step 5, image 3 of 3
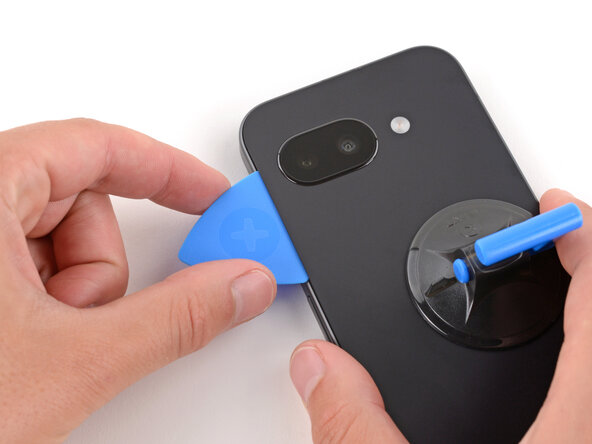
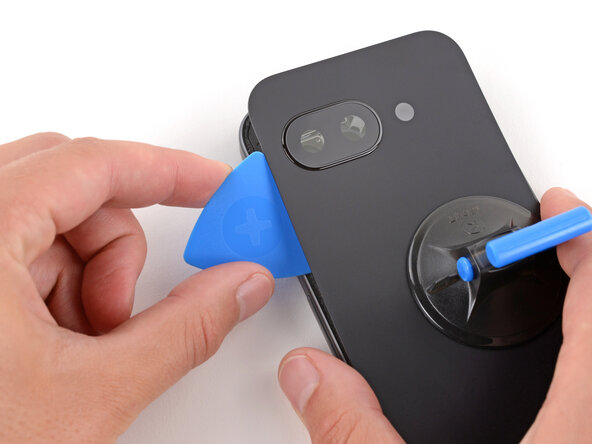
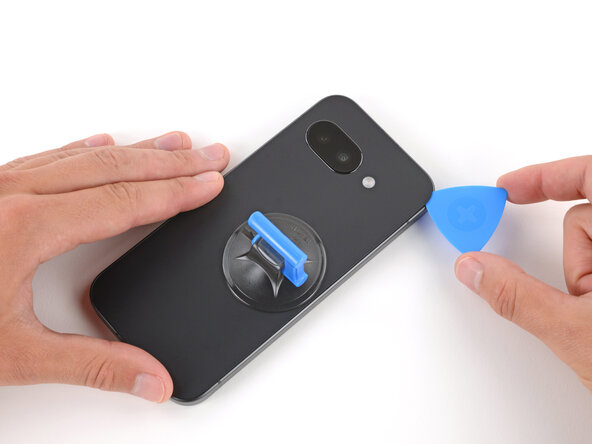
      • Pull up on the suction handle with strong, steady force until a gap forms between the cover and frame.

      • Insert the tip of an opening pick into the gap.

      Ask FixBot

      Add Comment

    4. Google Pixel 9a Ultrawide Camera Removal, Adhesive information: step 6, image 1 of 3 Google Pixel 9a Ultrawide Camera Removal, Adhesive information: step 6, image 2 of 3 Google Pixel 9a Ultrawide Camera Removal, Adhesive information: step 6, image 3 of 3
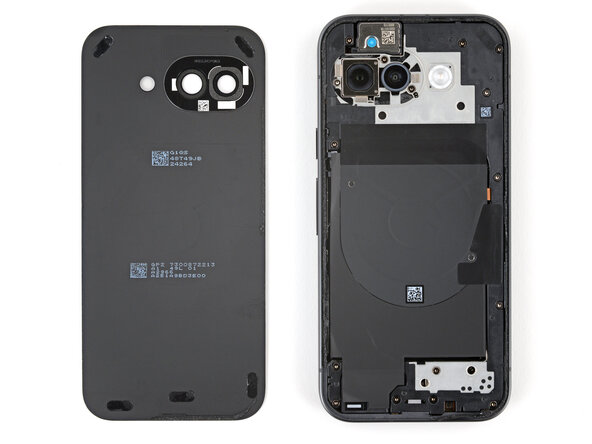
      • The rear cover is secured with adhesive around the perimeter of the frame and near the cameras. Use this picture as a reference while you separate the adhesive.

      • When separating the left and right edge adhesive, don't insert your pick more than 3 mm to avoid damaging the wireless charging coil and its graphite film.

      Ask FixBot

      Add Comment

    5. Google Pixel 9a Ultrawide Camera Removal, Separate the rear cover adhesive: step 7, image 1 of 3 Google Pixel 9a Ultrawide Camera Removal, Separate the rear cover adhesive: step 7, image 2 of 3 Google Pixel 9a Ultrawide Camera Removal, Separate the rear cover adhesive: step 7, image 3 of 3
      • If you ever have trouble separating the adhesive, apply more heat and try again.

      • Slide the opening pick up the right edge, around the top right corner, and along the top edge to separate the adhesive securing the rear cover.

      Ask FixBot

      Add Comment

    6. Google Pixel 9a Ultrawide Camera Removal: step 8, image 1 of 3 Google Pixel 9a Ultrawide Camera Removal: step 8, image 2 of 3 Google Pixel 9a Ultrawide Camera Removal: step 8, image 3 of 3
      • Insert an opening pick in the initial gap you created near the center of the rear cover's right edge.

      • Slide the opening pick down the right edge, along the bottom edge, and up the left edge to separate the adhesive securing the cover.

      Ask FixBot

      Add Comment

    7. Google Pixel 9a Ultrawide Camera Removal, Separate the camera bezel adhesive: step 9, image 1 of 3 Google Pixel 9a Ultrawide Camera Removal, Separate the camera bezel adhesive: step 9, image 2 of 3 Google Pixel 9a Ultrawide Camera Removal, Separate the camera bezel adhesive: step 9, image 3 of 3
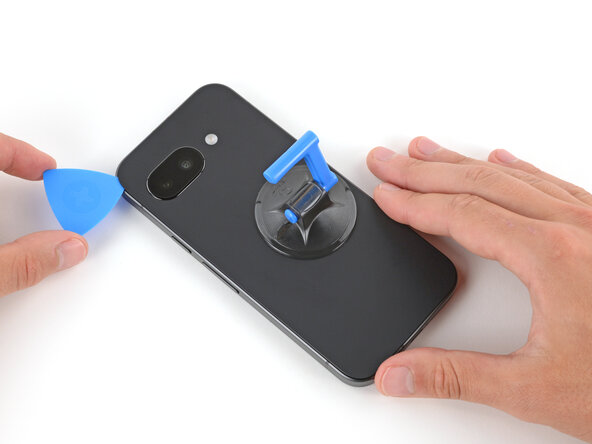
      • Insert the flat edge of an opening pick under the top of the rear cover's left edge, near the camera bezel.

      • Twist the pick and apply constant pressure to separate the adhesive around the camera bezel.

      Ask FixBot
      Add Comment

    8. Google Pixel 9a Ultrawide Camera Removal, Remove the rear cover: step 10, image 1 of 2 Google Pixel 9a Ultrawide Camera Removal, Remove the rear cover: step 10, image 2 of 2
      • Remove the rear cover.

      • If you feel resistance, go back around the perimeter of the cover and use a pick to separate any remaining adhesive.

      Ask FixBot
      Add Comment

    9. Google Pixel 9a Ultrawide Camera Removal, Remove the camera bezel: step 11, image 1 of 3 Google Pixel 9a Ultrawide Camera Removal, Remove the camera bezel: step 11, image 2 of 3 Google Pixel 9a Ultrawide Camera Removal, Remove the camera bezel: step 11, image 3 of 3
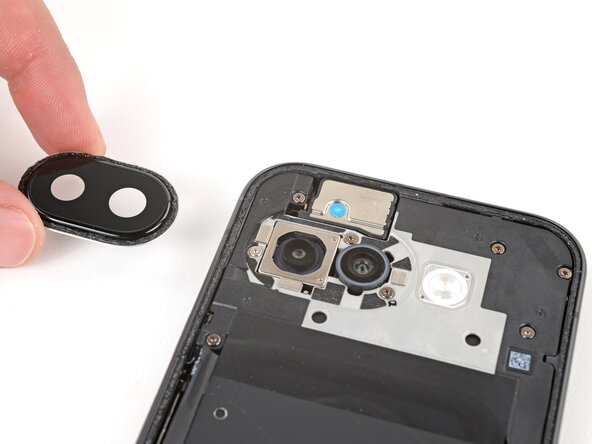
      • If the camera bezel detached from the rear cover and stayed stuck to your phone, follow this step to remove it. Otherwise, skip this step.

      • Slide an opening pick under the camera bezel and pry up to remove it.

      • Only insert the pick a few millimeters under the bezel, or you risk damaging the cameras.

      • If you're having trouble, lightly heat the camera bezel.

      Ask FixBot

      Add Comment

    1. Google Pixel 9a Ultrawide Camera Removal, Remove the wireless charging assembly screws: step 12, image 1 of 2 Google Pixel 9a Ultrawide Camera Removal, Remove the wireless charging assembly screws: step 12, image 2 of 2
      Tool used on this step:
      Magnetic Project Mat
      $19.95
      Buy
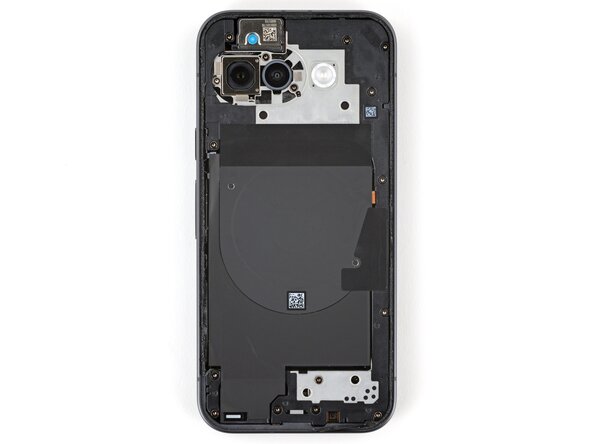
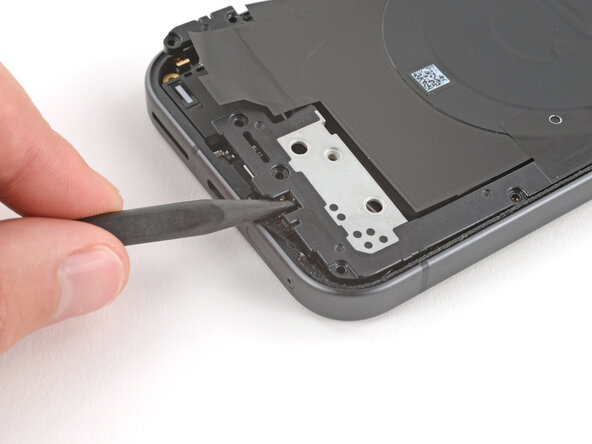
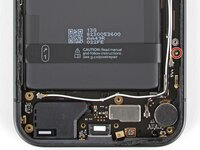
      • Use a Torx Plus 3IP screwdriver to remove the 16 screws securing the wireless charging assembly:

      • Thirteen 5.0 mm‑long screws

      • Three 2.2 mm‑long screws

      • Throughout this repair, keep track of each screw and make sure it goes back exactly where it came from to avoid damaging your phone.

      Ask FixBot

      Add Comment

    2. Google Pixel 9a Ultrawide Camera Removal, Unclip the wireless charging assembly: step 13, image 1 of 3 Google Pixel 9a Ultrawide Camera Removal, Unclip the wireless charging assembly: step 13, image 2 of 3 Google Pixel 9a Ultrawide Camera Removal, Unclip the wireless charging assembly: step 13, image 3 of 3
      Ask FixBot
      Add Comment

    3. Google Pixel 9a Ultrawide Camera Removal, Remove the wireless charging assembly: step 14, image 1 of 2 Google Pixel 9a Ultrawide Camera Removal, Remove the wireless charging assembly: step 14, image 2 of 2
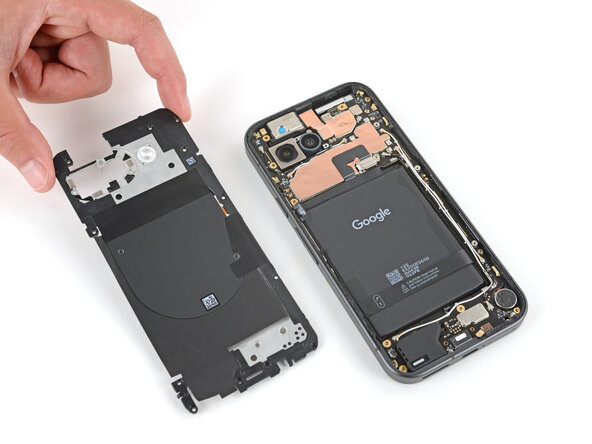
      • Remove the wireless charging assembly.

      Ask FixBot

      Add Comment

    1. Google Pixel 9a Ultrawide Camera Removal, Remove the connector cover screw: step 15, image 1 of 2 Google Pixel 9a Ultrawide Camera Removal, Remove the connector cover screw: step 15, image 2 of 2
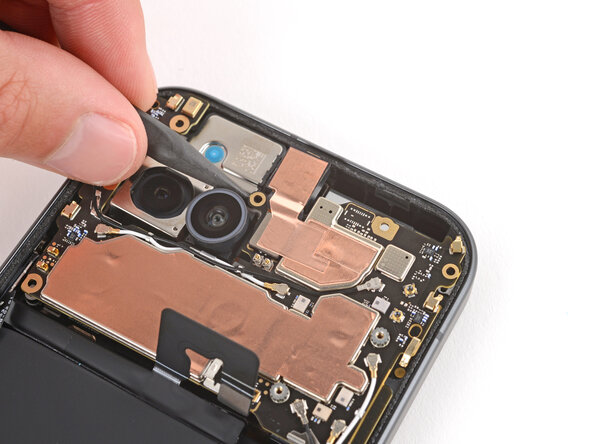
      • Be careful not to damage the battery with your tools while disconnecting it.

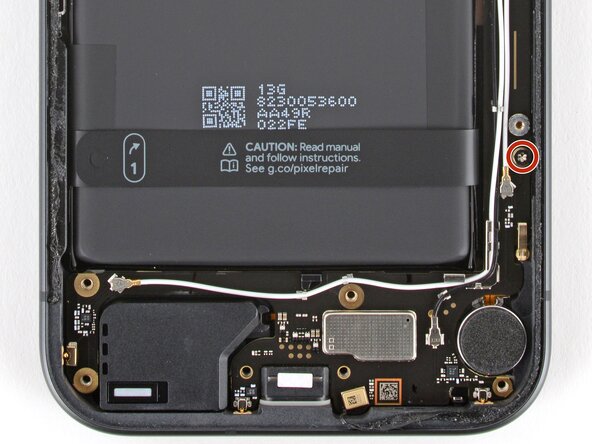
      • Use a Torx Plus 3IP screwdriver to remove the 1.7 mm‑long screw securing the battery connector cover.

      Ask FixBot
      Add Comment

    2. Google Pixel 9a Ultrawide Camera Removal, Remove the battery connector cover: step 16, image 1 of 3 Google Pixel 9a Ultrawide Camera Removal, Remove the battery connector cover: step 16, image 2 of 3 Google Pixel 9a Ultrawide Camera Removal, Remove the battery connector cover: step 16, image 3 of 3
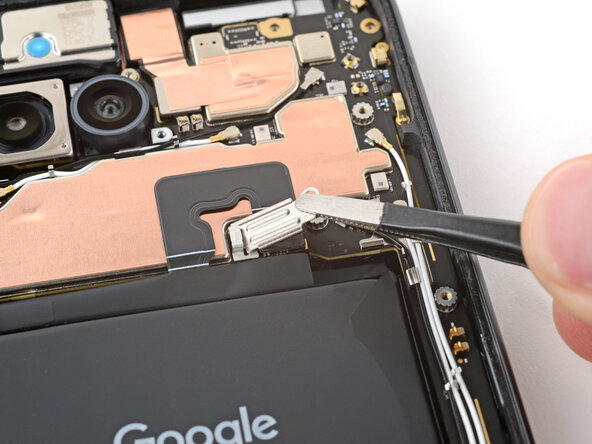
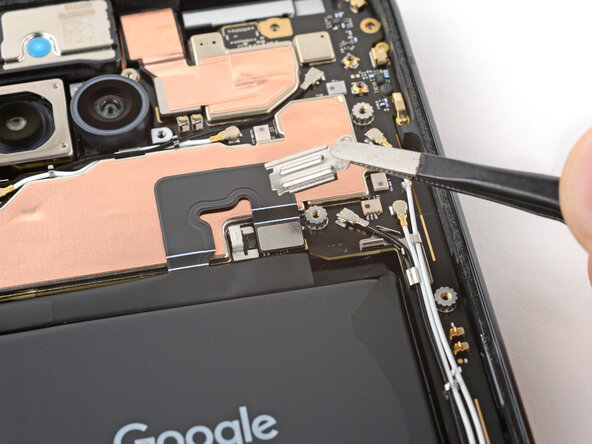
      • Use tweezers to lift and remove the battery connector cover.

      Ask FixBot

      Add Comment

    3. Google Pixel 9a Ultrawide Camera Removal, Disconnect the battery: step 17, image 1 of 2 Google Pixel 9a Ultrawide Camera Removal, Disconnect the battery: step 17, image 2 of 2
      • Use a spudger to pry up and disconnect the battery cable press connector.

      Ask FixBot

      Add Comment

    1. Google Pixel 9a Ultrawide Camera Removal, Remove the logic board screws: step 18, image 1 of 3 Google Pixel 9a Ultrawide Camera Removal, Remove the logic board screws: step 18, image 2 of 3 Google Pixel 9a Ultrawide Camera Removal, Remove the logic board screws: step 18, image 3 of 3
      • Use a 3IP Torx Plus screwdriver to remove the two 2.8 mm‑long screws securing the logic board.

      Ask FixBot

      Add Comment

    2. Google Pixel 9a Ultrawide Camera Removal, Lift the logic board: step 19, image 1 of 3 Google Pixel 9a Ultrawide Camera Removal, Lift the logic board: step 19, image 2 of 3 Google Pixel 9a Ultrawide Camera Removal, Lift the logic board: step 19, image 3 of 3
      • Be careful not to smudge the cameras when handling the logic board.

      • Before trying to remove the logic board, double‑check that you removed the SIM card tray.

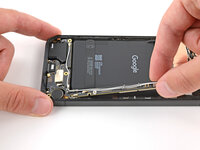
      • Insert the point of a spudger under the screw hole near the cameras and lift the board until you can grip it with your fingers.

      Ask FixBot

      Add Comment

    3. Google Pixel 9a Ultrawide Camera Removal, Free the bottom edge of the logic board: step 20, image 1 of 3 Google Pixel 9a Ultrawide Camera Removal, Free the bottom edge of the logic board: step 20, image 2 of 3 Google Pixel 9a Ultrawide Camera Removal, Free the bottom edge of the logic board: step 20, image 3 of 3
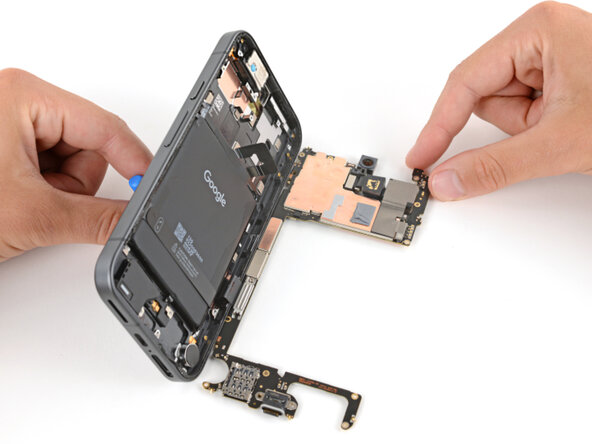
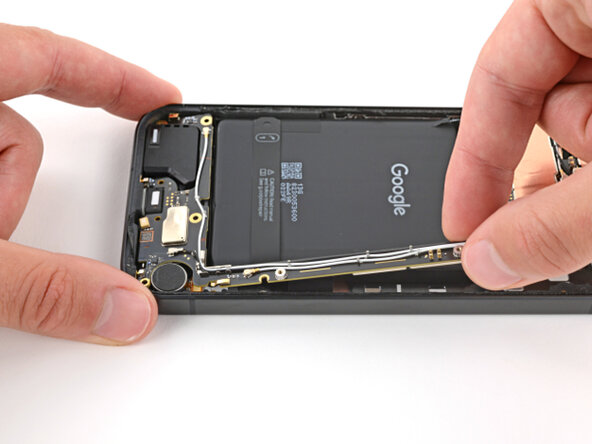
      • Don't try to fully remove the logic board yet, as it's still connected to the frame by the screen cable.

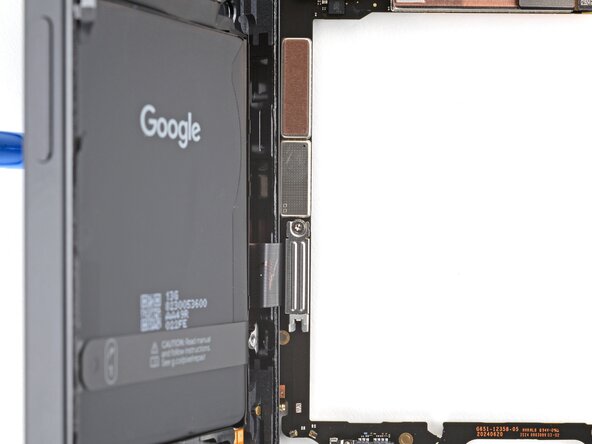
      • Grip the skinny section of the board with your fingers and lift until the clip near the bottom edge of the battery releases.

      • Pull the top edge of the board to the right of the frame until the charge port slides fully out of its recess.

      Ask FixBot

      Add Comment
    4. Google Pixel 9a Ultrawide Camera Removal, Lay the logic board down: step 21, image 1 of 3 Google Pixel 9a Ultrawide Camera Removal, Lay the logic board down: step 21, image 2 of 3 Google Pixel 9a Ultrawide Camera Removal, Lay the logic board down: step 21, image 3 of 3
      • The logic board may fall out of place during this step. Hold it steady, but don't grip any of the camera lenses or connectors.

      • Apply a suction handle to the screen and use it to prop up your phone.

      • Gently lay the logic board down flat against your work surface, being careful not to strain the screen cable.

      Ask FixBot

      Add Comment

    5. Google Pixel 9a Ultrawide Camera Removal, Remove the logic board connector cover: step 22, image 1 of 2 Google Pixel 9a Ultrawide Camera Removal, Remove the logic board connector cover: step 22, image 2 of 2
      • Use a Torx Plus 3IP screwdriver to remove the 1.7 mm‑long screw securing the screen cable cover.

      Ask FixBot

      Add Comment

    6. Google Pixel 9a Ultrawide Camera Removal, Remove the connector cover: step 23, image 1 of 3 Google Pixel 9a Ultrawide Camera Removal, Remove the connector cover: step 23, image 2 of 3 Google Pixel 9a Ultrawide Camera Removal, Remove the connector cover: step 23, image 3 of 3
      • Use tweezers to lift and remove the screen cable cover.

      Ask FixBot

      Add Comment

    7. Google Pixel 9a Ultrawide Camera Removal, Disconnect the logic board: step 24, image 1 of 2 Google Pixel 9a Ultrawide Camera Removal, Disconnect the logic board: step 24, image 2 of 2
      • Use the flat end of a spudger to pry up and disconnect the screen cable press connector.

      Ask FixBot

      Add Comment

    8. Google Pixel 9a Ultrawide Camera Removal, Remove the logic board: step 25, image 1 of 2 Google Pixel 9a Ultrawide Camera Removal, Remove the logic board: step 25, image 2 of 2
      • Slide the logic board away from the frame and remove it.

      Ask FixBot

      Add Comment

    1. Google Pixel 9a Ultrawide Camera Removal, Remove the ultrawide camera: step 26, image 1 of 3 Google Pixel 9a Ultrawide Camera Removal, Remove the ultrawide camera: step 26, image 2 of 3 Google Pixel 9a Ultrawide Camera Removal, Remove the ultrawide camera: step 26, image 3 of 3
      • Hold the logic board slightly above your work surface while working on the camera—don't press the board against your work surface, or you may damage fragile components.

      • Use the flat end of a spudger to pry up and disconnect the ultrawide camera press connector.

      • Remove the ultrawide camera.

      Ask FixBot

      Add Comment

Finish Line

Cancel: I did not complete this guide.

Spencer Day

Member since: 09/14/22

206,053 Reputation

1,267 Guides authored

Team

iFixit Member of iFixit

Staff

122 Members

72,401 Guides authored

0 Guide Comments

Add Comment

View Statistics:

Past 24 Hours: 1

Past 7 Days: 1

Past 30 Days: 11

All Time: 165