Free Shipping on Domestic Orders $75+

Google Pixel 9a Logic Board Installation

Prerequisite Only
This is a prerequisite-only guide! This guide is part of another procedure and isn’t meant to be used alone.

What you need

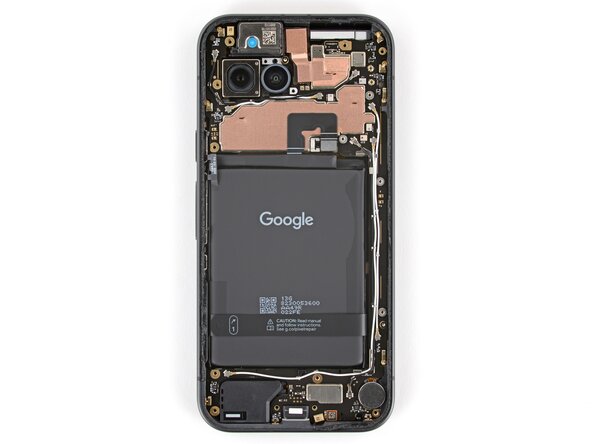
    1. Google Pixel 9a Logic Board Installation, Check the thermal pads: step 1, image 1 of 2 Google Pixel 9a Logic Board Installation, Check the thermal pads: step 1, image 2 of 2
      • Check the condition of the logic board thermal pads—they'll either be on the bottom of the board or stuck to the corresponding spot on the frame.

      • If the pads are ripped, torn, or otherwise damaged, follow the next five steps to replace them. If they aren't, skip ahead five steps.

      Ask FixBot

      Add Comment

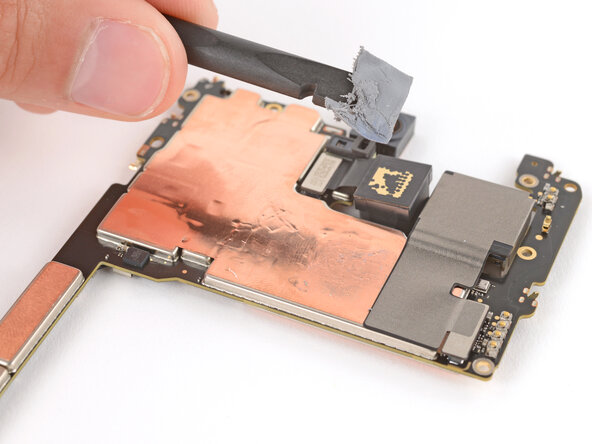
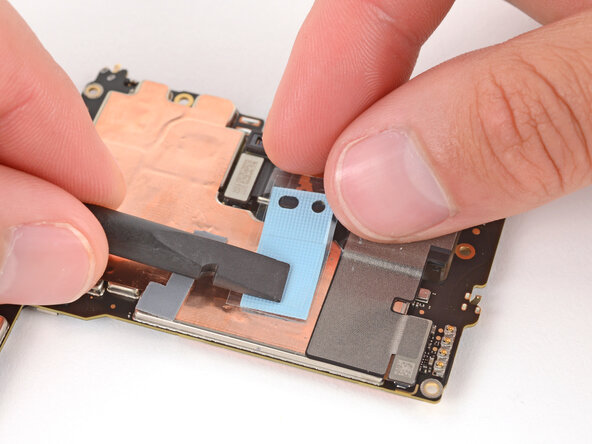
    2. Google Pixel 9a Logic Board Installation, Remove the thermal pads: step 2, image 1 of 3 Google Pixel 9a Logic Board Installation, Remove the thermal pads: step 2, image 2 of 3 Google Pixel 9a Logic Board Installation, Remove the thermal pads: step 2, image 3 of 3
      • Use the flat end of a spudger to scrape up and remove the damaged thermal pads.

      Ask FixBot

      Add Comment

    3. Google Pixel 9a Logic Board Installation: step 3, image 1 of 1
      • Use high‑concentration (>90%) isopropyl alcohol and a coffee filter to clean up and remove any residue where the thermal pads were.

      Ask FixBot

      Add Comment

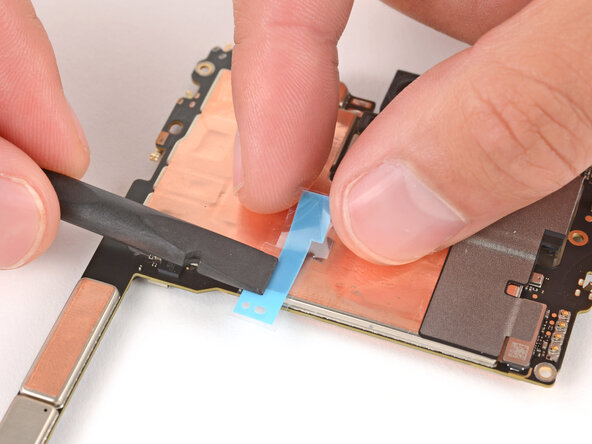
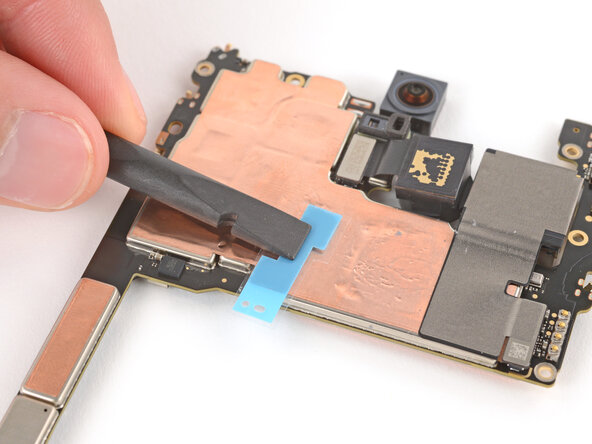
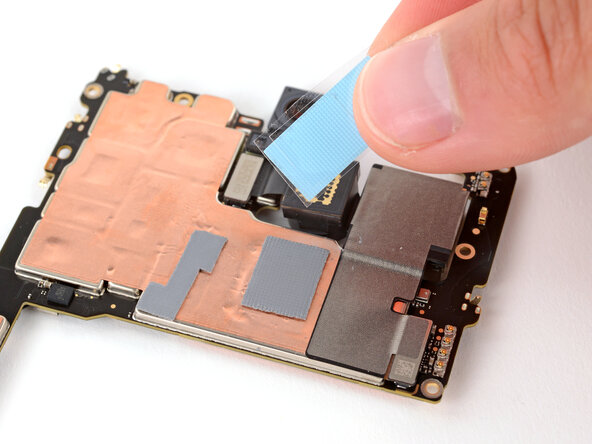
    4. Google Pixel 9a Logic Board Installation, Apply the thermal pads: step 4, image 1 of 3 Google Pixel 9a Logic Board Installation, Apply the thermal pads: step 4, image 2 of 3 Google Pixel 9a Logic Board Installation, Apply the thermal pads: step 4, image 3 of 3
      • The thermal pads are very delicate and can easily be misaligned when placing them and removing liners. Take your time when applying them—good placement will ensure proper heat dissipation.

      • Remove the textured liner from the smaller thermal pad.

      • Carefully place the pad onto the board.

      • Use this photo as a reference to help align the pad.

      • Use the flat end of a spudger or your finger to press down lightly on the entire surface of the thermal pad, securing it in place without deforming it.

      Ask FixBot

      Add Comment

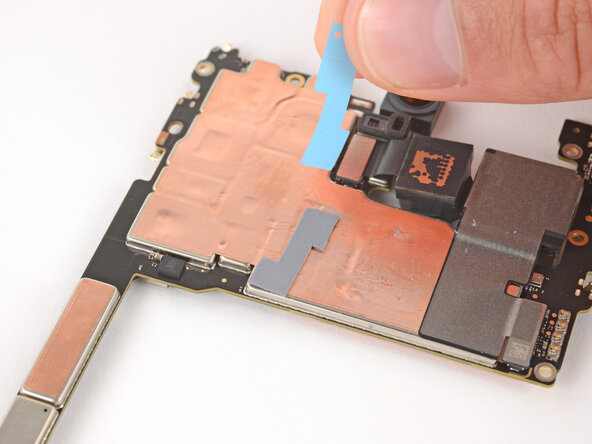
    5. Google Pixel 9a Logic Board Installation: step 5, image 1 of 2 Google Pixel 9a Logic Board Installation: step 5, image 2 of 2
      • Slowly lift and remove the remaining liners from the top of the thermal pad.

      • If the thermal pad start to lift up with the liners, lay it back down and press again to secure it.

      Ask FixBot

      Add Comment

    6. Google Pixel 9a Logic Board Installation: step 6, image 1 of 3 Google Pixel 9a Logic Board Installation: step 6, image 2 of 3 Google Pixel 9a Logic Board Installation: step 6, image 3 of 3
      • Repeat the previous two steps to apply the remaining, larger thermal pad.

      • Use this photo as a reference to help align the pad.

      Ask FixBot

      Add Comment

    7. Google Pixel 9a Logic Board Installation, Slide the logic board into place: step 7, image 1 of 2 Google Pixel 9a Logic Board Installation, Slide the logic board into place: step 7, image 2 of 2
      • If it isn't already, prop your phone up with the suction handle.

      • Slide the logic board up against the frame so the screen cable is near its connector.

      Ask FixBot

      Add Comment

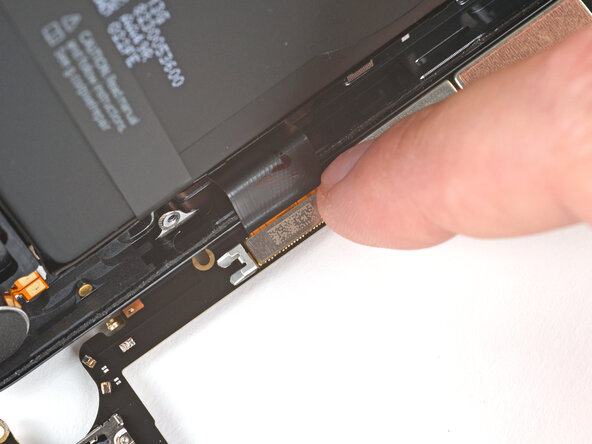
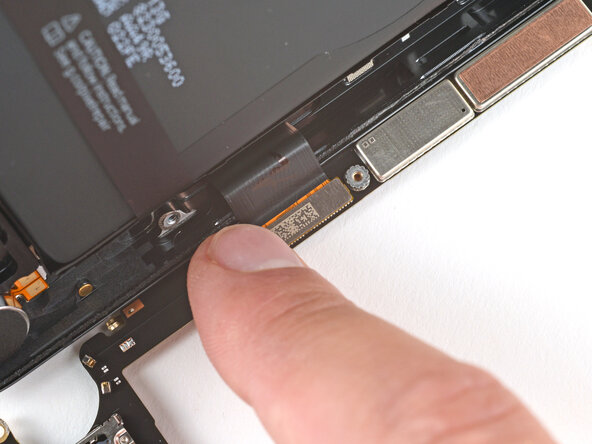
    8. Google Pixel 9a Logic Board Installation, Connect the screen cable: step 8, image 1 of 3 Google Pixel 9a Logic Board Installation, Connect the screen cable: step 8, image 2 of 3 Google Pixel 9a Logic Board Installation, Connect the screen cable: step 8, image 3 of 3
      • Align the screen cable press connector over its socket and press down with your fingertip—first on one side, then the other—until it clicks into place.

      Ask FixBot

      Add Comment

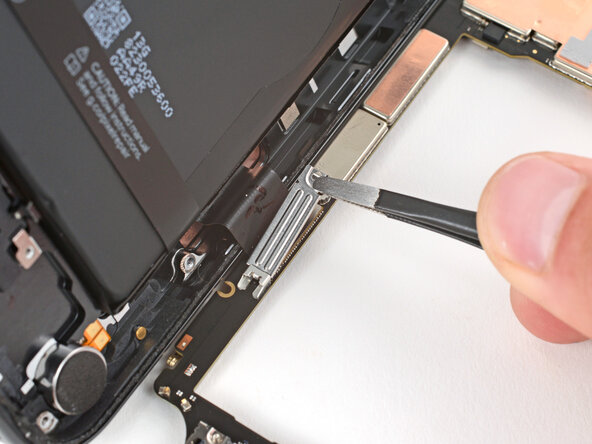
    9. Google Pixel 9a Logic Board Installation, Install the screen cable cover: step 9, image 1 of 3 Google Pixel 9a Logic Board Installation, Install the screen cable cover: step 9, image 2 of 3 Google Pixel 9a Logic Board Installation, Install the screen cable cover: step 9, image 3 of 3
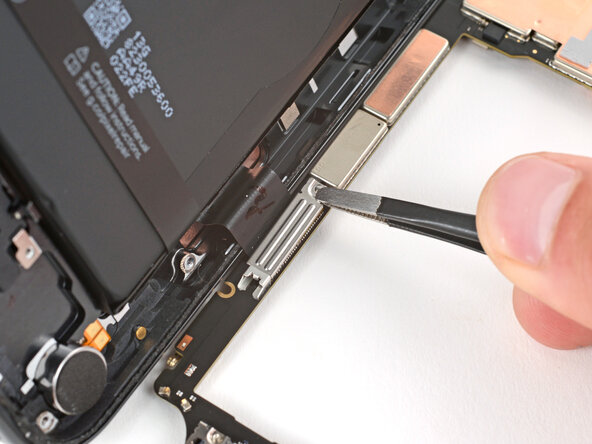
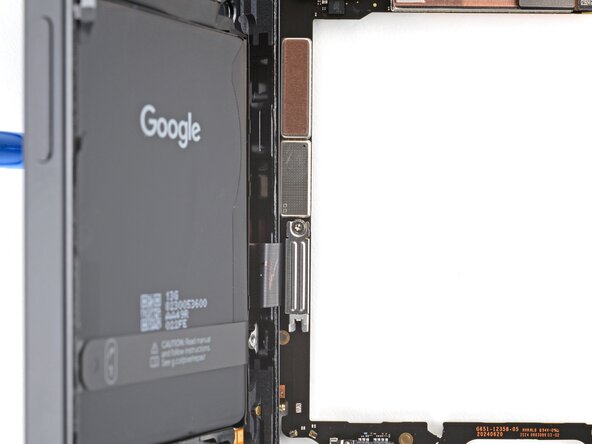
      • Use tweezers to hook the bottom edge of the screen cable cover into place, then lay the cover down flat.

      Ask FixBot

      Add Comment

    10. Google Pixel 9a Logic Board Installation: step 10, image 1 of 2 Google Pixel 9a Logic Board Installation: step 10, image 2 of 2
      • Use a 3IP Torx Plus screwdriver to install the 1.7 mm‑long screw securing the screen cable cover.

      Ask FixBot

      Add Comment

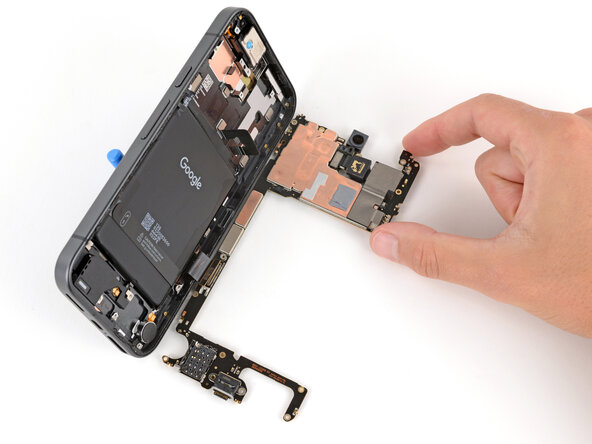
    11. Google Pixel 9a Logic Board Installation, Flip up the logic board: step 11, image 1 of 3 Google Pixel 9a Logic Board Installation, Flip up the logic board: step 11, image 2 of 3 Google Pixel 9a Logic Board Installation, Flip up the logic board: step 11, image 3 of 3
      • Be careful not to smudge the cameras when handling the logic board.

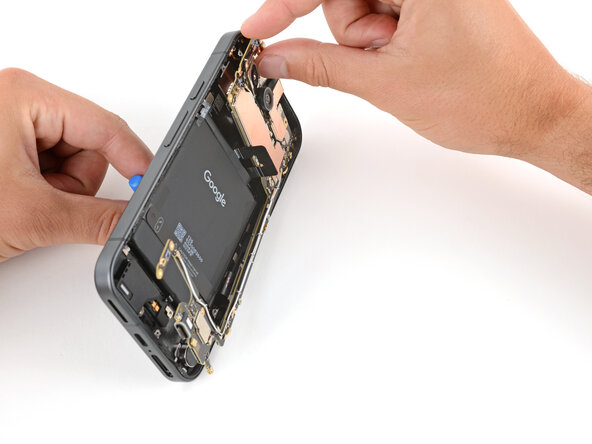
      • Flip the logic board up so it's gently resting in its recess in the frame.

      • Remove the suction cup and lay your phone screen-side down.

      Ask FixBot

      Add Comment

    12. Google Pixel 9a Logic Board Installation, Put the logic board into place: step 12, image 1 of 3 Google Pixel 9a Logic Board Installation, Put the logic board into place: step 12, image 2 of 3 Google Pixel 9a Logic Board Installation, Put the logic board into place: step 12, image 3 of 3
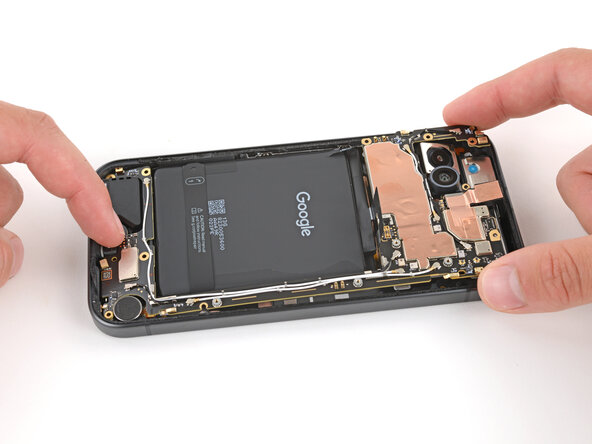
      • When inserting the logic board, make sure the battery cable doesn't get caught underneath. You may need to gently bend it out of the way.

      • Push the logic board toward the bottom of the frame and press the charging port down until it snaps into its cutout.

      • Press down on the center of the logic board's bottom edge until the clip near the battery engages.

      Ask FixBot

      Add Comment

    13. Google Pixel 9a Logic Board Installation: step 13, image 1 of 1
      • Push down on the top edge of the logic board so it goes into its recess. Make sure the cameras are sitting flush and not at odd angles.

      Ask FixBot

      Add Comment

    14. Google Pixel 9a Logic Board Installation, Install the logic board screws: step 14, image 1 of 2 Google Pixel 9a Logic Board Installation, Install the logic board screws: step 14, image 2 of 2
      • Use a 3IP Torx Plus screwdriver to install the two 2.8 mm‑long screws securing the logic board.

      • Make sure the logic board lays flat, with nothing caught underneath, before tightening these screws.

      Ask FixBot

      Add Comment

Finish Line

Cancel: I did not complete this guide.

Spencer Day

Member since: 09/14/22

205,821 Reputation

1,267 Guides authored

Team

iFixit Member of iFixit

Staff

122 Members

72,401 Guides authored

0 Guide Comments

Add Comment

View Statistics:

Past 24 Hours: 1

Past 7 Days: 3

Past 30 Days: 16

All Time: 169