
PlayStation 2 Slimline SCPH-900xx Lower Smart Plate Replacement

MrJulian and one other contributor
Last updated on Apr 29, 2023
Views: 4.3K
View statistics:
- Past 24 Hours:
- 5
- Past 7 Days:
- 31
- Past 30 Days:
- 141
- All Time:
- 4,334
Comments: 0
No one has left comments on this guide. Will you be first?
Go to guide commentsCompleted: 8 9
8 people have marked this guide "completed." Will you be next?
9 people have marked this guide "completed." Including you — great job!
Favorites: 0 1
No one has favorited (and subscribed to) this guide. Will you be the first?
1 person has favorited (and subscribed to) this guide — and that's you!
Community-Contributed Guide
An awesome member of our community made this guide. It was not created by iFixit staff.
Introduction
Go to step 1 ↓This guide shows you how to remove the lower smart plate of your PlayStation 2 to get access to the internal parts or how to replace it.
What you need
Tools
-
Spudger4.9
-


-
-
-
Turn off your PlayStation 2 and remove the disc and Memory Card.
-
Turn over the PlayStation 2 and put it on a soft surface (e.g. a towel).
 Ask FixBot
-
-
-
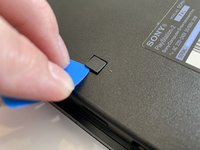
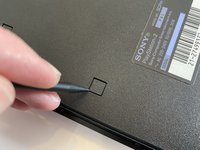
Locate the six covers.
-
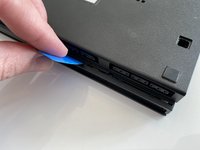
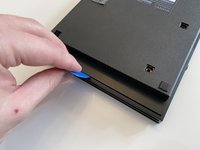
Two are located underneath the feet.
-
One cover is located underneath the Void sticker.
-
-
-
-
Remove the covers by using either a Spudger, Opening Picks or your fingernail.
-
-
-
Remove the six Phillips #1 screws with a screwdriver.
-
The screws on the right are a bit deeper inside the shell as like the rest but are the same size.
-
-
-
Separate the clips at the front and the overhanging side from their mounting using a Prying Tool.
-
Separate the two halves.
-
-




To reassemble your device, follow these instructions in reverse order.
Cancel: I did not complete this guide.
8 other people completed this guide.
Special thanks to these translators:
100%
MrJulian is helping us fix the world! Want to contribute?
Start translating ›

