Free Shipping on Domestic Orders $75+

Google Pixel 10 Pro XL Front Camera Installation

Prerequisite Only
This is a prerequisite-only guide! This guide is part of another procedure and isn’t meant to be used alone.

What you need

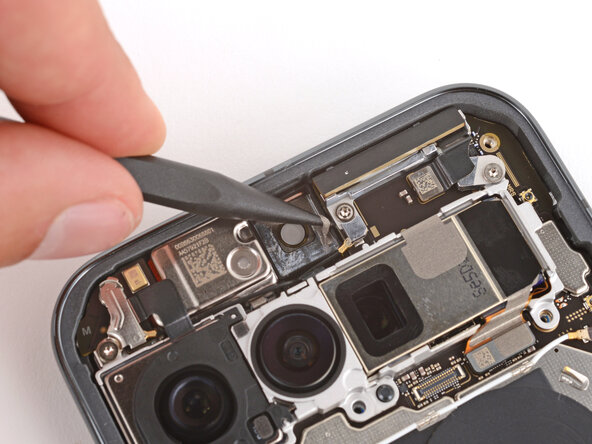
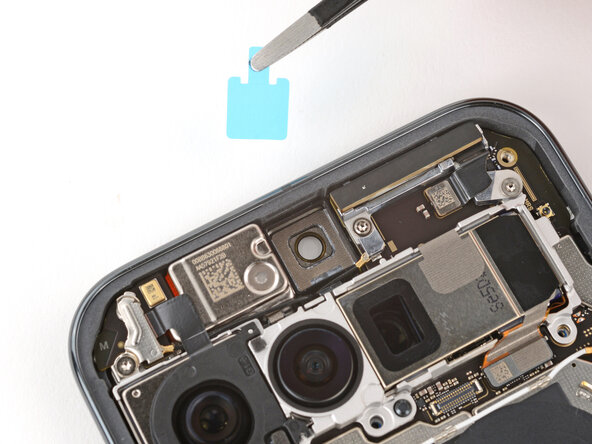
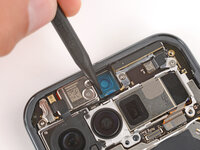
    1. Google Pixel 10 Pro XL Front Camera Installation, Remove the old front camera adhesive: step 1, image 1 of 2 Google Pixel 10 Pro XL Front Camera Installation, Remove the old front camera adhesive: step 1, image 2 of 2
      • Use the point of a spudger and tweezers to gently scrape up and remove all the old front camera adhesive.

      Ask FixBot

      Add Comment

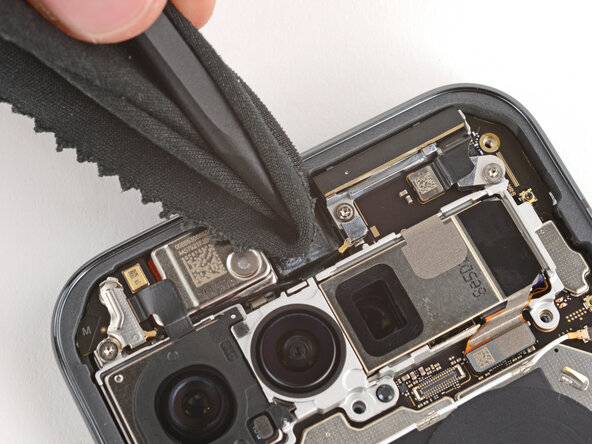
    2. Google Pixel 10 Pro XL Front Camera Installation: step 2, image 1 of 1
      • Use a spudger wrapped in a microfiber cloth and one drop of high‑concentration (>90%) isopropyl alcohol to clean up any adhesive residue from the front camera recess.

      • Allow the alcohol to dry completely before continuing.

      Ask FixBot

      Add Comment

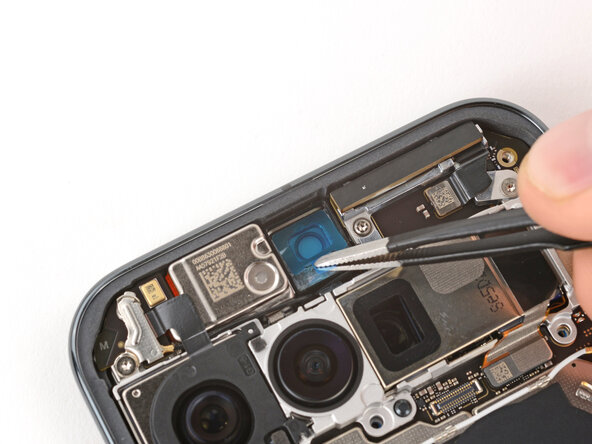
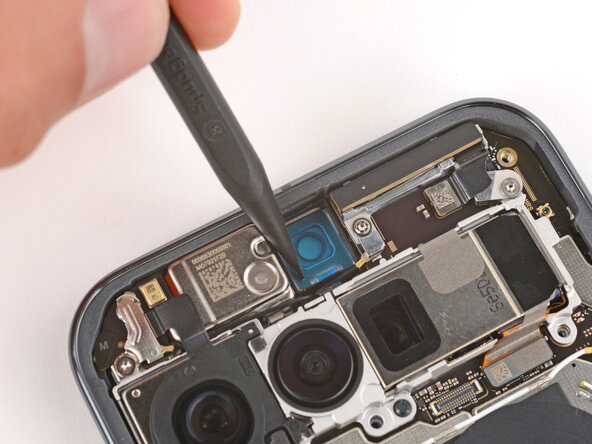
    3. Google Pixel 10 Pro XL Front Camera Installation, Install new front camera adhesive: step 3, image 1 of 3 Google Pixel 10 Pro XL Front Camera Installation, Install new front camera adhesive: step 3, image 2 of 3 Google Pixel 10 Pro XL Front Camera Installation, Install new front camera adhesive: step 3, image 3 of 3
      • Remove the large clear liner from the front camera adhesive and gently place it into the recess.

      • Use a spudger to press down firmly on the adhesive to secure it.

      • Slowly peel up and remove the remaining liner.

      • If the adhesive starts to peel up with the liner, lay it down and press it into place firmly before trying again.

      Ask FixBot

      Add Comment

    4. Google Pixel 10 Pro XL Front Camera Installation, Remove any protective caps: step 4, image 1 of 1
      • If your replacement front camera has a protective cap on the front, carefully remove it.

      Ask FixBot

      Add Comment

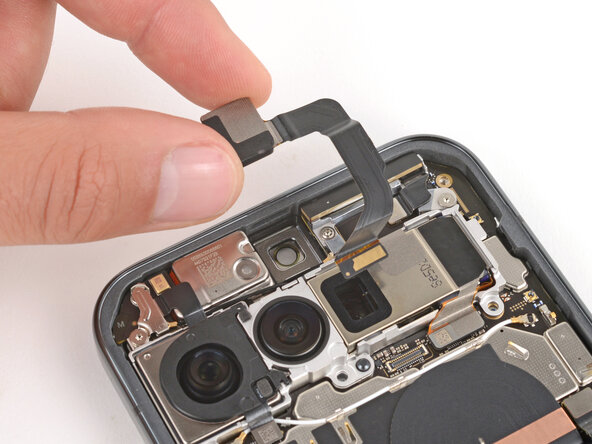
    5. Google Pixel 10 Pro XL Front Camera Installation, Put the front camera in its recess: step 5, image 1 of 3 Google Pixel 10 Pro XL Front Camera Installation, Put the front camera in its recess: step 5, image 2 of 3 Google Pixel 10 Pro XL Front Camera Installation, Put the front camera in its recess: step 5, image 3 of 3
      • With the cable facing the bottom of the phone, lay the front camera into its recess and press it into place.

      Ask FixBot

      Add Comment

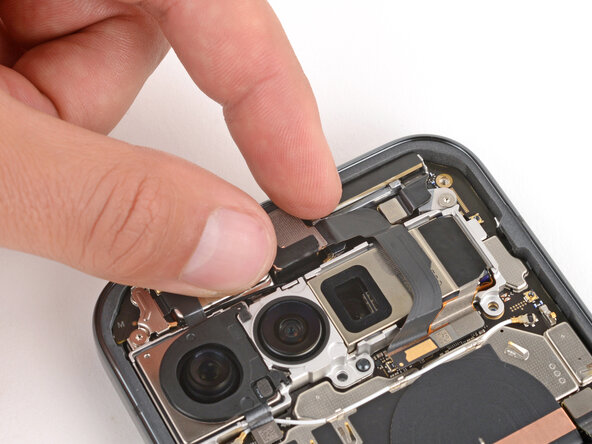
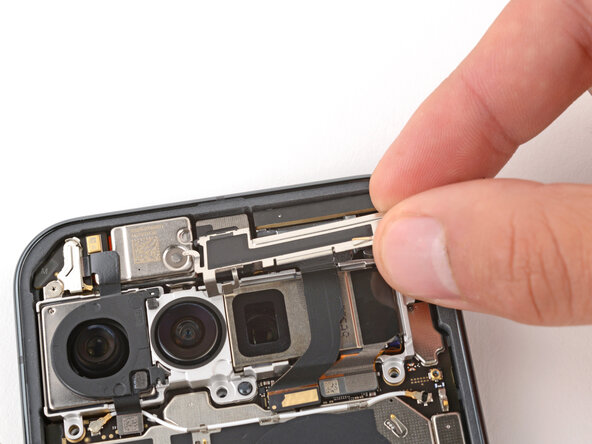
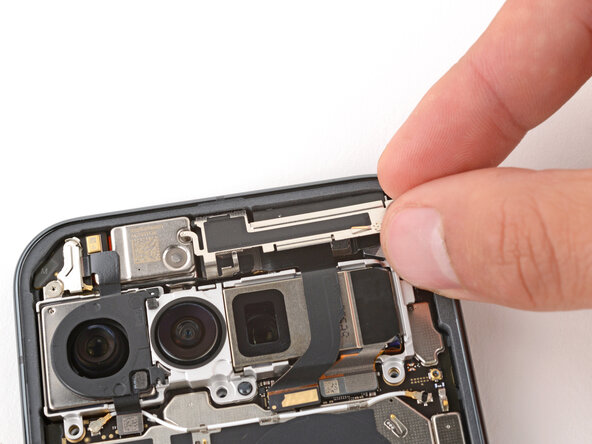
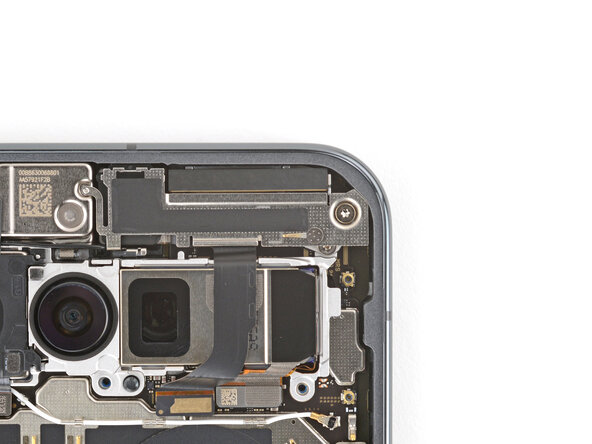
    6. Google Pixel 10 Pro XL Front Camera Installation, Install the front camera bracket: step 6, image 1 of 3 Google Pixel 10 Pro XL Front Camera Installation, Install the front camera bracket: step 6, image 2 of 3 Google Pixel 10 Pro XL Front Camera Installation, Install the front camera bracket: step 6, image 3 of 3
      • Slide the top corners of the front camera bracket under the lip in the frame and press the clip in to secure it.

      • Be careful not to touch the rear cameras.

      Ask FixBot

      Add Comment

    7. Google Pixel 10 Pro XL Front Camera Installation: step 7, image 1 of 2 Google Pixel 10 Pro XL Front Camera Installation: step 7, image 2 of 2
      • Use a Torx Plus 3IP screwdriver to install the 5.0 mm‑long screw securing the front camera cover.

      Ask FixBot

      Add Comment

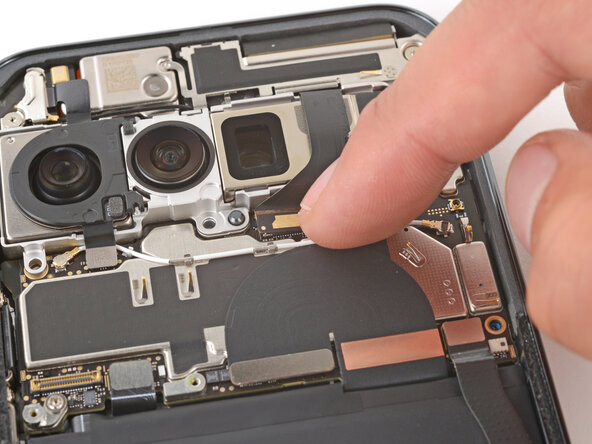
    8. Google Pixel 10 Pro XL Front Camera Installation, Reconnect the front camera: step 8, image 1 of 2 Google Pixel 10 Pro XL Front Camera Installation, Reconnect the front camera: step 8, image 2 of 2
      • Use your finger to reconnect the front camera press connector, pressing down on one of the short sides first until it clicks into place, then pressing on the other side.

      Ask FixBot

      Add Comment

Finish Line

Cancel: I did not complete this guide.

Spencer Day

Member since: 09/14/22

205,941 Reputation

1,267 Guides authored

0 Guide Comments

Add Comment

View Statistics:

Past 24 Hours: 1

Past 7 Days: 3

Past 30 Days: 8

All Time: 63