Free Shipping on Domestic Orders $75+

Google Pixel 10 Pro Fold Back Glass Installation

Prerequisite Only
This is a prerequisite-only guide! This guide is part of another procedure and isn’t meant to be used alone.
    1. Google Pixel 10 Pro Fold Back Glass Installation, Reconnect the back cover cable: step 1, image 1 of 2 Google Pixel 10 Pro Fold Back Glass Installation, Reconnect the back cover cable: step 1, image 2 of 2
      • While holding the back cover or propping it up, reconnect the back cover cable.

      Ask FixBot

      Add Comment

    2. Google Pixel 10 Pro Fold Back Glass Installation, Place the top bracket: step 2, image 1 of 3 Google Pixel 10 Pro Fold Back Glass Installation, Place the top bracket: step 2, image 2 of 3 Google Pixel 10 Pro Fold Back Glass Installation, Place the top bracket: step 2, image 3 of 3
      • Place the top bracket into its spot in the frame.

      Ask FixBot

      Add Comment

    3. Google Pixel 10 Pro Fold Back Glass Installation: step 3, image 1 of 2 Google Pixel 10 Pro Fold Back Glass Installation: step 3, image 2 of 2
      • Use a spudger or your finger to push the bracket upwards and slide its clip under the top edge of the frame.

      Ask FixBot

      Add Comment

    4. Google Pixel 10 Pro Fold Back Glass Installation, Install the top bracket screws: step 4, image 1 of 2 Google Pixel 10 Pro Fold Back Glass Installation, Install the top bracket screws: step 4, image 2 of 2
      • Use a Torx Plus 3IP driver to install the three 3.0 mm‑long screws securing the top bracket.

      Ask FixBot

      Add Comment

    5. Google Pixel 10 Pro Fold Back Glass Installation, Expose the adhesive: step 5, image 1 of 2 Google Pixel 10 Pro Fold Back Glass Installation, Expose the adhesive: step 5, image 2 of 2
      • Separate one of the secondary liner's pull tabs at the top right corner.

      Ask FixBot

      Add Comment

    6. Google Pixel 10 Pro Fold Back Glass Installation: step 6, image 1 of 2 Google Pixel 10 Pro Fold Back Glass Installation: step 6, image 2 of 2
      • Peel the liner from the right and bottom edge of the frame.

      Ask FixBot

      Add Comment

    7. Google Pixel 10 Pro Fold Back Glass Installation: step 7, image 1 of 3 Google Pixel 10 Pro Fold Back Glass Installation: step 7, image 2 of 3 Google Pixel 10 Pro Fold Back Glass Installation: step 7, image 3 of 3
      • While holding the back cover over the frame, peel the liner from the left and top edge of the frame and expose the adhesive.

      Ask FixBot

      Add Comment

    8. Google Pixel 10 Pro Fold Back Glass Installation, Secure the back cover: step 8, image 1 of 3 Google Pixel 10 Pro Fold Back Glass Installation, Secure the back cover: step 8, image 2 of 3 Google Pixel 10 Pro Fold Back Glass Installation, Secure the back cover: step 8, image 3 of 3
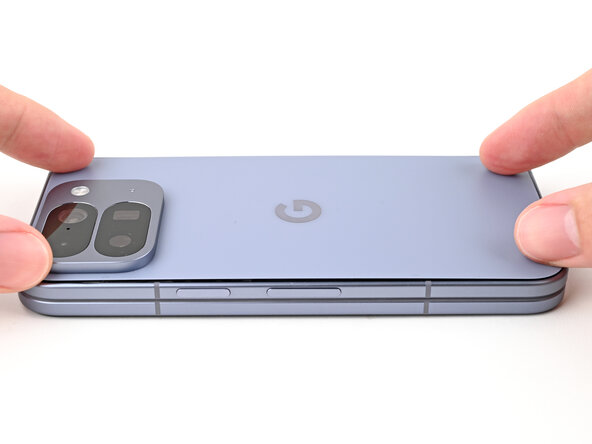
      • Align the back cover over the frame and press it into place.

      Ask FixBot

      Add Comment

    9. Google Pixel 10 Pro Fold Back Glass Installation: step 9, image 1 of 2 Google Pixel 10 Pro Fold Back Glass Installation: step 9, image 2 of 2
      • Press along the perimeter of the back cover to adhere it to the frame.

      • Optionally, you can use a hair dryer or heat gun to lightly heat the edges of the back cover and create a stronger bond.

      • Let the phone sit a few hours for the adhesive to cure.

      Ask FixBot

      Add Comment

Conclusion

To reassemble your device, follow these instructions in reverse order.

Cancel: I did not complete this guide.

Alex Diaz-Kokaisl

Member since: 01/16/22

250,162 Reputation

1,203 Guides authored

0 Guide Comments

Add Comment

View Statistics:

Past 24 Hours: 0

Past 7 Days: 2

Past 30 Days: 9

All Time: 74