
GoPro Hero+ LCD Back Panel Disassembly

Prerequisite Only
This guide is only intended to be used as a prerequisite for other guides. It's incomplete by itself.

What you need

  1. GoPro Hero+ LCD Back Panel Disassembly, Back Panel: step 1, image 1 of 2 GoPro Hero+ LCD Back Panel Disassembly, Back Panel: step 1, image 2 of 2
    • Be sure to power off the GoPro before you start disassembly.

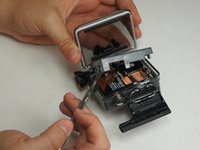
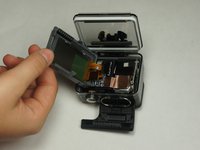
    • Pop up and pull back on the clip to remove the screen cover and expose the back panel with the touchscreen.

  2. GoPro Hero+ LCD Back Panel Disassembly: step 2, image 1 of 2 GoPro Hero+ LCD Back Panel Disassembly: step 2, image 2 of 2
    • Use the metal spudger to pry around the perimeter of the panel.

    • Pry the panel upwards by inserting the metal spudger into the corner crease between the panel and camera shell.

  3. GoPro Hero+ LCD Back Panel Disassembly: step 3, image 1 of 2 GoPro Hero+ LCD Back Panel Disassembly: step 3, image 2 of 2
    • Pry around the panel to ensure it is not attached to the device.

    • Move the panel to the side so you can access the internal components.

    • The panel is still attached to the rest of the device with a ribbon cable, so be sure to not tear or damage the cable.

Conclusion

To reassemble your device, follow these instructions in reverse order.

Matthew Tinkey

Member since: 08/27/15

892 Reputation

4 Guides authored

Team

USF Tampa, Team 2-4, Blackwell Fall 2015 Member of USF Tampa, Team 2-4, Blackwell Fall 2015

USFT-BLACKWELL-F15S2G4

4 Members

20 Guides authored

0 Comments

Add Comment

View Statistics:

Past 24 Hours: 0

Past 7 Days: 0

Past 30 Days: 0

All Time: 110