Free Shipping on Domestic Orders $75+

Geek Bar Pulse Tank Cover Removal

Views: 126

View statistics:

Past 24 Hours:
2
Past 7 Days:
5
Past 30 Days:
13
All Time:
126
Comments: 0

No one has left comments on this guide. Will you be first?

Go to guide comments
Completed: 0

No one has marked this guide "completed." Will you be the first?

Favorites: 0

No one has favorited (and subscribed to) this guide. Will you be the first?

Time Required: No estimate
Difficulty: Easy
Community-Contributed Guide

An awesome member of our community made this guide. It was not created by iFixit staff.

Geek Bar Pulse Tank Cover Removal
Prerequisite Only This is a prerequisite-only guide! This guide is part of another procedure and isn’t meant to be used alone.

Introduction

Go to step 1 ↓

Prerequisite only guide for removing the tank cover.

What you need

Tools

    1. Geek Bar Pulse Tank Cover Removal, Remove the Mouthpiece: step 1, image 1 of 2 Geek Bar Pulse Tank Cover Removal, Remove the Mouthpiece: step 1, image 2 of 2
      • Grasp the mouthpiece with a pair of pliers.

      • Give it a good, solid twist, left or right doesn't matter.

      • The pliers won't damage the silicone coating on the mouthpiece, but faint marks may be visible.

      Ask FixBot

      Add Comment

    2. Geek Bar Pulse Tank Cover Removal, The Mouthpiece Seal: step 2, image 1 of 3 Geek Bar Pulse Tank Cover Removal, The Mouthpiece Seal: step 2, image 2 of 3 Geek Bar Pulse Tank Cover Removal, The Mouthpiece Seal: step 2, image 3 of 3
      • Hopefully the mouthpiece seal stays in place when you removed the mouthpiece, but it doesn't always. If it has come off, you need to know how to replace it.

      • It is inserted into the mouthpiece with the felt piece up. Putting it in the other way will not allow for an airtight seal between the tank and the mouthpiece.

      • When you reassemble your vape, be sure to test it by turning the power switch off, then sucking on the mouthpiece. If you can get any air at all through, you've got the seal in wrong.

      Ask FixBot

      Add Comment

    3. Geek Bar Pulse Tank Cover Removal, Replacing the Mouthpiece: step 3, image 1 of 2 Geek Bar Pulse Tank Cover Removal, Replacing the Mouthpiece: step 3, image 2 of 2
      • Note that the mouthpiece has a tab that only allows it to be mounted in one orientation. The arrow here points to the one you'll need to match up with on the case.

      • Here you can see inside the case where the tab on the mouthpiece lines up.

      Ask FixBot

      Add Comment

    1. Geek Bar Pulse Tank Cover Removal, Switch the Vape Off: step 4, image 1 of 1
      • Turn the power switch to the Off position; no air holes should be visible.

      Ask FixBot

      Add Comment

    2. Geek Bar Pulse Tank Cover Removal, Remove the Power Button: step 5, image 1 of 3 Geek Bar Pulse Tank Cover Removal, Remove the Power Button: step 5, image 2 of 3 Geek Bar Pulse Tank Cover Removal, Remove the Power Button: step 5, image 3 of 3
      • Use your utility knife to lever the power button up. It is only pressed on, so there is no adhesive or clips to deal with.

      • Remove the power button.

      • Since the creation of this guide, I have found that on newer models it appears the manufacturer has started gluing the buttons on, presumably to keep them from falling off. The instructions will still work, but requires more effort to remove the button and you may need to glue it back on.

      Ask FixBot

      Add Comment

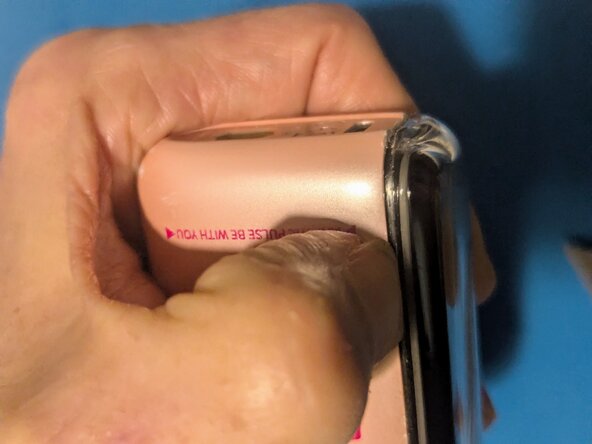
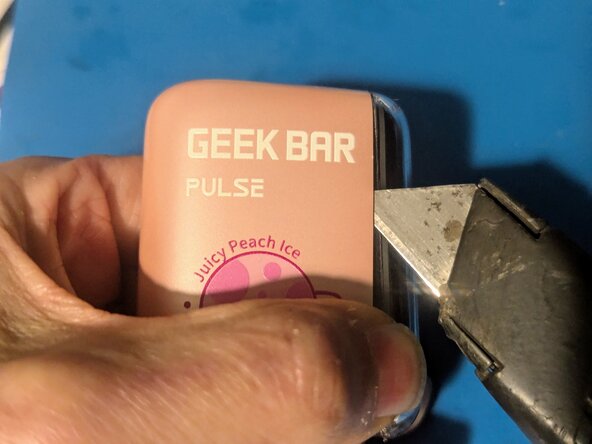
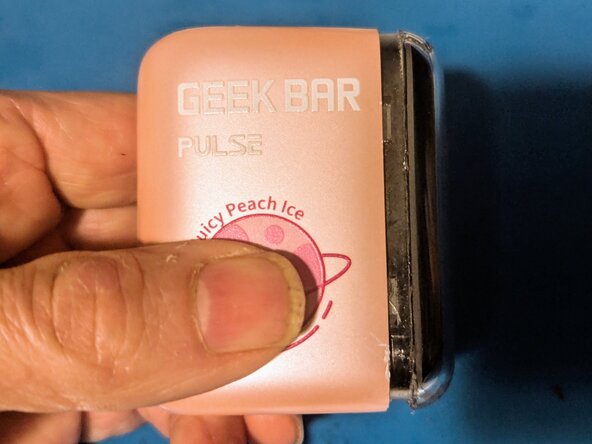
    3. Geek Bar Pulse Tank Cover Removal: step 6, image 1 of 3 Geek Bar Pulse Tank Cover Removal: step 6, image 2 of 3 Geek Bar Pulse Tank Cover Removal: step 6, image 3 of 3
      • Position your thumbnail on the seam near the bottom of the vape.

      • Work your utility knife into the two high points of the case on the bottom.

      • Pry the near side of the case far enough open to get your fingernail into the gap to keep it open.

      Ask FixBot

      Add Comment

    4. Geek Bar Pulse Tank Cover Removal: step 7, image 1 of 3 Geek Bar Pulse Tank Cover Removal: step 7, image 2 of 3 Geek Bar Pulse Tank Cover Removal: step 7, image 3 of 3
      • Insert your knife and slide it down, then use it to lever the top of the vape out of the case.

      • Using the knife, go back to the bottom and lever the opposite side out.

      • On the other side, insert the knife and use it to pop the clips on that side.

      Ask FixBot

      Add Comment

    5. Geek Bar Pulse Tank Cover Removal, Remove the Cover: step 8, image 1 of 2 Geek Bar Pulse Tank Cover Removal, Remove the Cover: step 8, image 2 of 2
      • The clips should be free all the way around at this point.

      • Pull the vape straight out of the case.

      Ask FixBot

      Add Comment

    6. Geek Bar Pulse Tank Cover Removal: step 9, image 1 of 1
      • The cover has been removed.

      Ask FixBot

      Add Comment

Conclusion

To reassemble your device, follow these instructions in reverse order.

Cancel: I did not complete this guide.

Jerry Wheeler

Member since: 03/21/22

101,635 Reputation

92 Guides authored

0 Guide Comments

Add Comment

View Statistics:

Past 24 Hours: 2

Past 7 Days: 5

Past 30 Days: 13

All Time: 126