Introduction
Although these devices are well made and work amazingly, it's disappointing that they simply make their way into the garbage once they're empty.
It is, however, possible to refill these with your favorite flavor of ejuice, and this guide will show you the right way to go about it.
Three or four refills are all that are recommended; after that the heater coils get too gummed up with carbon and the cotton gets burnt, resulting in bad flavor and poor vapor production.
If you're considering refilling your vape for the first time, be sure to stop using it just as soon as you start tasting a burn flavor. A couple of pulls that taste burnt won't hurt anything, but if you continue you'll burn the cotton and possibly burn out a coil.
What you need
-
-
Grasp the mouthpiece with a pair of pliers.
-
Give it a good, solid twist, left or right doesn't matter.
 Ask FixBot
-
-
-
Hopefully the mouthpiece seal stays in place when you removed the mouthpiece, but it doesn't always. If it has come off, you need to know how to replace it.
-
It is inserted into the mouthpiece with the felt piece up. Putting it in the other way will not allow for an airtight seal between the tank and the mouthpiece.
-
-
-
Note that the mouthpiece has a tab that only allows it to be mounted in one orientation. The arrow here points to the one you'll need to match up with on the case.
-
Here you can see inside the case where the tab on the mouthpiece lines up.
-
-
-
Turn the power switch to the Off position; no air holes should be visible.
-
-
-
-
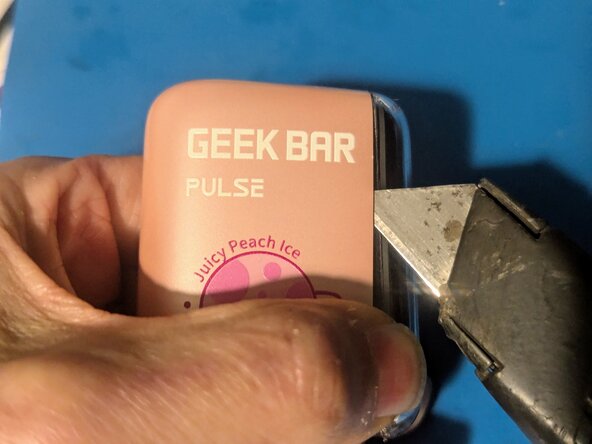
Use your utility knife to lever the power button up. It is only pressed on, so there is no adhesive or clips to deal with.
-
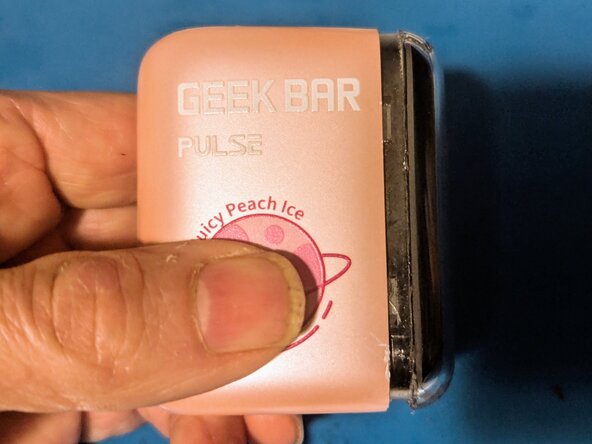
Remove the power button.
-
-
-
Position your thumbnail on the seam near the bottom of the vape.
-
Work your utility knife into the two high points of the case on the bottom.
-
Pry the near side of the case far enough open to get your fingernail into the gap to keep it open.
-
-
-
Insert your knife and slide it down, then use it to lever the top of the vape out of the case.
-
Using the knife, go back to the bottom and lever the opposite side out.
-
On the other side, insert the knife and use it to pop the clips on that side.
-
-
-
The clips should be free all the way around at this point.
-
Pull the vape straight out of the case.
-
-
-
Start with pressing the tip of your bottle or syringe on top of the foam. Aim it toward the side and fill until the top of the vape fills with liquid, then stop.
-
In the second picture you can see the liquid spreading out into the foam and filling the space between the foam and the clear case.
-
-
-
Move to one of the sides to continue filling.
-
...And continue to the next side.
-
And finally the last side.
-
-
-
Here you can see the liquid as it soaks into the foam.
-
Continue filling on all four sides.
-
Stop when you get to about 2/3rd of the way down; the liquid will continue to spread through the foam. Too much will again end up dripping.
-


To reassemble your device, follow these instructions in reverse order.
Cancel: I did not complete this guide.
One other person completed this guide.

5 Guide Comments
It's not burning out it's the counter ran out so now it does the light instead of the electricity like it only we could reset the counter... Once it runs down even though it worked perfect 2 seconds before, poof. Lights of death as they call them on xbox with the ring of light.... I loved the crap out of mine it's too bad! Ill still use the cotton somehow in another device I guess. Maybe if I disconnect the screen altogether and just have the battery on it isnt that he black cord their always colorful but it's bound to work like a screenless counter less draw activated....or is it the electricity were enjoying eating on ha. Yum.
Based on my experience with the Pulse vapes, you've got a burnt out coil. I've noted two different conditions where the outer ring flashes red; the first is after you've taken a hit when the counter is at zero; it flashes red for a moment after you've finished drawing, but that doesn't seem to affect the operation in any way.
The second condition where it flashes red is when one or both of the coils is reading wildly out of spec. I've seen them measure on the order of 30 ohms when they should be showing somewhere between 1.2 and 1.5 ohms. When that happens, the flashing will happen as you're drawing air, and it won't heat during that time. The fix for that is to rebuild the coils; usually it's the lower one that goes out first, since that's the one that's used when you're in the normal rather than pulse mode.
Geek Bar Pulse Mesh Coil Rebuild - iFixit Repair Guide
As far as the counter, I haven't found or heard of a way to reset it, but I've refilled a Pulse several times and it doesn't affect anything.
Hi! My vape rapidly starts and stops after I refilled it. Im positive that some liquid got into its electronics. Is there any way to fix it? It also won't start when im sucking on the mouthpiece. It does releace smoke if I keep sucking on it while it keeps quickly turning on the heater for a split second.
I’m not sure how I got here… but might as well ask a question…. I have a vape that still has visible liquid in the tank thing, draw on the vape… no smoke, no lights, blow into the opposite end like where the charger goes and smoke comes out of the top/mouthpuece. 🤷🏽♀️🤷🏽♀️🤷🏽♀️
@connorwate97521, @tiffanycar26507, About all I can suggest for both of you is to try drying out the microphone that senses airflow. If you've followed the refill guide then you're already up to Step 9 of the Mesh Coil Rebuild guide. Just continue with Step 10 to remove the tank from the vape.
Once it's off, you can look at where it sits and you'll see another piece of molded silicone that the tank sits on. With the display facing upward, you'll see a round hole in the upper left corner of that silicone pad; the microphone sits under it. Peel up the pad and you'll see a small drum shaped object; that's the microphone. Take a cotton swab and dry it off, along with as much of the rest of the circuit board as you can get to.
The one time I had a vape that acted similar to yours, I had gotten liquid down the center tube while refilling it. Once I dried out the microphone it started working again.