
Gateway Z5WTC Hard Drive Replacement

What you need

  1. Gateway Z5WTC Hard Drive Replacement, Hard Drive: step 1, image 1 of 1
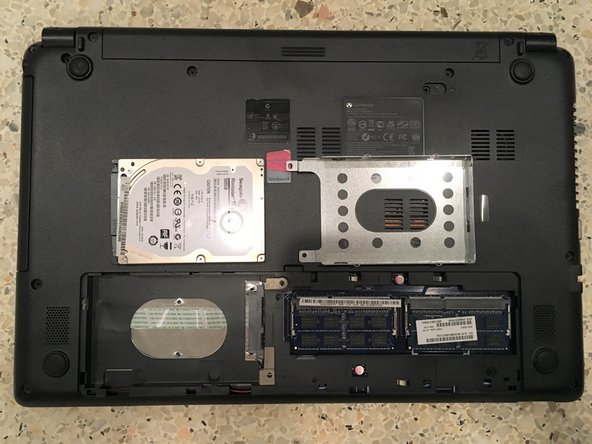
    • Ensuring the laptop is turned off, flip the laptop upside down.

    • Remove the single Phillips #1 screw in the laptop bottom casing.

  2. Gateway Z5WTC Hard Drive Replacement: step 2, image 1 of 2 Gateway Z5WTC Hard Drive Replacement: step 2, image 2 of 2
    • Insert a prying tool into the casing’s opening and steadily pry around the casing’s edges until it pops open.

  3. Gateway Z5WTC Hard Drive Replacement: step 3, image 1 of 1
    • Using a Phillips #1 screwdriver, remove the single screw in the hard drive's metal holder.

  4. Gateway Z5WTC Hard Drive Replacement: step 4, image 1 of 2 Gateway Z5WTC Hard Drive Replacement: step 4, image 2 of 2
    • Remove the hard drive, pulling up on the hard drive’s plastic tab while inserting and lifting a prying tool inside the hard drive bay.

    • When the above step is complete, the hard drive will gently "pop" out of the hard drive bay.

  5. Gateway Z5WTC Hard Drive Replacement: step 5, image 1 of 1
    • Remove the two Phillips #1 screws in the metal hard drive holder. One screw is on each side of the metal frame.

  6. Gateway Z5WTC Hard Drive Replacement: step 6, image 1 of 1
    • Slide the hard drive out of the metal hard drive frame.

    • Slide the replacement hard drive into the frame.

  7. Gateway Z5WTC Hard Drive Replacement: step 7, image 1 of 1
    • Screw in the two screws in the metal hard drive holder. One screw is on each side of the metal frame.

    • Use a #1 Philips screwdriver

  8. Gateway Z5WTC Hard Drive Replacement: step 8, image 1 of 2 Gateway Z5WTC Hard Drive Replacement: step 8, image 2 of 2
    • Insert the metal hard drive holder into the hard drive bay, then push the hard drive’s plastic tab to connect the hard drive to the laptop.

  9. Gateway Z5WTC Hard Drive Replacement: step 9, image 1 of 1
    • Using a #1 Philips screwdriver, screw in the single screw in the hard drive metal holder.

  10. Gateway Z5WTC Hard Drive Replacement: step 10, image 1 of 2 Gateway Z5WTC Hard Drive Replacement: step 10, image 2 of 2
    • Tilting the bottom of the laptop's casing at a 45 degree angle, insert the casing's bottom "teeth" into their holders.

    • Place a bottom casing tooth into holder here

    • Place a bottom casing tooth into holder here

    • Place a bottom casing tooth into holder here

    • After the bottom of the casing is installed, apply slight pressure on the right, center, and left areas of the casing to place each tooth into its holder (see second photo).

    • Apply slight pressure on the right

    • Apply slight pressure on the center

    • Apply slight pressure on the left

  11. Gateway Z5WTC Hard Drive Replacement: step 11, image 1 of 1
    • Using a #1 Philips screwdriver, screw in the single screw in the laptop bottom casing.

Conclusion

You have now replaced your Gateway Z5WTC laptop hard drive! Thanks for reading.

Seth Horner

Member since: 03/03/19

193 Reputation

1 Guide authored

One Comment

Is this replacement hard drive for Gateway Z5WTC one with a SATA connector? (Thinking of putting in an SSD drive to speed up performance.)

Dixie - Reply

Add Comment

View Statistics:

Past 24 Hours: 0

Past 7 Days: 0

Past 30 Days: 9

All Time: 437