Introduction
This repair will be needed in circumstances where the computer fails to load software due to insufficient memory. If software adjustments do not fix the issue, replacing the RAM with higher capacity should correct the memory issue.
What you need
-
-
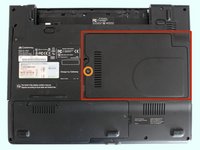
Turn the laptop upside down and position it as shown in the image.
 Ask FixBot
-
-
-
Slide the locking switch towards the open lock picture.
-
Hold the release switch in the unlocked position while simultaneously pushing the battery away from the laptop.
-
Once the laptop is disengaged, completely remove the battery from the laptop.
-
-
-
-
Turn the laptop over to remove the plastic cover.
-
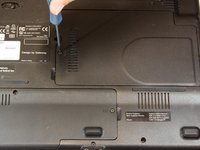
Remove the single 3mm Phillips #0 screw holding on the plastic cover.
-
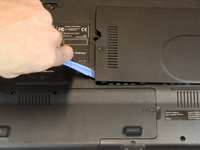
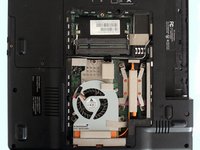
Use a plastic opening tool to gently pry off the plastic cover.
-
-
-
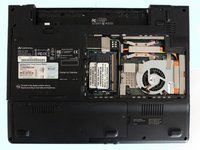
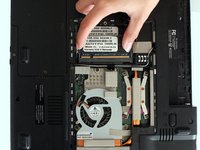
Gently pull the first RAM chip to slide it free from the mounting on the board.
-
Gently pull the second RAM chip, located under the first, to slide it free from the mounting on the board.
-


To reassemble your device, follow these instructions in reverse order.
Cancel: I did not complete this guide.
One other person completed this guide.
Team

USF Tampa, Team 4-1, Brown Fall 2014 Member of USF Tampa, Team 4-1, Brown Fall 2014
USFT-BROWN-F14S4G1
3 Members
10 Guides authored