Introduction
Use this guide to replace a non-functional or malfunctioning fan in your Gateway 600GY2 laptop. This laptop was released in 2010 and is a part of the Gateway 600 series, with it's counterpart being the Gateway 600YGR.
The fan in your laptop is a mechanical that utilizes spinning blades to regulate air and cool internal components within the laptop. Your fan may require replacement if you experience excessive shutdowns due to frequent overheating of the device. Regular malfunctions with your laptops fan can potentially lead to damage of inner components if it is not replaced.
Another indication that replacement may be necessary is if your laptop is producing overpowering, irregular noises. You can test your fan's functionality by conducting a visual inspection. Follow steps 1 and 2 to remove the battery cover and examine the fan for damage or dust buildup. If dust is present, use a fan blade cleaner or compressed air to remove debris.
Before following the keyboard instructions, it is necessary to power off your device and unplug it to avoid electrical shock. To avoid potential damage to the keyboard upon removal, exercise caution by folding the fan back along the bar edge rather than lifting up. Cables are vulnerable to damage as well and should be gently removed by pulling it from the connecter itself.
What you need
-
-
Flip the laptop over.
-
Slide the battery release tab to the right to open the battery cover.
 Ask FixBot
-
-
-
Remove the battery cover using the tab on the right side.
-
Lift and remove the battery.
-
-
-
-
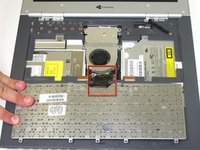
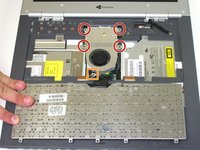
Unscrew the four captive screws.
-
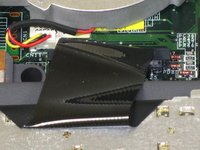
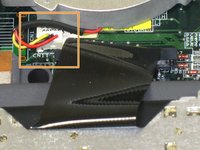
Unplug the fan from the system and pull it out. This should slide forward before coming free.
-


To reassemble your device, follow these instructions in reverse order.
Team

Cal Poly, Team 20-10, Maness Fall 2010 Member of Cal Poly, Team 20-10, Maness Fall 2010
CPSU-MANESS-F10S20G10
3 Members
22 Guides authored