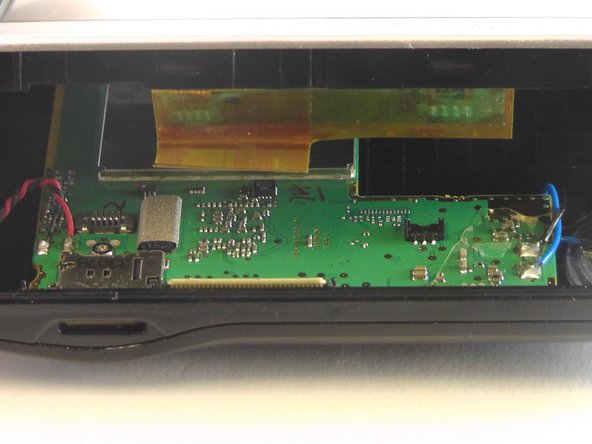
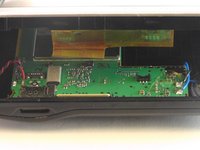
Garmin Nuvi 2597LMT LCD Replacement

What you need

  1. Garmin Nuvi 2597LMT LCD Replacement, LCD: step 1, image 1 of 2 Garmin Nuvi 2597LMT LCD Replacement, LCD: step 1, image 2 of 2
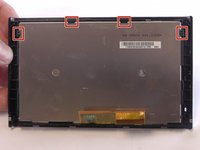
    • Turn your device over so the back is revealed and you can see the screws in the four corners.

    • Remove the four 3mm width by 6mm length T5 Torx screws using your screwdriver.

  2. Garmin Nuvi 2597LMT LCD Replacement: step 2, image 1 of 2 Garmin Nuvi 2597LMT LCD Replacement: step 2, image 2 of 2
    • Use the plastic opening tool to pry open the device at the seam where the two halves meet, prying all along all sides if need be.

    • Do it slowly so you don't accidently rip the ribbon cable that connects the digitizer to the motherboard, as well as don't completely separate the halves as this can tear the ribbon cable as well.

  3. Garmin Nuvi 2597LMT LCD Replacement: step 3, image 1 of 3 Garmin Nuvi 2597LMT LCD Replacement: step 3, image 2 of 3 Garmin Nuvi 2597LMT LCD Replacement: step 3, image 3 of 3
    • Use your tweezers to flip back the tab of the ZIF (Zero Insertion Force) Connector, that is used to keep the ribbon cable in place.

    • This releases the ribbon cable separating the two halves of the device.

  4. Garmin Nuvi 2597LMT LCD Replacement: step 4, image 1 of 2 Garmin Nuvi 2597LMT LCD Replacement: step 4, image 2 of 2
    • Use your hands to pull back the clips that hold the LCD in place.

    • Once you have removed the LCD you can safely set it aside.

Conclusion

To reassemble your device, follow these instructions in reverse order.

3 other people completed this guide.

Patrick McNett

Member since: 10/03/16

887 Reputation

5 Guides authored

Team

USF Tampa, Team 1-4, Sullivan Fall 2016 Member of USF Tampa, Team 1-4, Sullivan Fall 2016

USFT-SULLIVAN-F16S1G4

4 Members

5 Guides authored

One Comment

Where can I get this replacement screen?

Anand Geetey - Reply

Add Comment

View Statistics:

Past 24 Hours: 0

Past 7 Days: 3

Past 30 Days: 9

All Time: 1,648