
Garmin Nuvi 2595LMT LCD Screen Replacement

What you need

  1. Garmin Nuvi 2595LMT LCD Screen Replacement, Garmin Nuvi 2595LMT Back Cover Replacement: step 1, image 1 of 1
    • Place the device on the workspace so the screen is facing downward.

  2. Garmin Nuvi 2595LMT LCD Screen Replacement: step 2, image 1 of 2 Garmin Nuvi 2595LMT LCD Screen Replacement: step 2, image 2 of 2
    • Using the t5 screwdriver from the iFixit Pro Tool Kit, remove all four 5.6mm screws placing them safely on the table.

  3. Garmin Nuvi 2595LMT LCD Screen Replacement: step 3, image 1 of 3 Garmin Nuvi 2595LMT LCD Screen Replacement: step 3, image 2 of 3 Garmin Nuvi 2595LMT LCD Screen Replacement: step 3, image 3 of 3
    • Grab a spudger from tool kit.

    • Pry open sides of Nuvi gently with spudger (do not rip apart).

    • Use plastic opening tool to pry ribbon slowly from white plastic bar.

    • Separate the two pieces and place them on the table

  4. Garmin Nuvi 2595LMT LCD Screen Replacement, LCD Screen: step 4, image 1 of 2 Garmin Nuvi 2595LMT LCD Screen Replacement, LCD Screen: step 4, image 2 of 2
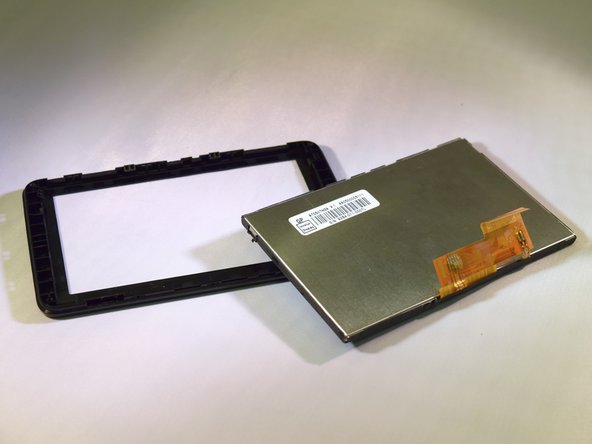
    • Grabbing the top half of the Nuvi, remove the screen from the tabs holding it in place using thumbs.

    • Place screen on table.

  5. Garmin Nuvi 2595LMT LCD Screen Replacement: step 5, image 1 of 2 Garmin Nuvi 2595LMT LCD Screen Replacement: step 5, image 2 of 2
    • Place new screen in proper position, with the ribbon facing downward.

Conclusion

To reassemble your device, follow these instructions in reverse order.

2 other people completed this guide.

3 Comments

cannot prise open the connector to replace ribbon

norman bayne - Reply

My screen is cracked. The screen opens, but I can't use the key board.

Thank You For any Help You Can Give Me,

Cookie

cookiecaafato1@yahoo.com nuvi 2595 LMT

cookiecalafato1 - Reply

Re-seating the ribbon is simply impossible.

daBee - Reply

Add Comment

View Statistics:

Past 24 Hours: 0

Past 7 Days: 1

Past 30 Days: 5

All Time: 4,580