Introduction
One of the main reasons we would replace a button pad is if the functions are not working properly or at all. The functions could be getting stuck if that is the case then the button pad will need to be replaced. Some of the tools needed to replace the button pad are a Phillips screwdriver, soldering iron, soldering wire, and a pair of tweezers. Some soldering skills will be needed to perform this repair.
What you need
-
-
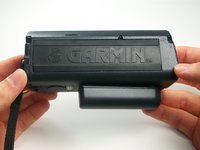
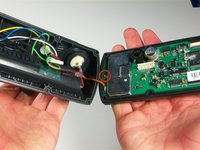
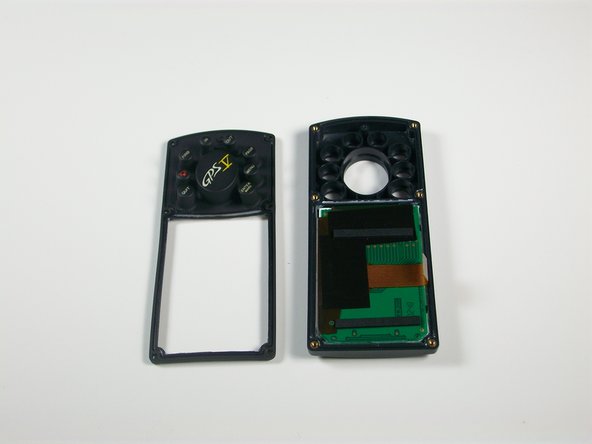
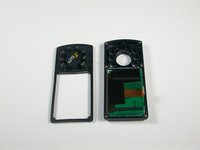
Orient the GPS V backside up.
-
With a #0 Philips screwdriver, remove six M2x0.4 black screws on the back of the unit.
 Ask FixBot
-
-
-
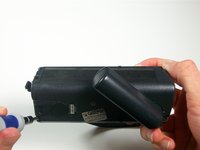
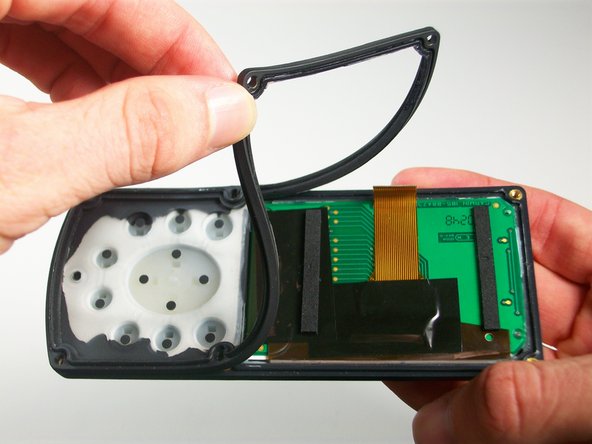
With the spudger, gently pry the back plate off the unit starting at the corners.
-
Open the back plate about 35°, use the antenna side act like a hinge.
-
-
-
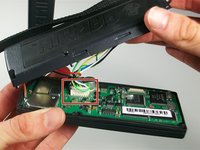
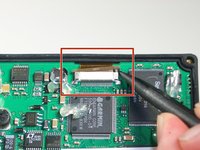
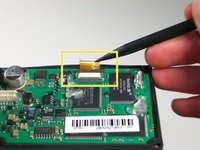
Locate the white 8-pin connector on the logic board and disconnect it.
-
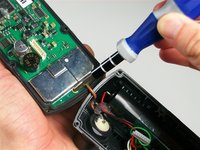
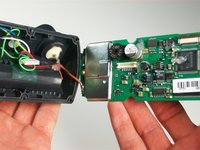
Open the device all the way, making sure to not disconnect the brown antenna wire.
-
-
-
-
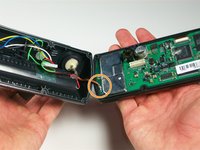
With a #1 Philips screwdriver, remove the silver M2x0.4 screw on the logic board near the brown wire.
-
-
-
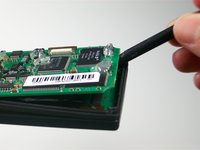
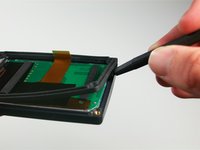
Locate the ribbon connector on the logic board.
-
With the spudger, gently apply pressure to both sides of the brown connector lock until it pushes out.
-
With the spudger, gently work the ribbon cable out of the connector until it is free.
-
-
-
Locate the brown wire connection on the logic board.
-
Carefully apply heat with the soldering iron while gently pulling on the brown wire.
-
Pull brown wire free of the logic board.
-


To reassemble your device, follow these instructions in reverse order.
Cancel: I did not complete this guide.
3 other people completed this guide.
Team

Cal Poly, Team 3-25, Amido Winter 2012 Member of Cal Poly, Team 3-25, Amido Winter 2012
CPSU-AMIDO-W12S3G25
4 Members
4 Guides authored
1 Guide Comment
Hey, a have an old Garmin GPS III and my problem is that the GPS can not find any satelliters. I have opened back plate and I think its looks ok inside.
What can I do?
Best regards
Christian Tregert
Ctregert@hotmail.com