Introduction
In this guide we will show you how to replace the power button of the Garmin DriveSmart 60 LMT. If the device won't turn on or the device feels unresponsive when pressing the button, or if the button is physically damaged, replacing it might restore normal operation. The process involves opening the device, disconnecting internal components, and then installing a new power button. Please assure that you are working carefully and delicately when performing this task as you follow each step. Taking these precautions will avoid damaging the screen or the motherboard.
What you need
-
-
-
Use a T4 Torx screwdriver to remove the four 6.3 mm-long screws that secure the rear case.
 Ask FixBot
-
-
-
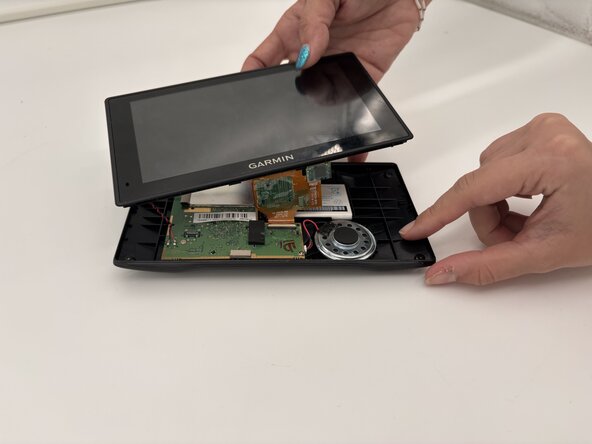
Insert a plastic opening tool into the seam between the rear case and chassis.
-
Pry around the perimeter until the rear case fully releases.
-
Remove the rear case.
-
-
-
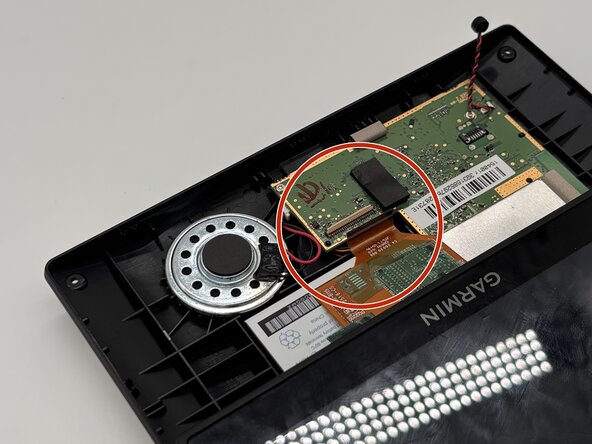
Use a spudger to gently disconnect the black and red wires (ZIF connector) from the socket on the screen assembly. Take care not to pull on the wires or damage the connector.
-
-
-
-
Gently lift the white clamp to release the ZIF Connector, which is the orange ribbon cable, and carefully unsnap it from the connector.
-
-
-
-
-
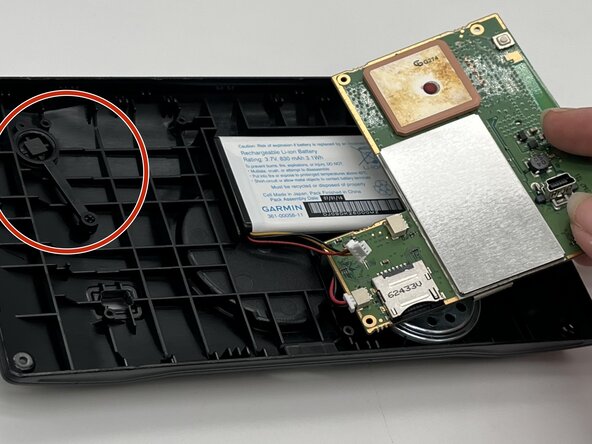
Using a plastic spudger, gently disconnect the black and red wires (ZIF connector) from the socket on the screen assembly. Take care not to pull on the wires or damage the connector.
-
-
-
Gently lift the white clamp to release the ZIF Connector, which is the orange ribbon cable, and carefully unsnap it from the connector.
-
-








To reassemble your device, follow these instructions in reverse order.
Cancel: I did not complete this guide.
One other person completed this guide.

Team

University of North Texas, Team 6-4, Kilpatrick Fall 2025 Member of University of North Texas, Team 6-4, Kilpatrick Fall 2025
UNT-KILPATRICK-F25S6G4
4 Members
60 Guides authored
