Game Boy Pocket Power Button Replacement

What you need

  1. Game Boy Pocket Power Button Replacement, Remove the external screws: step 1, image 1 of 3 Game Boy Pocket Power Button Replacement, Remove the external screws: step 1, image 2 of 3 Game Boy Pocket Power Button Replacement, Remove the external screws: step 1, image 3 of 3
    • Place the Game Boy Pocket face-down on a clean, flat surface.

    • Use a Y1 tri-wing screwdriver and turn counterclockwise to remove the four external screws.

    • Use a Y1 tri-wing screwdriver and turn counterclockwise to remove the two screws inside the battery compartment.

  2. Game Boy Pocket Power Button Replacement, Open the device: step 2, image 1 of 3 Game Boy Pocket Power Button Replacement, Open the device: step 2, image 2 of 3 Game Boy Pocket Power Button Replacement, Open the device: step 2, image 3 of 3
    • Place your hands on the front and back covers of the Game Boy Pocket, and carefully separate the device.

    • Set the back cover aside. You will need it to reassemble the device.

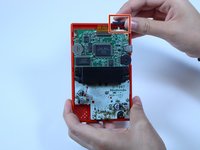
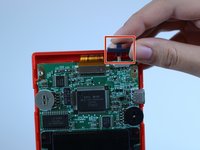
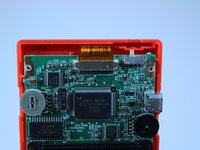
  3. Game Boy Pocket Power Button Replacement, Remove the power button: step 3, image 1 of 3 Game Boy Pocket Power Button Replacement, Remove the power button: step 3, image 2 of 3 Game Boy Pocket Power Button Replacement, Remove the power button: step 3, image 3 of 3
    • Use your fingers to remove the grey power button to the right of the ribbon cable.

Conclusion

To reassemble your device, follow these instructions in reverse order.

One other person completed this guide.

Adriana Rahrig

Member since: 10/07/14

1,523 Reputation

5 Guides authored

Team

USF Tampa, Team 1-1, Leahy Fall 2014 Member of USF Tampa, Team 1-1, Leahy Fall 2014

USFT-LEAHY-F14S1G1

4 Members

13 Guides authored

0 Comments

Add Comment

View Statistics:

Past 24 Hours: 0

Past 7 Days: 7

Past 30 Days: 36

All Time: 3,684