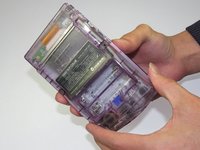
Free Shipping on Domestic Orders $75+

Game Boy Color Front Housing Replacement

What you need

  1. Game Boy Color Front Housing Replacement, Battery: step 1, image 1 of 2 Game Boy Color Front Housing Replacement, Battery: step 1, image 2 of 2
    • Locate the battery compartment on the back of the Game Boy Color.

    • Push down on the tab and hinge the cover downwards and outwards to remove the battery cover.

    Ask FixBot

    Add Comment

  2. Game Boy Color Front Housing Replacement: step 2, image 1 of 1
    • Remove the batteries from the battery compartment.

    Ask FixBot

    Add Comment

  3. Game Boy Color Front Housing Replacement, Back Housing: step 3, image 1 of 1
    • Using a Y1 screwdriver, remove the six screws on the back of the device as pictured. The bottom two screws are located inside of the battery compartment.

    Ask FixBot

    Add Comment

  4. Game Boy Color Front Housing Replacement: step 4, image 1 of 2 Game Boy Color Front Housing Replacement: step 4, image 2 of 2
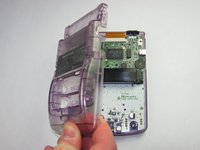
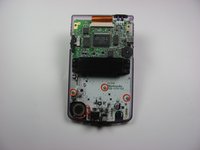
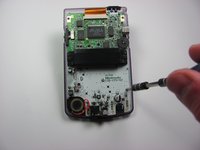
    • Gently lift and separate the back housing from the rest of the device. Now you've got the back housing out!

    Ask FixBot

    Add Comment

  5. Game Boy Color Front Housing Replacement, LCD Ribbon Cable: step 5, image 1 of 3 Game Boy Color Front Housing Replacement, LCD Ribbon Cable: step 5, image 2 of 3 Game Boy Color Front Housing Replacement, LCD Ribbon Cable: step 5, image 3 of 3
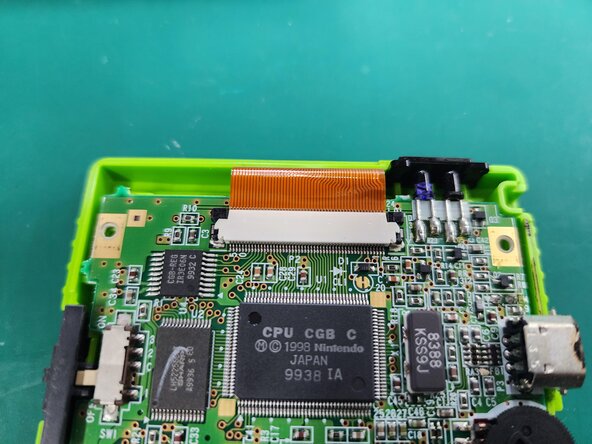
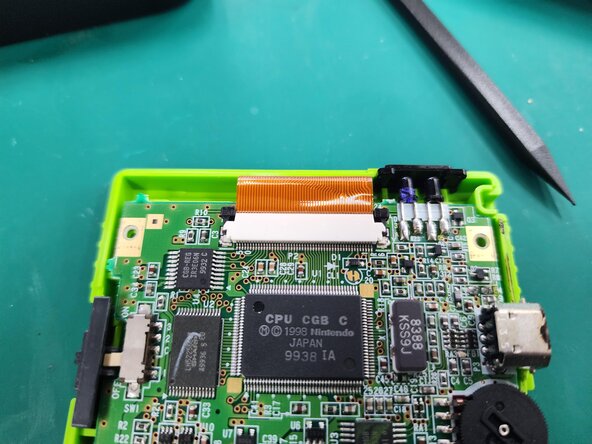
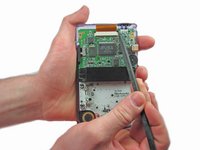
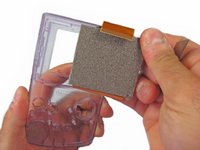
    • Push up on the tabs on either side of the ribbon with a spudger.

    Ask FixBot

    Add Comment

  6. Game Boy Color Front Housing Replacement: step 6, image 1 of 2 Game Boy Color Front Housing Replacement: step 6, image 2 of 2
    • Gently remove the ribbon cable from the port

    Ask FixBot

    Add Comment

  7. Game Boy Color Front Housing Replacement, Motherboard: step 7, image 1 of 2 Game Boy Color Front Housing Replacement, Motherboard: step 7, image 2 of 2
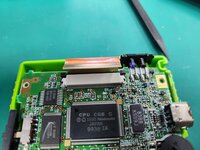
    • Using the Phillips #1 screwdriver, remove the 3 screws shown in the picture.

    Ask FixBot

    Add Comment

  8. Game Boy Color Front Housing Replacement: step 8, image 1 of 1
    • Gently lift the motherboard from the front housing.

    Ask FixBot

    Add Comment

  9. Game Boy Color Front Housing Replacement, Buttons: step 9, image 1 of 1
    • Remove the rubber backing on each button grouping.

    Ask FixBot

    Add Comment

  10. Game Boy Color Front Housing Replacement: step 10, image 1 of 1
    • Remove the original buttons from the housing.

    Ask FixBot

    Add Comment

  11. Game Boy Color Front Housing Replacement, LCD Display: step 11, image 1 of 2 Game Boy Color Front Housing Replacement, LCD Display: step 11, image 2 of 2
    • Gently pry and lift the LCD Display from the front panel.

    • Twisting the front casing may help gain more leverage.

    Ask FixBot

    Add Comment

Conclusion

To reassemble your device, follow these instructions in reverse order.

Cancel: I did not complete this guide.

23 other people completed this guide.

Angela Yoeurng

Member since: 01/18/13

2,103 Reputation

2 Guides authored

Team

Cal Poly, Team 19-47, Regan Winter 2013 Member of Cal Poly, Team 19-47, Regan Winter 2013

CPSU-REGAN-W13S19G47

4 Members

61 Guides authored

0 Guide Comments

Add Comment

View Statistics:

Past 24 Hours: 4

Past 7 Days: 10

Past 30 Days: 81

All Time: 13,225