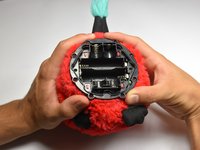
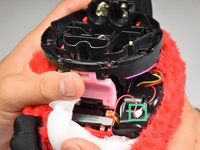
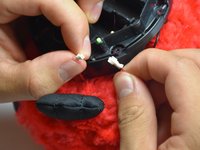
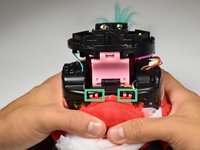
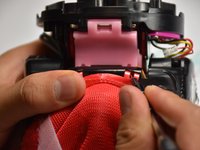
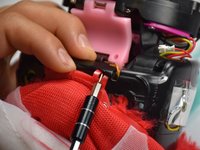
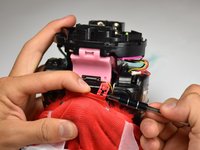
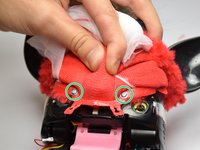
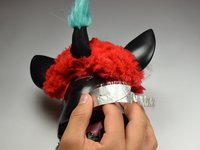
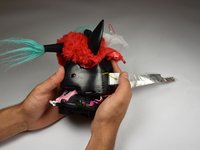
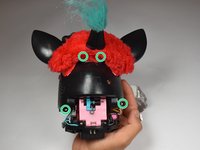
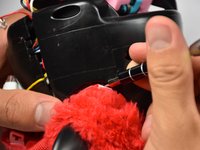
Furby Outer Shell Replacement

Prerequisite Only
This guide is only intended to be used as a prerequisite for other guides. It's incomplete by itself.

What you need

  1. Furby Outer Shell Replacement, Outer Shell: step 1, image 1 of 3 Furby Outer Shell Replacement, Outer Shell: step 1, image 2 of 3 Furby Outer Shell Replacement, Outer Shell: step 1, image 3 of 3
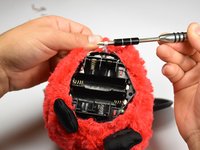
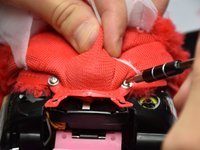
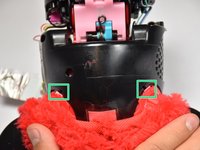
    • Use a flathead screwdriver to remove the two 10mm screws on the base of the Furby.
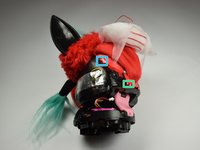
  2. Furby Outer Shell Replacement: step 2, image 1 of 3 Furby Outer Shell Replacement: step 2, image 2 of 3 Furby Outer Shell Replacement: step 2, image 3 of 3
    • Use a Phillips #0 driver to unscrew the eight 10mm screws.

    • Remove the base ring after unscrewing all the screws.

    • Be careful when lifting the base ring from the Furby. There are sharp edges that hold the base ring in place.

  3. Furby Outer Shell Replacement: step 3, image 1 of 2 Furby Outer Shell Replacement: step 3, image 2 of 2
    • Unhook the white ribbon from the tab on the base.

  4. Furby Outer Shell Replacement: step 4, image 1 of 3 Furby Outer Shell Replacement: step 4, image 2 of 3 Furby Outer Shell Replacement: step 4, image 3 of 3
    • Roll the Furby's fur downward.

    • Disconnect the now exposed red wire.

  5. Furby Outer Shell Replacement: step 5, image 1 of 3 Furby Outer Shell Replacement: step 5, image 2 of 3 Furby Outer Shell Replacement: step 5, image 3 of 3
    • Locate the two middle clips first.

    • Locate the two remaining clips on Furby's sides, they are opposite each other.

    • Orient the Furby upside down with the tail facing away from you.

  6. Furby Outer Shell Replacement: step 6, image 1 of 3 Furby Outer Shell Replacement: step 6, image 2 of 3 Furby Outer Shell Replacement: step 6, image 3 of 3
    • Insert a metal prying tool directly into the clip opening.

    • Press upward into the clip. At the same time, use your other hand to pull away the plastic seam from the Furby's body.

    • Repeat the previous step to remove the remaining three clips.

  7. Furby Outer Shell Replacement: step 7, image 1 of 3 Furby Outer Shell Replacement: step 7, image 2 of 3 Furby Outer Shell Replacement: step 7, image 3 of 3
    • Locate the two 10mm screws and remove them with the Phillips #0 head screwdriver.

    • Lift up on the fur covering until the face of the Furby is exposed.

  8. Furby Outer Shell Replacement: step 8, image 1 of 3 Furby Outer Shell Replacement: step 8, image 2 of 3 Furby Outer Shell Replacement: step 8, image 3 of 3
    • Orient the Furby on its side to where the beak is facing left and locate the edge of the aluminum tape.

    • Lift tape gently and peel back until the tape is nearly removed.

    • Do not pull on the yellow wire located on the opposite end of the tape.

  9. Furby Outer Shell Replacement: step 9, image 1 of 2 Furby Outer Shell Replacement: step 9, image 2 of 2
    • Locate the four 10mm screws. Two on either side of body, and two on top of back plate, around the tape.

    • Remove the 10mm screws with the Phillips#0 screwdriver.

  10. Furby Outer Shell Replacement: step 10, image 1 of 1
    • Peel the tape gently, grabbing it from the bottom edge and folding the tape upward.

    • Peel the tape up until it is nearly detached from the black case.

  11. Furby Outer Shell Replacement: step 11, image 1 of 2 Furby Outer Shell Replacement: step 11, image 2 of 2
    • Orient the Furby face down, with the base facing away from you.

    • Locate the clips below the ears.

    • Repeat the technique used in Step 6. Create leverage using a metal prying tool to press upward into the clip, while also pulling back on the clip itself.

  12. Furby Outer Shell Replacement: step 12, image 1 of 2 Furby Outer Shell Replacement: step 12, image 2 of 2
    • Remove the loose, plastic back panel by pulling the panel away from Furby's body.

Finish Line

One other person completed this guide.

Jordan Castillo

Member since: 10/06/16

912 Reputation

5 Guides authored

Team

Cal Poly, Team 15-5, Livingston Fall 2016 Member of Cal Poly, Team 15-5, Livingston Fall 2016

CPSU-LIVINGSTON-F16S15G5

4 Members

9 Guides authored

0 Comments

Add Comment

View Statistics:

Past 24 Hours: 0

Past 7 Days: 0

Past 30 Days: 0

All Time: 90