Free Shipping on Domestic Orders $75+

Fujifilm X-M1 Back Case Replacement

What you need

    1. Fujifilm X-M1 Back Case Replacement, Battery: step 1, image 1 of 2 Fujifilm X-M1 Back Case Replacement, Battery: step 1, image 2 of 2
      • Turn the camera upside down to locate the battery compartment.

      • Slide the button up to open the compartment.

      • Slide the orange button up to release the battery.

      • The battery is not shown in these photos.

      Ask FixBot

      Add Comment

    1. Fujifilm X-M1 Back Case Replacement, Back Case: step 2, image 1 of 1
      • Remove the six 2.5 mm Phillips screws from the bottom of the camera.

      Ask FixBot

      Add Comment

    2. Fujifilm X-M1 Back Case Replacement: step 3, image 1 of 1
      Tool used on this step:
      Tweezers
      $4.99
      Buy
      • Use tweezers or a finger nail to peel back the rubber cover on the left handgrip.

      • Remove the 3.4 mm Phillips screw.

      • Remove the 3.7 mm screw.

      Ask FixBot

      Add Comment

    3. Fujifilm X-M1 Back Case Replacement: step 4, image 1 of 1
      • Use tweezers or a fingernail to peel back the rubber cover on the right handgrip.

      • Remove the 3.2 mm Phillips screw.

      • Remove the 3.8 mm Phillips screw.

      • Remove the 2.8 mm Phillips screw.

      Ask FixBot

      Add Comment

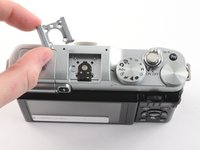
    4. Fujifilm X-M1 Back Case Replacement: step 5, image 1 of 2 Fujifilm X-M1 Back Case Replacement: step 5, image 2 of 2
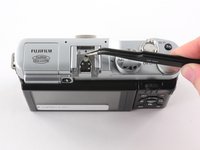
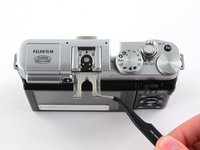
      • Use tweezers to slide the metal shield straight out of the external flash mount.

      Ask FixBot

      Add Comment

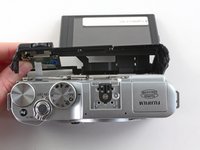
    5. Fujifilm X-M1 Back Case Replacement: step 6, image 1 of 3 Fujifilm X-M1 Back Case Replacement: step 6, image 2 of 3 Fujifilm X-M1 Back Case Replacement: step 6, image 3 of 3
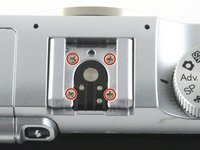
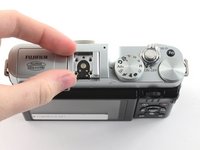
      • Remove the four 4.6 mm Phillips screws from the external flash mount.

      • Use tweezers or two fingers to remove the mount clip.

      Ask FixBot

      Add Comment

    6. Fujifilm X-M1 Back Case Replacement: step 7, image 1 of 1
      • Extend the LCD.

      • Remove the two black 4.3 mm Phillips screws from the back case.

      Ask FixBot

      Add Comment

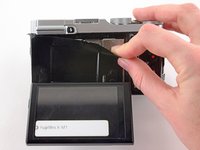
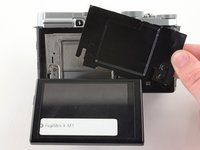
    7. Fujifilm X-M1 Back Case Replacement: step 8, image 1 of 2 Fujifilm X-M1 Back Case Replacement: step 8, image 2 of 2
      • Use two fingers to peel back and remove the black plastic cover from behind the LCD.

      Ask FixBot

      Add Comment

    8. Fujifilm X-M1 Back Case Replacement: step 9, image 1 of 3 Fujifilm X-M1 Back Case Replacement: step 9, image 2 of 3 Fujifilm X-M1 Back Case Replacement: step 9, image 3 of 3
      • Slowly pull the back frame away from the camera.

      • Do not attempt to remove the frame, as it is attached to the camera by a ribbon cable.

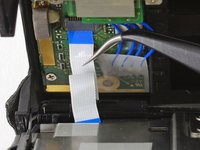
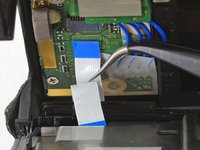
      • Use tweezers to pull the white and blue ribbon cable out of the connector.

      Ask FixBot

      Add Comment

    9. Fujifilm X-M1 Back Case Replacement: step 10, image 1 of 1
      • Slide the frame around the LCD to remove it from the camera.

      Ask FixBot

      Add Comment

    10. Fujifilm X-M1 Back Case Replacement: step 11, image 1 of 1
      • Remove the two 2.6 mm Phillips screws from the right side of the metal frame.

      Ask FixBot

      Add Comment

    11. Fujifilm X-M1 Back Case Replacement: step 12, image 1 of 2 Fujifilm X-M1 Back Case Replacement: step 12, image 2 of 2
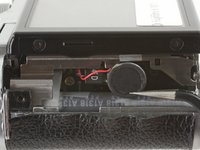
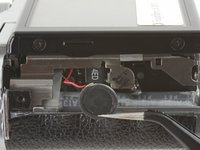
      • Use tweezers to unhook the speaker near the left handgrip.

      Ask FixBot

      Add Comment

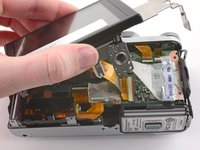
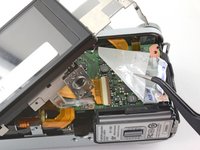
    12. Fujifilm X-M1 Back Case Replacement: step 13, image 1 of 2 Fujifilm X-M1 Back Case Replacement: step 13, image 2 of 2
      • Slowly lift the metal frame away from the motherboard.

      • Do not attempt to remove the frame, as it is attached to the motherboard by a large ribbon cable.

      • Use tweezers to remove the plastic covering the motherboard.

      Ask FixBot

      Add Comment

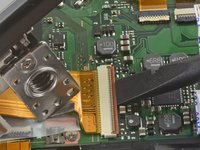
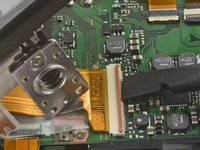
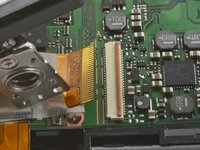
    13. Fujifilm X-M1 Back Case Replacement: step 14, image 1 of 3 Fujifilm X-M1 Back Case Replacement: step 14, image 2 of 3 Fujifilm X-M1 Back Case Replacement: step 14, image 3 of 3
      • To remove the ribbon cable, flip back the orange lock on the large ZIF connector with the flat end of a spudger.

      • If the ribbon cable does not pop out on its own, use tweezers to pull it out of the connector.

      • Remove the back case.

      Ask FixBot

      Add Comment

Conclusion

To reassemble your device, follow these instructions in reverse order.

Cancel: I did not complete this guide.

2 other people completed this guide.

Kelsea Weber

Member since: 11/12/15

21,458 Reputation

32 Guides authored

0 Guide Comments

Add Comment

View Statistics:

Past 24 Hours: 1

Past 7 Days: 11

Past 30 Days: 37

All Time: 2,120