Fujifilm Instax Minion Capacitor Replacement

What you need

  1. Fujifilm Instax Minion Capacitor Replacement, Camera Shell: step 1, image 1 of 3 Fujifilm Instax Minion Capacitor Replacement, Camera Shell: step 1, image 2 of 3 Fujifilm Instax Minion Capacitor Replacement, Camera Shell: step 1, image 3 of 3
    • Remove the six 4.5 mm #00 Phillips screws from the bottom, left, and right sides.

  2. Fujifilm Instax Minion Capacitor Replacement: step 2, image 1 of 3 Fujifilm Instax Minion Capacitor Replacement: step 2, image 2 of 3 Fujifilm Instax Minion Capacitor Replacement: step 2, image 3 of 3
    • Use a spudger to remove the film slot guard on the top of the camera.

    • Remove the one 4.5 mm #00 Phillips screw under the slot guard.

  3. Fujifilm Instax Minion Capacitor Replacement: step 3, image 1 of 3 Fujifilm Instax Minion Capacitor Replacement: step 3, image 2 of 3 Fujifilm Instax Minion Capacitor Replacement: step 3, image 3 of 3
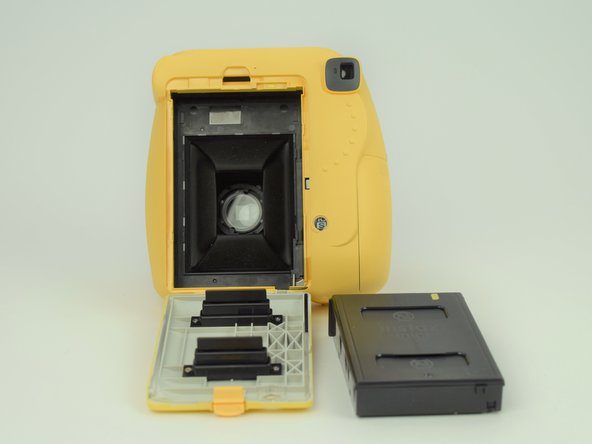
    • Press the release tab on the back of the camera to open the film compartment.

    • Remove the film cartridge within this compartment.

  4. Fujifilm Instax Minion Capacitor Replacement: step 4, image 1 of 3 Fujifilm Instax Minion Capacitor Replacement: step 4, image 2 of 3 Fujifilm Instax Minion Capacitor Replacement: step 4, image 3 of 3
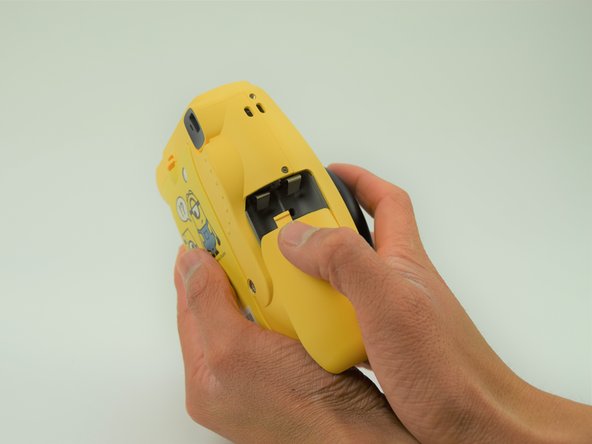
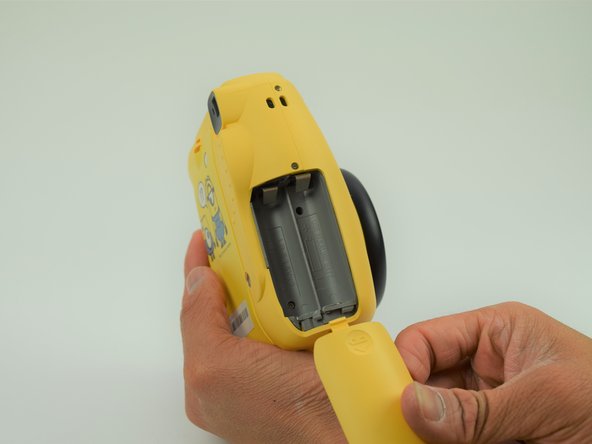
    • Press the battery cover in and down to remove it.

    • Remove any batteries within.

  5. Fujifilm Instax Minion Capacitor Replacement: step 5, image 1 of 3 Fujifilm Instax Minion Capacitor Replacement: step 5, image 2 of 3 Fujifilm Instax Minion Capacitor Replacement: step 5, image 3 of 3
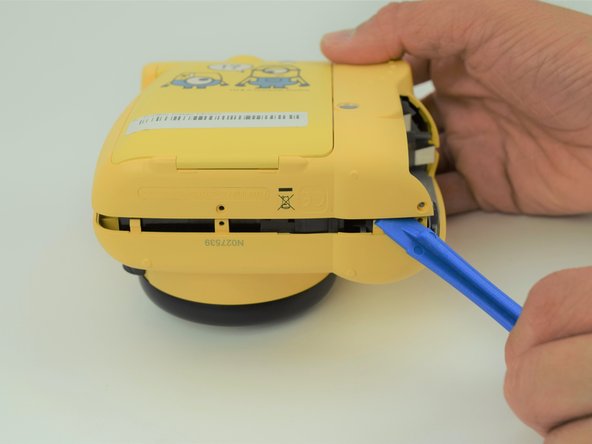
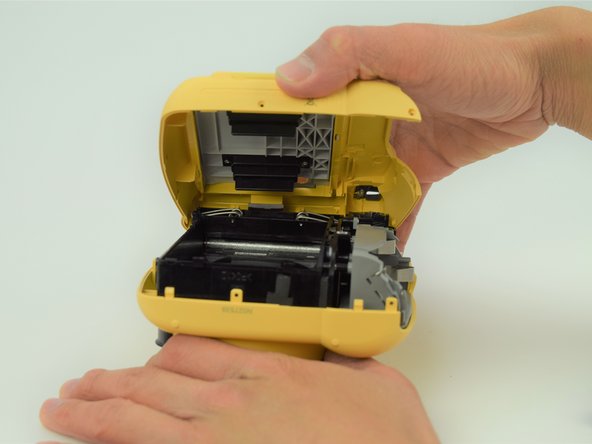
    • Use a plastic opening tool to help pry the front and back shells apart.

    • With the camera facing down, remove only the back shell.

  6. Fujifilm Instax Minion Capacitor Replacement: step 6, image 1 of 3 Fujifilm Instax Minion Capacitor Replacement: step 6, image 2 of 3 Fujifilm Instax Minion Capacitor Replacement: step 6, image 3 of 3
    • Carefully peel the front side of the shell away.

    • As you lift the front shell, be careful to not pull too hard since there is a spring attached to the shell and the camera body.

    • Using a set of tweezers, detach the spring from the body. The spring will retract into the black and gray ring on the front shell.

  7. Fujifilm Instax Minion Capacitor Replacement, Capacitor: step 7, image 1 of 3 Fujifilm Instax Minion Capacitor Replacement, Capacitor: step 7, image 2 of 3 Fujifilm Instax Minion Capacitor Replacement, Capacitor: step 7, image 3 of 3
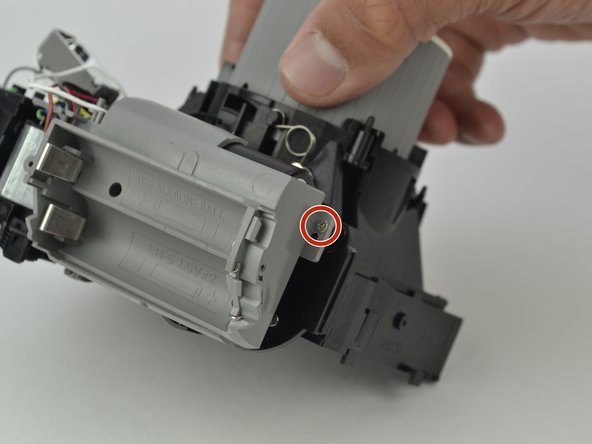
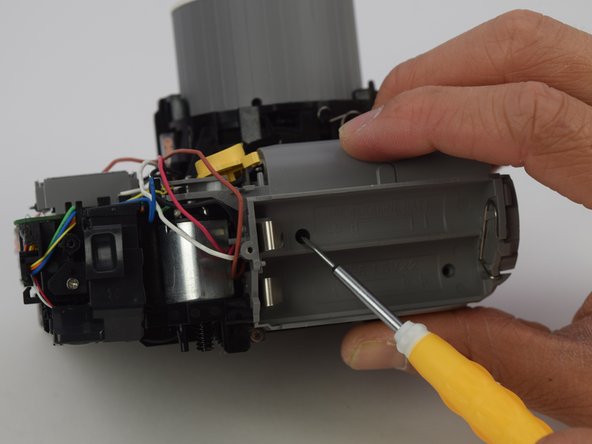
    • Remove the four 4.5 mm screws inside the battery holder with a long #00 Phillips screwdriver.

  8. Fujifilm Instax Minion Capacitor Replacement: step 8, image 1 of 3 Fujifilm Instax Minion Capacitor Replacement: step 8, image 2 of 3 Fujifilm Instax Minion Capacitor Replacement: step 8, image 3 of 3
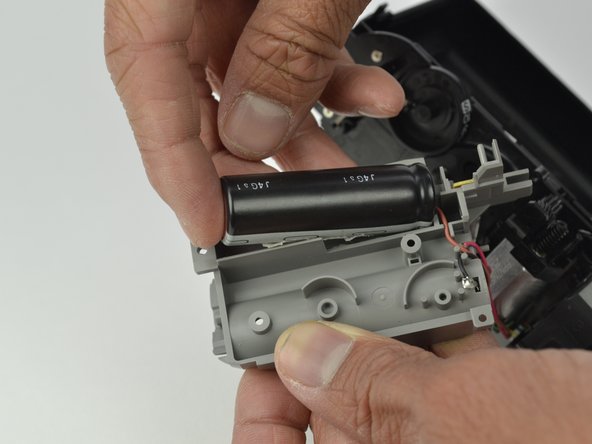
    • Gently pull on the battery holder to remove it from the case, exposing the capacitor.

    • Pull up on the backside of the capacitor to remove it from the battery holder.

    • The capacitor will have a small amount of adhesive holding it onto the battery holder. Keep this intact, but don't worry if it is damaged.

    • Be careful not to touch the wire leads on the front of the capacitor, as you could get shocked.

  9. Fujifilm Instax Minion Capacitor Replacement: step 9, image 1 of 2 Fujifilm Instax Minion Capacitor Replacement: step 9, image 2 of 2
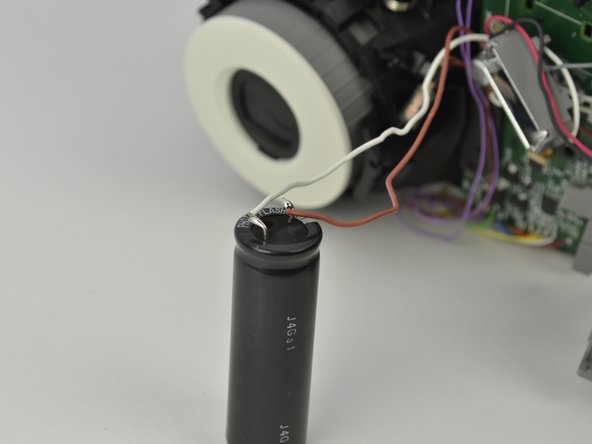
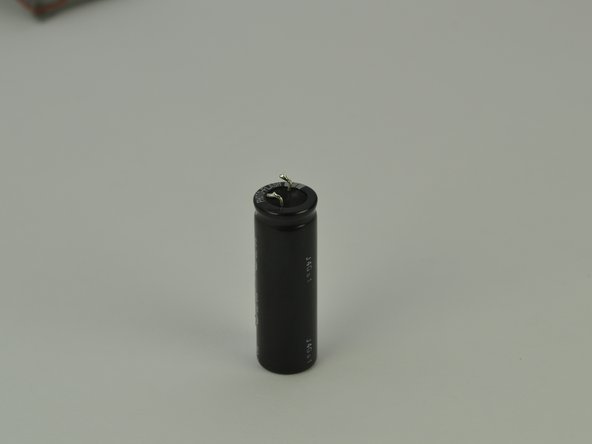
    • Desolder the ends of the wires from the leads of the capacitor to remove it.

    • Take note of the connections between the wires and leads for reassembly. The brown wire connects to side with white line and the white wire connects to the other side.

    • Be careful not to touch both leads of the capacitor with your soldering iron. This will bridge the connection and could create a spark.

Conclusion

To reassemble your device, follow these instructions in reverse order.

Jeffery

Member since: 03/28/15

220 Reputation

2 Guides authored

Team

Cal Poly, Team S18-G6, Livingston Spring 2018 Member of Cal Poly, Team S18-G6, Livingston Spring 2018

CPSU-LIVINGSTON-S18S18G6

4 Members

10 Guides authored

0 Comments

Add Comment

View Statistics:

Past 24 Hours: 1

Past 7 Days: 3

Past 30 Days: 6

All Time: 640