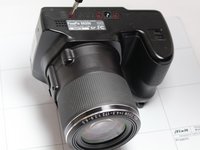
Fujifilm FinePix S8200 LCD Screen Replacement

What you need

  1. Fujifilm FinePix S8200 LCD Screen  Replacement, Batteries: step 1, image 1 of 1
    • Turn the camera upside down so you can access the battery chamber.

    • Make sure that the camera is powered off before opening the battery chamber. Not doing so could damage your memory card.

  2. Fujifilm FinePix S8200 LCD Screen  Replacement: step 2, image 1 of 1
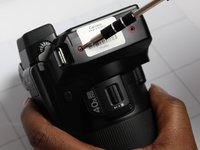
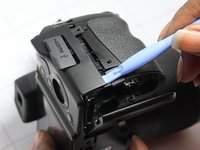
    • Push the battery chamber latch in the direction of the front of the camera. Keeping tension on the latch, slide the battery chamber cover toward the outside of the camera, opening the battery chamber.

  3. Fujifilm FinePix S8200 LCD Screen  Replacement: step 3, image 1 of 1
    • With the battery chamber open, remove the old batteries.

    • When replacing the batteries, remember that the battery orientation is shown by the + and - marks. Each mark indicates which side of the battery faces up in the chamber.

  4. Fujifilm FinePix S8200 LCD Screen  Replacement, Rear Housing Cover: step 4, image 1 of 3 Fujifilm FinePix S8200 LCD Screen  Replacement, Rear Housing Cover: step 4, image 2 of 3 Fujifilm FinePix S8200 LCD Screen  Replacement, Rear Housing Cover: step 4, image 3 of 3
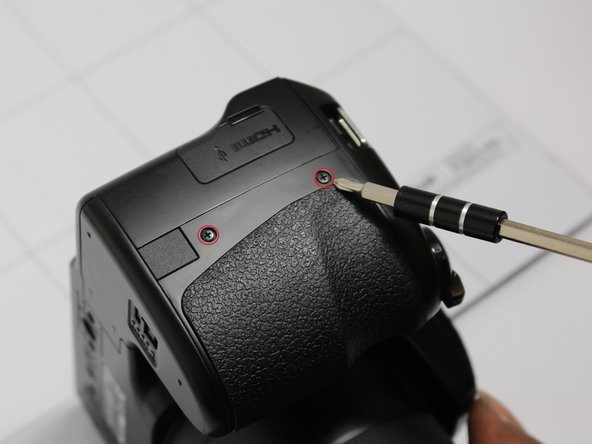
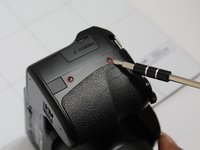
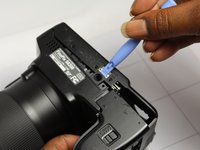
    • Remove the 4mm JIS #00 screws from the sides and bottom of the camera.

  5. Fujifilm FinePix S8200 LCD Screen  Replacement: step 5, image 1 of 3 Fujifilm FinePix S8200 LCD Screen  Replacement: step 5, image 2 of 3 Fujifilm FinePix S8200 LCD Screen  Replacement: step 5, image 3 of 3
    • Carefully pry away the rear housing cover with the plastic opening tool.

  6. Fujifilm FinePix S8200 LCD Screen  Replacement: step 6, image 1 of 1
    • Remove the rear housing cover by carefully pulling it away from the camera.

  7. Fujifilm FinePix S8200 LCD Screen  Replacement, LCD Screen: step 7, image 1 of 2 Fujifilm FinePix S8200 LCD Screen  Replacement, LCD Screen: step 7, image 2 of 2
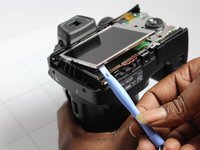
    • Fold back the LCD screen with the plastic opening tool.

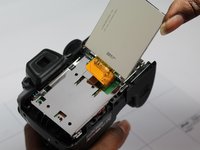
    • Remove the cable coming from the LCD screen that goes into the motherboard.

Conclusion

To reassemble your device, follow these instructions in reverse order.

2 other people completed this guide.

Joseph Kelley

Member since: 01/15/15

228 Reputation

2 Guides authored

Team

USF Tampa, Team 7-1, Remmell Winter 2015 Member of USF Tampa, Team 7-1, Remmell Winter 2015

USFT-REMMELL-W15S7G1

4 Members

9 Guides authored

0 Comments

Add Comment

View Statistics:

Past 24 Hours: 0

Past 7 Days: 1

Past 30 Days: 1

All Time: 1,282