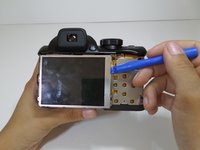
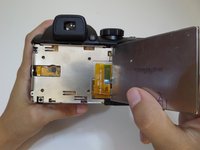
Fujifilm FinePix S4200 LCD Screen Replacement

What you need

  1. Fujifilm FinePix S4200 LCD Screen Replacement, LCD Screen: step 1, image 1 of 1
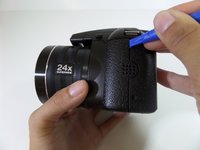
    • Turn the camera off.

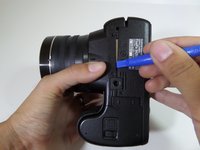
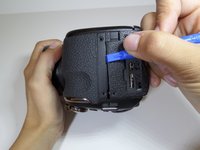
    • Turn the camera upside down so that the battery compartment is showing.

  2. Fujifilm FinePix S4200 LCD Screen Replacement: step 2, image 1 of 1
    • Remove the three 4 mm screws from the bottom of the camera with a Phillips #000 screwdriver.

  3. Fujifilm FinePix S4200 LCD Screen Replacement: step 3, image 1 of 1
    • Rotate camera to the side where the speaker ports are located.

    • Remove the three 4 mm screws with a Phillips #000 screwdriver.

  4. Fujifilm FinePix S4200 LCD Screen Replacement: step 4, image 1 of 1
    • Turn the camera to the opposite side where the HDMI port is located.

    • Remove all five 4 mm screws with a Phillips #000 screwdriver.

  5. Fujifilm FinePix S4200 LCD Screen Replacement: step 5, image 1 of 3 Fujifilm FinePix S4200 LCD Screen Replacement: step 5, image 2 of 3 Fujifilm FinePix S4200 LCD Screen Replacement: step 5, image 3 of 3
    • Casing is fragile.

    • Utilize the plastic opening tool to pry in between the back casing of the camera from the front casing.

    • Continue this motion around the camera to create a wedge between the front and back casing of the camera.

  6. Fujifilm FinePix S4200 LCD Screen Replacement: step 6, image 1 of 1
    • Use force to pull apart the back casing from the camera.

  7. Fujifilm FinePix S4200 LCD Screen Replacement: step 7, image 1 of 1
    • Remove the two 4 mm screws that hold the motherboard and metal plate in place.

  8. Fujifilm FinePix S4200 LCD Screen Replacement: step 8, image 1 of 2 Fujifilm FinePix S4200 LCD Screen Replacement: step 8, image 2 of 2
    • Utilize the plastic opening tool to gently lift the LCD screen away from the metal plate.

    • Flip over LCD screen so that the left side of the metal plate is visible.

  9. Fujifilm FinePix S4200 LCD Screen Replacement: step 9, image 1 of 1
    • Rotate the camera vertically so that it is easier to manage.

    • Use a Phillips #000 screwdriver to remove the two 4mm screws that are located on the metal plate under the LCD screen.

  10. Fujifilm FinePix S4200 LCD Screen Replacement: step 10, image 1 of 1
    • Detach the metal plate from the motherboard.

  11. Fujifilm FinePix S4200 LCD Screen Replacement: step 11, image 1 of 2 Fujifilm FinePix S4200 LCD Screen Replacement: step 11, image 2 of 2
    • The orange ribbon cable is fragile.

    • Pull back the small black latch connecting the orange ribbon cable to the motherboard.

    • Gently remove the LCD screen from the motherboard.

Conclusion

To reassemble your device, follow these instructions in reverse order.

3 other people completed this guide.

Jackie Acevedo

Member since: 09/14/15

325 Reputation

2 Guides authored

Team

CSU Fullerton, Team 1-4, Bruce Fall 2015 Member of CSU Fullerton, Team 1-4, Bruce Fall 2015

CSUF-BRUCE-F15S1G4

4 Members

6 Guides authored

One Comment

Ou peut on trouver cet écran ?

lise.didion - Reply

Add Comment

View Statistics:

Past 24 Hours: 1

Past 7 Days: 4

Past 30 Days: 17

All Time: 1,481