Free Shipping on Domestic Orders $75+

Framework Laptop 13 Input Cover Installation

Prerequisite Only
This is a prerequisite-only guide! This guide is part of another procedure and isn’t meant to be used alone.
    1. Framework Laptop 13 Input Cover Installation, Check the Touchpad Cable: step 1, image 1 of 3 Framework Laptop 13 Input Cover Installation, Check the Touchpad Cable: step 1, image 2 of 3 Framework Laptop 13 Input Cover Installation, Check the Touchpad Cable: step 1, image 3 of 3
      • Before continuing, check the Touchpad Cable's ZIF connector located on the back of the Touchpad:

      • Make sure the white line on the cable is parallel to and adjacent with the socket.

      • If the cable isn't inserted far enough, use the flat end of the Framework Screwdriver to flip up the black latch, reposition the cable, and lock the latch.

      Ask FixBot

      Add Comment

    2. Framework Laptop 13 Input Cover Installation, Position the Input Cover: step 2, image 1 of 2 Framework Laptop 13 Input Cover Installation, Position the Input Cover: step 2, image 2 of 2
      • Position the Input Cover, Keyboard down, on top of the laptop so it just covers the battery.

      • This allows the Touchpad Cable to be folded over and reconnected without straining it.

      Ask FixBot

      Add Comment

    3. Framework Laptop 13 Input Cover Installation, Connect the Touchpad Cable: step 3, image 1 of 2 Framework Laptop 13 Input Cover Installation, Connect the Touchpad Cable: step 3, image 2 of 2
      • Insert your finger into the Touchpad Cable press connector loop.

      • Align the press connector over its socket and press down with your finger.

      • You should hear it "click" into place. Don't try to force the connector into place. If you're having trouble, reposition it and try again.

      Ask FixBot

      Add Comment

    4. Framework Laptop 13 Input Cover Installation, Place the Input Cover: step 4, image 1 of 2 Framework Laptop 13 Input Cover Installation, Place the Input Cover: step 4, image 2 of 2
      • Flip the Input Cover over the laptop and align the bottom edges.

      Ask FixBot

      Add Comment

    5. Framework Laptop 13 Input Cover Installation: step 5, image 1 of 3 Framework Laptop 13 Input Cover Installation: step 5, image 2 of 3 Framework Laptop 13 Input Cover Installation: step 5, image 3 of 3
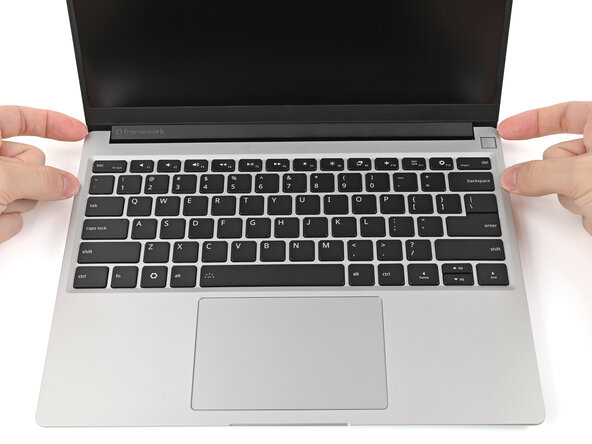
      • Lay the Input Cover over the laptop and let the magnets snap it into place.

      • The bottom right corner of the Input Cover won't sit flush with the laptop until you tighten its screws.

      Ask FixBot

      Add Comment

    6. Framework Laptop 13 Input Cover Installation, Tighten the Input Cover screws: step 6, image 1 of 2 Framework Laptop 13 Input Cover Installation, Tighten the Input Cover screws: step 6, image 2 of 2
      • Use your Framework Screwdriver to tighten the five captive T5 Torx screws securing the Input Cover.

      • Don't overtighten the screws—just make sure they're snug.

      Ask FixBot

      Add Comment

Conclusion

To reassemble your device, follow these instructions in reverse order.

Cancel: I did not complete this guide.

Alex Diaz-Kokaisl

Member since: 01/16/22

249,973 Reputation

1,203 Guides authored

0 Guide Comments

Add Comment

View Statistics:

Past 24 Hours: 0

Past 7 Days: 0

Past 30 Days: 11

All Time: 76