Free Shipping on Domestic Orders $75+

Framework Desktop Primary Storage Installation

Prerequisite Only
This is a prerequisite-only guide! This guide is part of another procedure and isn’t meant to be used alone.
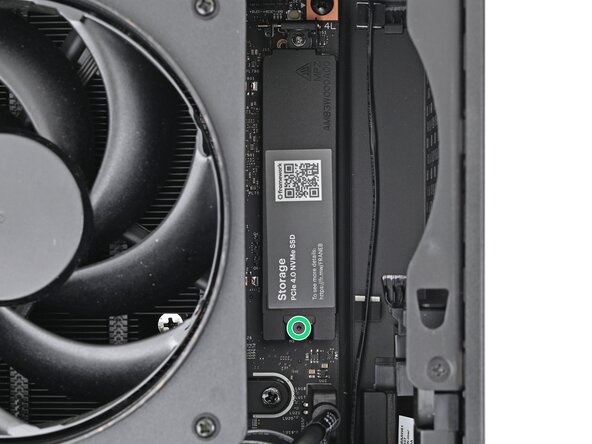
    1. Framework Desktop Primary Storage Installation, Loosen the heat spreader screw: step 1, image 1 of 1
      • Use your Framework Desktop Screwdriver to loosen the captive T5 Torx screw securing the SSD.

      Ask FixBot

      Add Comment

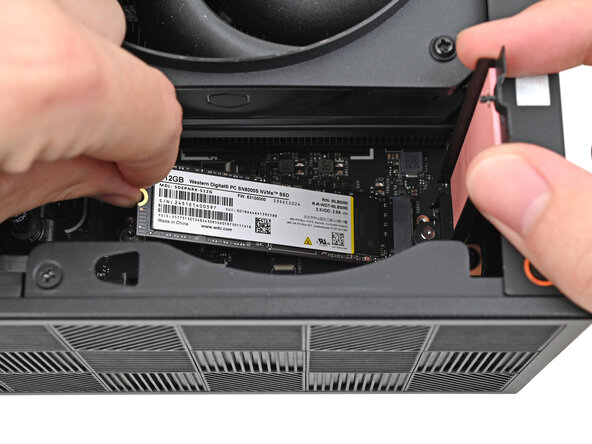
    2. Framework Desktop Primary Storage Installation, Install the SSD: step 2, image 1 of 2 Framework Desktop Primary Storage Installation, Install the SSD: step 2, image 2 of 2
      • Hold the SSD by its edges. Don't touch the gold contacts with your fingers. If you do, wipe the contacts with a clean, lint-free cloth to remove any finger oils.

      • While holding the heat spreader upright, align the SSD's gold contacts with its socket.

      • Insert the SSD into the socket at a shallow angle. The gold contacts should mostly be covered by the socket.

      • The SSD fits into the socket in one orientation. If it doesn't feel like it fits, try flipping the module.

      Ask FixBot

      Add Comment

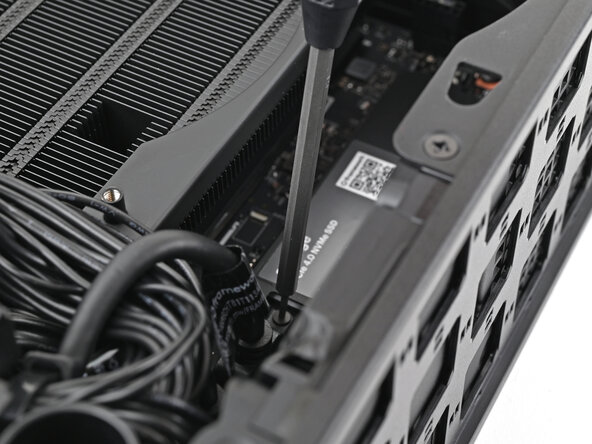
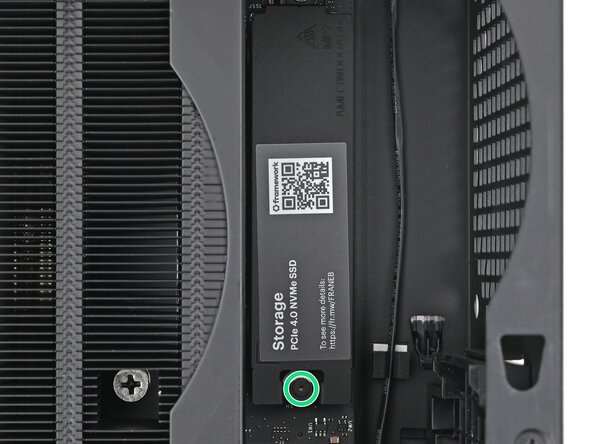
    3. Framework Desktop Primary Storage Installation, Install the SSD screw: step 3, image 1 of 3 Framework Desktop Primary Storage Installation, Install the SSD screw: step 3, image 2 of 3 Framework Desktop Primary Storage Installation, Install the SSD screw: step 3, image 3 of 3
      • Insert your Framework Desktop Screwdriver into the captive screw on the primary storage heat spreader and press it flat to the Mainboard.

      • Tighten the screw securing the SSD.

      Ask FixBot

      Add Comment

Conclusion

To reassemble your device, follow these instructions in reverse order.

Cancel: I did not complete this guide.

Alex Diaz-Kokaisl

Member since: 01/16/22

249,970 Reputation

1,203 Guides authored

0 Guide Comments

Add Comment

View Statistics:

Past 24 Hours: 0

Past 7 Days: 2

Past 30 Days: 9

All Time: 84