Introduction
Do you also own a fixed gear or a track bike? Fixed-gear bikes generally have fewer components and parts than any other bikes. A chain ring plays a vital role in the drive train and is attached to the crankset. As the bike ages, and the more miles you put on your fixie, the higher the chances of the chainring getting worn down. Replacing a worn-out chainring benefits the quality of your bike rides and drivetrain longevity.
What you need
-
-
Slightly loosen the two rear nuts with a 15 mm wrench to give the chain slack.
-
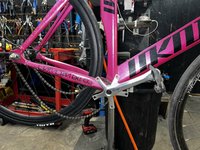
Remove the chain from the worn out chain ring.
 Ask FixBot
-
-
-
-
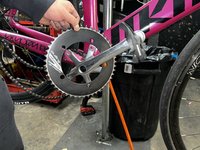
Take the chain ring off through the crank arm of the pedal and swap the chainring of your choice.
-
-
-
Line up the chainring’s hole to the crankset and tighten all five bolts to hold the chainring in place.
-


Team

CSU Los Angeles, Team 1-1, Briggs Fall 2023 Member of CSU Los Angeles, Team 1-1, Briggs Fall 2023
CSULA-BRIGGS-F23S1G1
6 Members
5 Guides authored