
Fairphone 4 Back Cover Replacement

What you need

  1. Fairphone 4 Back Cover Replacement, Pry the back cover up: step 1, image 1 of 2 Fairphone 4 Back Cover Replacement, Pry the back cover up: step 1, image 2 of 2
    • Be sure to power off your phone before you begin.

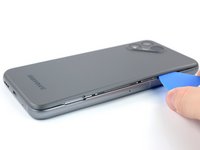
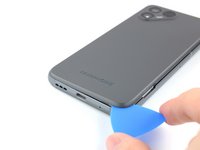
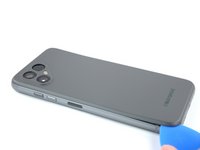
    • Insert your thumbnail, or a prying tool like a spudger, into the notch at the bottom right of the back cover.

    • Pry the back cover up to start separating its plastic clips.

  2. Fairphone 4 Back Cover Replacement: step 2, image 1 of 3 Fairphone 4 Back Cover Replacement: step 2, image 2 of 3 Fairphone 4 Back Cover Replacement: step 2, image 3 of 3
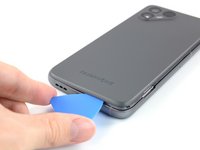
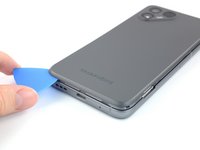
    • Using your thumbnail or an opening pick, slide along the right side of the phone to loosen the plastic clips.

  3. Fairphone 4 Back Cover Replacement: step 3, image 1 of 3 Fairphone 4 Back Cover Replacement: step 3, image 2 of 3 Fairphone 4 Back Cover Replacement: step 3, image 3 of 3
    • Slide along the bottom of the phone to loosen the plastic clips.

  4. Fairphone 4 Back Cover Replacement: step 4, image 1 of 3 Fairphone 4 Back Cover Replacement: step 4, image 2 of 3 Fairphone 4 Back Cover Replacement: step 4, image 3 of 3
    • Slide along the left side of the phone to loosen the plastic clips.

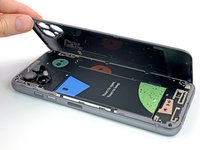
    • Lift the back cover to release the rest of the plastic clips and remove it.

    • To reinstall the back cover press it firmly into place until you hear a snap from the plastic clips.

Conclusion

To reassemble your device, follow these instructions in reverse order.

4 other people completed this guide.

Manuel Haeussermann

Member since: 07/13/22

15,487 Reputation

71 Guides authored

Team

iFixit Member of iFixit

Staff

135 Members

16,817 Guides authored

0 Comments

Add Comment

View Statistics:

Past 24 Hours: 1

Past 7 Days: 12

Past 30 Days: 69

All Time: 1,979