
Ezonics EZ-307 Main Board and USB Cable Replacement

What you need

  1. Ezonics EZ-307 Main Board and USB Cable  Replacement, Get Tools: step 1, image 1 of 1
    • A Phillips Head Size Zero Screw Driver

  2. Ezonics EZ-307 Main Board and USB Cable  Replacement, Detach the Base: step 2, image 1 of 1
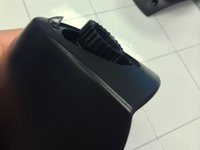
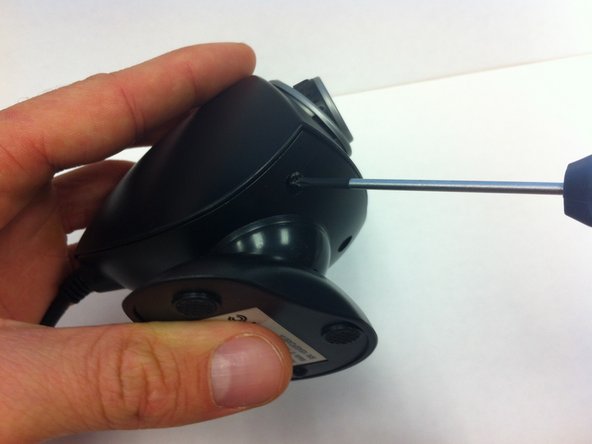
    • Using a Phillips-head screwdriver, remove each of the 3 screws from the underside of the camera head.

  3. Ezonics EZ-307 Main Board and USB Cable  Replacement, Set Aside the Base: step 3, image 1 of 1
    • Gently pull back the base and set it aside.

    • Be careful not to pull out the USB cable attachment when taking off the base

  4. Ezonics EZ-307 Main Board and USB Cable  Replacement, Remove USB Connector: step 4, image 1 of 3 Ezonics EZ-307 Main Board and USB Cable  Replacement, Remove USB Connector: step 4, image 2 of 3 Ezonics EZ-307 Main Board and USB Cable  Replacement, Remove USB Connector: step 4, image 3 of 3
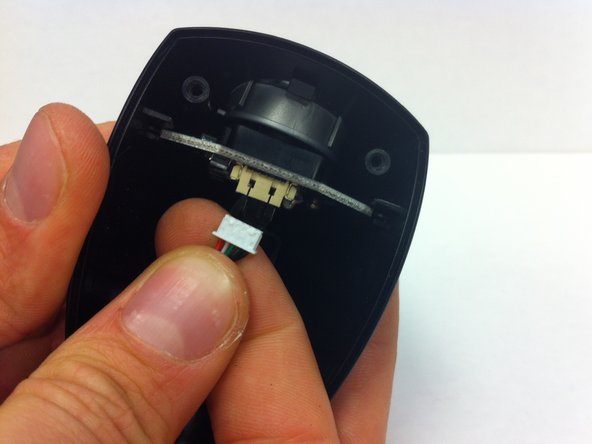
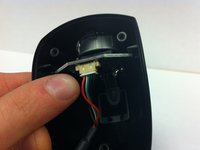
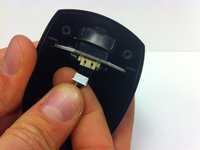
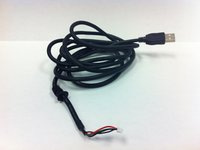
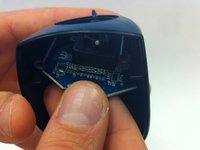
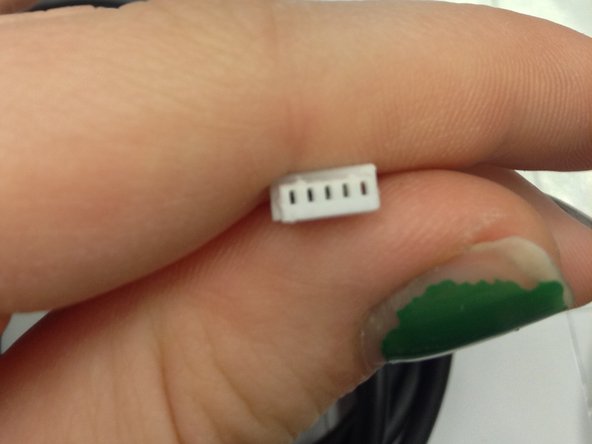
    • Gently remove the white connector with the red, green, white & black cord with your fingers. This connector is the end of the USB cable.

  5. Ezonics EZ-307 Main Board and USB Cable  Replacement, Remove Top Lens Casing: step 5, image 1 of 3 Ezonics EZ-307 Main Board and USB Cable  Replacement, Remove Top Lens Casing: step 5, image 2 of 3 Ezonics EZ-307 Main Board and USB Cable  Replacement, Remove Top Lens Casing: step 5, image 3 of 3
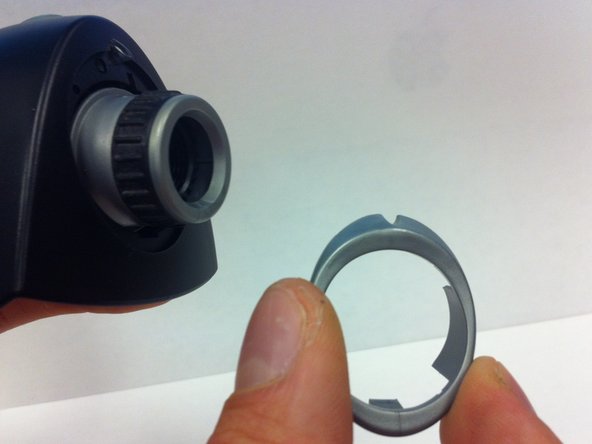
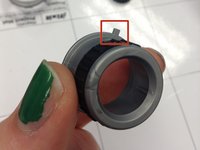
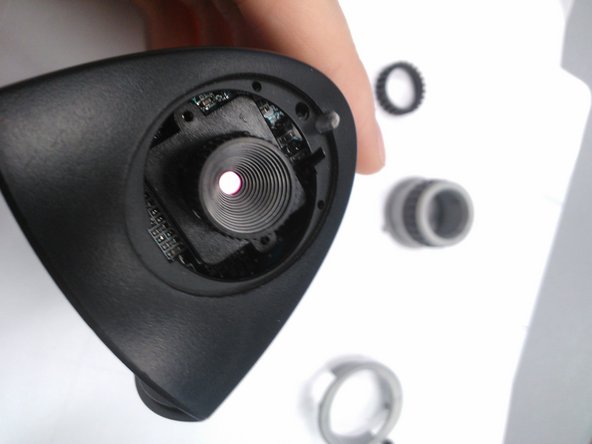
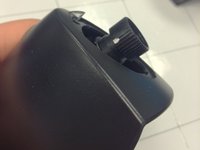
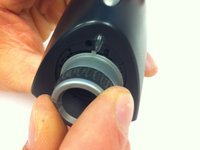
    • Press tab on inside of device to release silver ring.

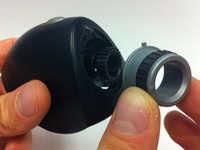
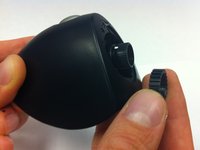
    • Gently remove top (silver) ring of lens casing with your fingers.

  6. Ezonics EZ-307 Main Board and USB Cable  Replacement, Remove Inner Lens Casing: step 6, image 1 of 2 Ezonics EZ-307 Main Board and USB Cable  Replacement, Remove Inner Lens Casing: step 6, image 2 of 2
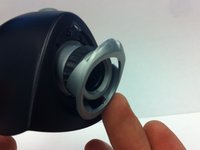
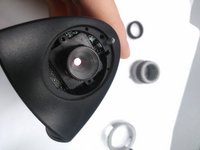
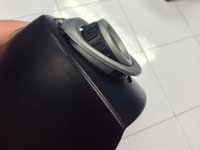
    • Gently remove inner casing of the lens (silver with a black ring).

    • Be careful not to break the small notch at the top, which holds the inner casing in place.

  7. Ezonics EZ-307 Main Board and USB Cable  Replacement, Remove the Inner Ring: step 7, image 1 of 2 Ezonics EZ-307 Main Board and USB Cable  Replacement, Remove the Inner Ring: step 7, image 2 of 2
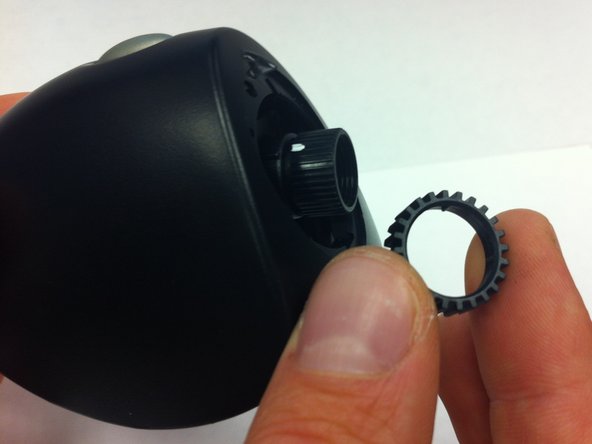
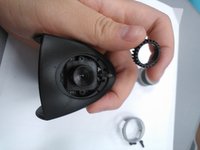
    • Remove the small, black, ridged inner ring around the lens with your fingers.

  8. Ezonics EZ-307 Main Board and USB Cable  Replacement, Unscrew the Lens: step 8, image 1 of 2 Ezonics EZ-307 Main Board and USB Cable  Replacement, Unscrew the Lens: step 8, image 2 of 2
    • Unscrew the lens counterclockwise with your fingers.

  9. Ezonics EZ-307 Main Board and USB Cable  Replacement, Carefully Remove Board From Outer Casing: step 9, image 1 of 2 Ezonics EZ-307 Main Board and USB Cable  Replacement, Carefully Remove Board From Outer Casing: step 9, image 2 of 2
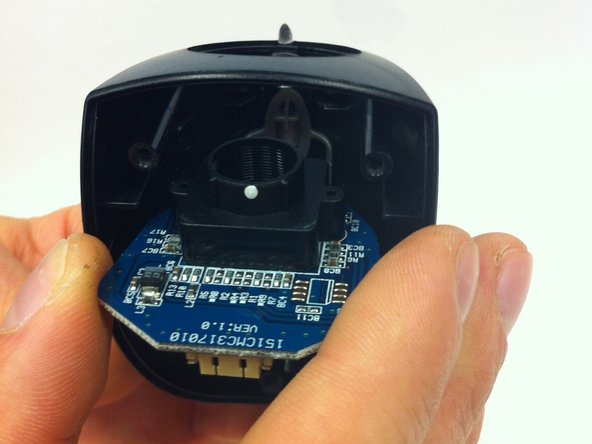
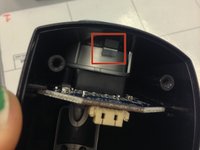
    • Turn the hollow outer casing so that you can see inside of it.

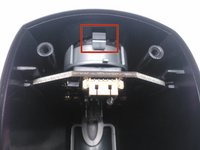
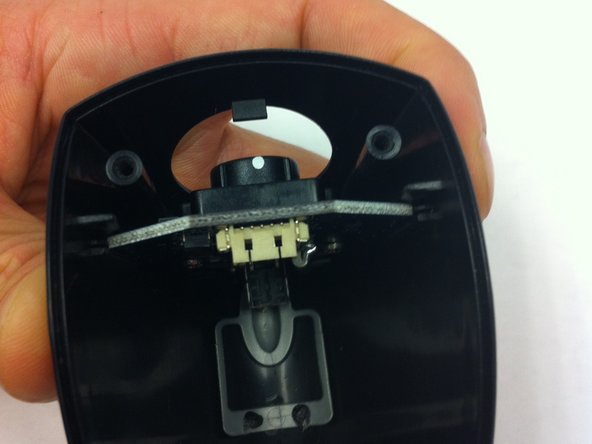
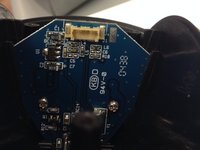
    • Gently pull out main board with fingers.

  10. Ezonics EZ-307 Main Board and USB Cable  Replacement, A New Board: step 10, image 1 of 2 Ezonics EZ-307 Main Board and USB Cable  Replacement, A New Board: step 10, image 2 of 2
    • Insert your new board into the outer casing. Be sure that it rests firmly between the sets of rails on either side.

  11. Ezonics EZ-307 Main Board and USB Cable  Replacement, Reassembly of Lens: step 11, image 1 of 2 Ezonics EZ-307 Main Board and USB Cable  Replacement, Reassembly of Lens: step 11, image 2 of 2
    • Twist the lens piece in clockwise and then insert black ring around the lens.

  12. Ezonics EZ-307 Main Board and USB Cable  Replacement, Reassemble the Lens: step 12, image 1 of 3 Ezonics EZ-307 Main Board and USB Cable  Replacement, Reassemble the Lens: step 12, image 2 of 3 Ezonics EZ-307 Main Board and USB Cable  Replacement, Reassemble the Lens: step 12, image 3 of 3
    • Line up notch on inner lens casing (silver with black ring) with notch on body of camera. Gently push it into place, being sure not to break the notch.

    • Insert the silver ring. You should hear it click into place.

  13. Ezonics EZ-307 Main Board and USB Cable  Replacement, Insert the USB Cord: step 13, image 1 of 3 Ezonics EZ-307 Main Board and USB Cable  Replacement, Insert the USB Cord: step 13, image 2 of 3 Ezonics EZ-307 Main Board and USB Cable  Replacement, Insert the USB Cord: step 13, image 3 of 3
    • Hold the camera in one hand with the hollow side facing up.

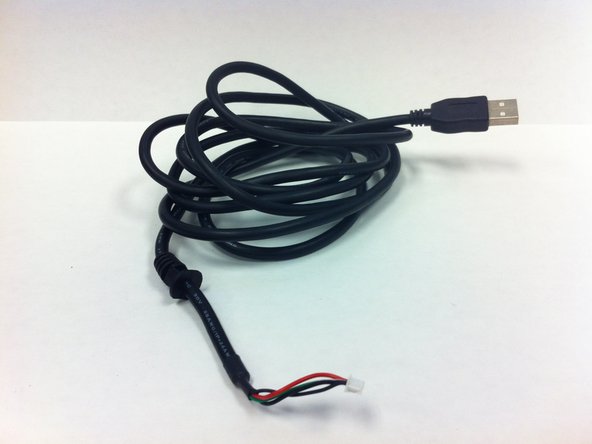
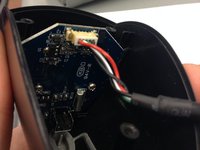
    • Hold the USB cable in your other hand with the four small holes facing up.

    • Plug the USB cable into the port.

  14. Ezonics EZ-307 Main Board and USB Cable  Replacement, Reassemble the Base of the Camera: step 14, image 1 of 1
    • Lay the USB cord in the notch at the base of the camera bottom.

    • Place the bottom back onto the camera top.

  15. Ezonics EZ-307 Main Board and USB Cable  Replacement, Reassemble the Base of the Camera: step 15, image 1 of 1
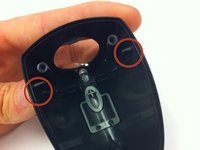
    • Line up the base of the camera with the screw holes.

    • Use a Phillips-head screwdriver to twist the three screws back into place.

Conclusion

To reassemble your device, follow these instructions in reverse order.

Lyndsi

Member since: 10/13/14

7 Reputation

1 Guide authored

Team

Ohio State, Team 1-5, Mccook Fall 2014 Member of Ohio State, Team 1-5, Mccook Fall 2014

OSU-MCCOOK-F14S1G5

4 Members

2 Guides authored

0 Comments

Add Comment

View Statistics:

Past 24 Hours: 0

Past 7 Days: 0

Past 30 Days: 1

All Time: 574