
Evercade EXP Buttons Replacement

Annie Muirbrook and 3 other contributors
Last updated on Jun 19, 2026
Views: 244
View statistics:
- Past 24 Hours:
- 1
- Past 7 Days:
- 13
- Past 30 Days:
- 73
- All Time:
- 244
Comments: 0
No one has left comments on this guide. Will you be first?
Go to guide commentsCompleted: 0 1
No one has marked this guide "completed." Will you be the first?
1 person has marked this guide "completed." It's you — great job!
Favorites: 0 1
No one has favorited (and subscribed to) this guide. Will you be the first?
1 person has favorited (and subscribed to) this guide — and that's you!
Introduction
Go to step 1 ↓If the buttons on your Evercade EXP are sticking, unresponsive, or worn down, use this guide to safely remove and access them for cleaning or replacement.
The buttons are essential for gameplay, translating your inputs into on-screen actions. Over time, dust, debris, or general wear can affect the overall performance.
Before beginning the repair, inspect the buttons and surrounding shell for visible damage that may affect how the buttons sit in place or how the device opens, as this could make disassembly more challenging.
Power the device off completely and ensure it is disconnected from any power source before starting.
What you need
Tools


-
-
-
Lay the device on a flat surface, with the screen facing the sufrace.
-
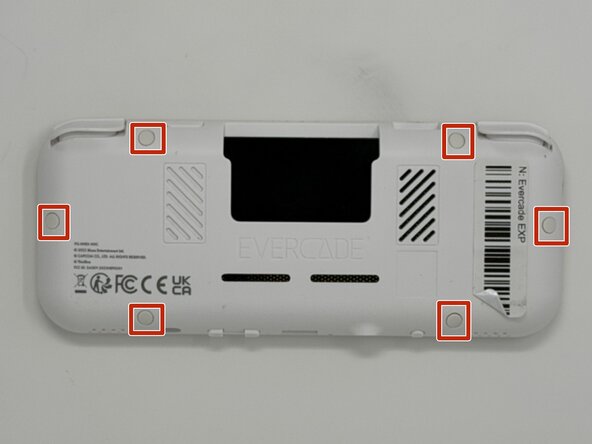
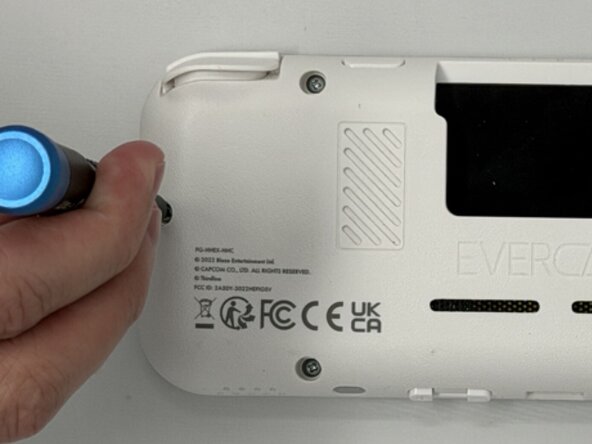
Using angled tweezers, remove the six rubber screw covers from the sockets.
 Ask FixBot
-
-
-
Using a Phillips #00 screwdriver, remove the six 8 mm screws on the lower case.
-
-
-
Flip the device so the screen is facing you.
-
Four hidden retaining clips hold the pieces together even near each corner of the screen.
-
Insert a Jimmy into the seam located between the faceplate and the shell.
-
Move the a Jimmy toward the screen until you find the first clasp. Move the handle of the jimmy tool up to pop the faceplate free from the clasp.
-
Repeat until for each of the four clasps to fully release the faceplate from the shell.
-
-
-
Flip the faceplate away from the shell carefully. The faceplate is still connected to the motherboard via a ribbon cable.
-
Flip up the locking flap securing the display ribbon cable, then use tweezers to disconnect the ribbon cable.
-
-
-
-
-
-
Locate the four circular buttons in a diamond shape on the face plate, the two circular buttons placed next to each other, and the two small oval buttons and a circular button in a row near those in a diamond pattern.
-
Using angled tweezer, gently remove the buttons from the face plate. The buttons may fall out, so be ready to catch any that fall from the device before intended removal.
-
-




To reassemble your device, follow these instructions in reverse order.

Team

Utah Tech University, Team 1-6, McMurrin Spring 2026 Member of Utah Tech University, Team 1-6, McMurrin Spring 2026
UTAHTECH-MCMURRIN-S26S1G6
3 Members
84 Guides authored
