
Ematic Model FTABMP2 Case Replacement

Timothy and 5 other contributors
Last updated on Jan 14, 2026
Views: 558
View statistics:
- Past 24 Hours:
- 2
- Past 7 Days:
- 18
- Past 30 Days:
- 79
- All Time:
- 558
Comments: 0
No one has left comments on this guide. Will you be first?
Go to guide commentsCompleted: 0 1
No one has marked this guide "completed." Will you be the first?
1 person has marked this guide "completed." It's you — great job!
Favorites: 1 2
1 person has favorited (and subscribed to) this guide. Will you be next?
2 people have favorited (and subscribed to) this guide — including you!
Better Introduction
Improve this guide by completing or revising its introduction.
Missing Details
Some of this guide's details are missing. Help users by adding tools, difficulty, or time.
What you need
Tools

-
-
-
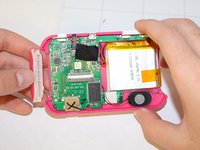
Disconnect the LCD cable from the motherboard by pressing the two sides of the clamp together.
-
-
-
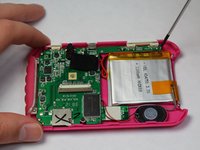
After disconnecting the LCD from the motherboard, remove the screws that hold down the motherboard.
-
Remove the plastic power and volume buttons.
-
Remove the two side grips of the device.
-
-
-
-
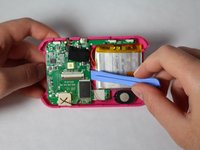
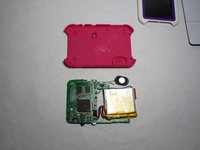
Remove the motherboard, the speaker, and the battery, leaving just the back casing of the device.
-


 Ask FixBot




To reassemble your device, follow these instructions in reverse order.

Team

USF Tampa, Team 9-2, Brown Winter 2015 Member of USF Tampa, Team 9-2, Brown Winter 2015
USFT-BROWN-W15S9G2
5 Members
60 Guides authored
