Introduction
A drawcord is a length of cording, often elastic, that runs through hems, waistbands, hoods, and other areas where adjustable tightness is beneficial. Over time, a drawcord can stretch out and lose its elasticity, or it may break or snap during use. In these situations, replacing the entire drawcord is necessary.
This guide will demonstrate how to replace a drawcord without the need for sewing. To ensure this solution is applicable, confirm that the drawcord is not sewn into the item on either end.
While this tutorial focuses on a jacket hem, the same techniques can be applied to other non-sewn drawcords, such as those found in waistbands and hoods.
Read through the entire guide before starting the repair, and gather the necessary tools and materials. While Patagonia-specific materials are ideal, they are not required. Patagonia replacement parts can be obtained by calling or messaging Patagonia Customer Service.
Alternatively, Patagonia products can be taken to a local retail store for repair evaluation or sent in to Patagonia through their mail-in repair service.
Let's get fixing!
Related tutorial: Cord Lock Replacement
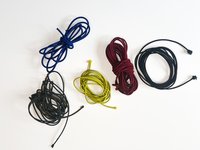
What you need
-
-
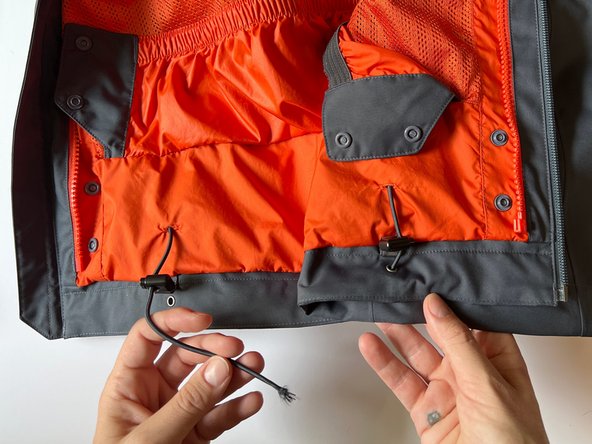
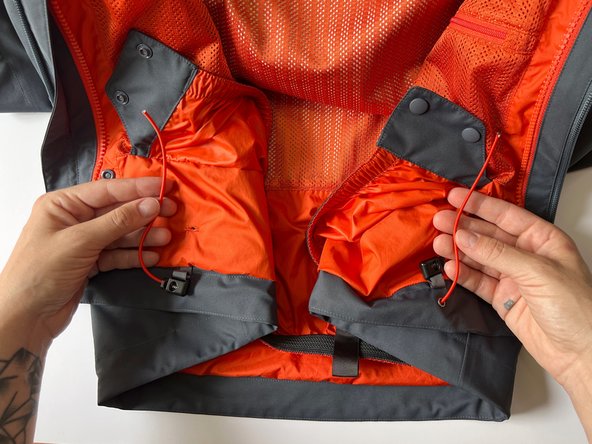
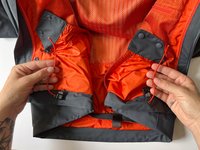
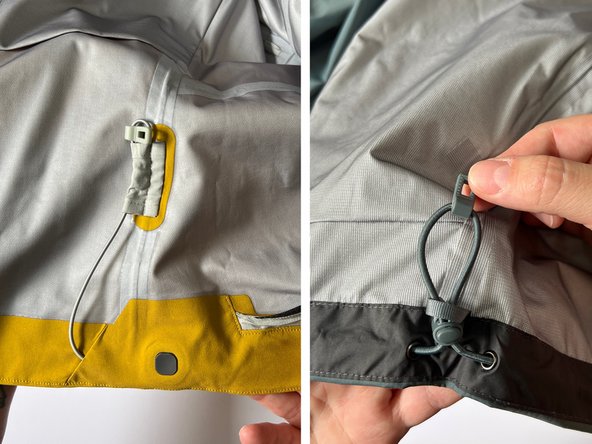
Assess the state of the drawcord - if it's damaged, stretched out, or missing entirely.
-
If original drawcord is present, take note of:
-
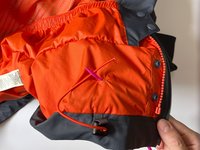
Design - How the drawcord is threaded into the garment (e.g. through hand pockets or a grosgrain loop)
-
Cord Lock - How the drawcord threads through the cord lock(s)
-
Other Pieces - If the drawcord is used with any additional hard trims like end caps or clear plastic discs
-
If the drawcord is missing entirely, please see Step 3.
 Ask FixBot
-
-
-
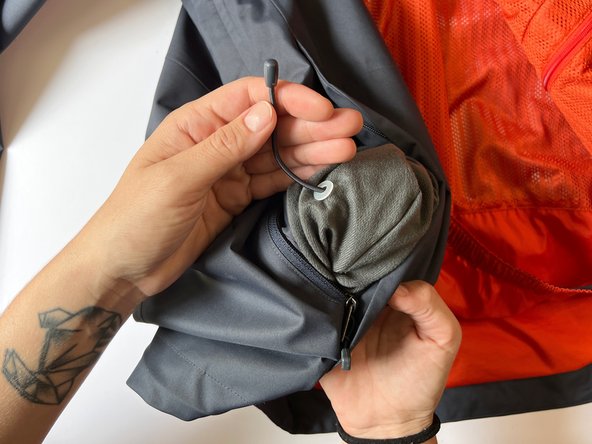
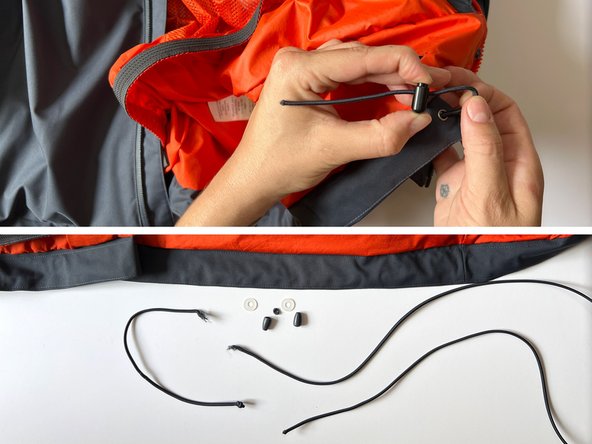
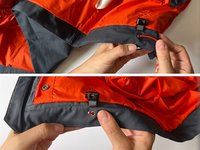
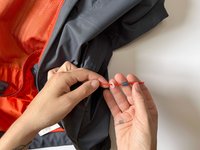
On both ends of the drawcord:
-
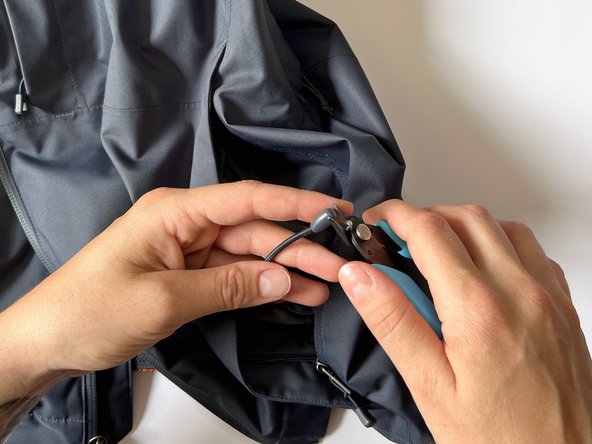
Use flush cutters to pry off the tip of the end cap.
-
Pull the drawcord end out of the end cap and untie the knot.
-
Remove the base of the end cap and any plastic discs (if present).
-
Unthread the drawcord by releasing the tension from the cord locks and pulling it out of the garment completely.
-
-
-
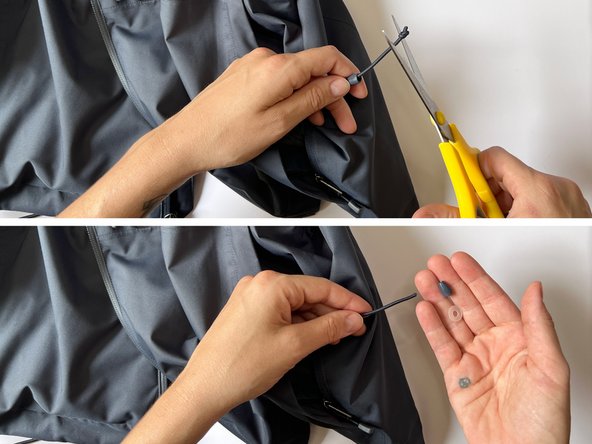
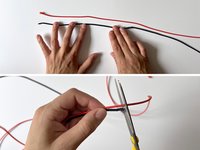
If the drawcord isn't stretched out or missing any part, use the old drawcord as a reference to measure and cut the appropriate length for a new one.
-
Alternatively, to measure and cut a new drawcord without the old one:
-
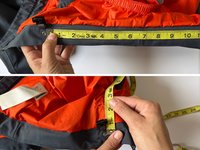
Measure the length of the hem.
-
Add the distance the cord travels to and from any cord locks.
-
Add 2 inches (~51 mm) to account for a 1 inch (~25 mm) seam allowance on each end.
-
Add an additional 1 inch (~25 mm) if the drawcord end knots were cut in Step 2.
-
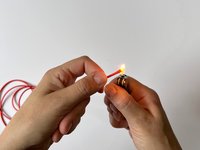
Use a lighter to singe the cut ends of the drawcord.
-
Discard broken pieces responsibly.
-
-
-
-
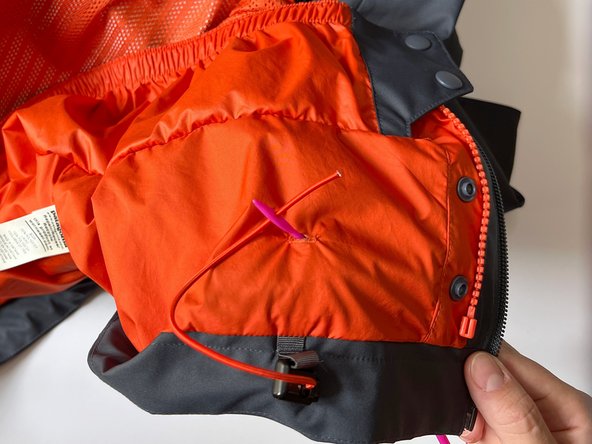
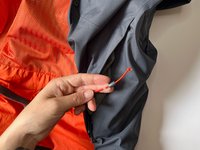
Use your fingers or a plastic drawstring threader to thread the new drawcord through the hem.
-
Once through the hem, double check that the drawcord length is correct.
-
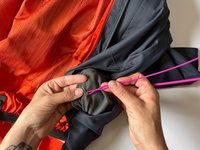
Thread the drawcord through any cord locks and associated grosgrain tabs.
-
-
-
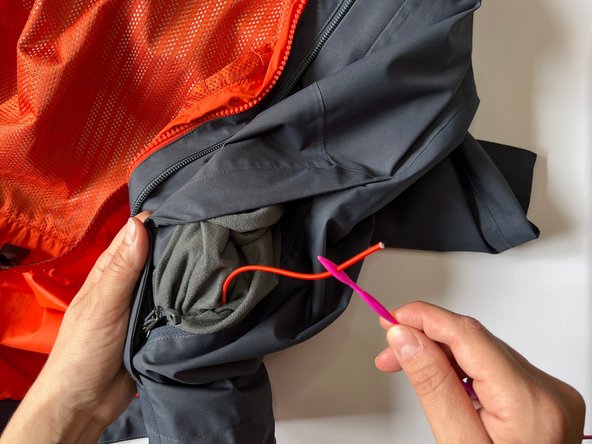
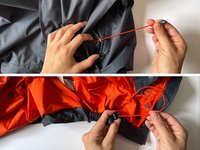
Use a plastic drawstring threader, latch hook, bodkin, or safety pin to thread the drawcord ends into pockets.
-
-
-
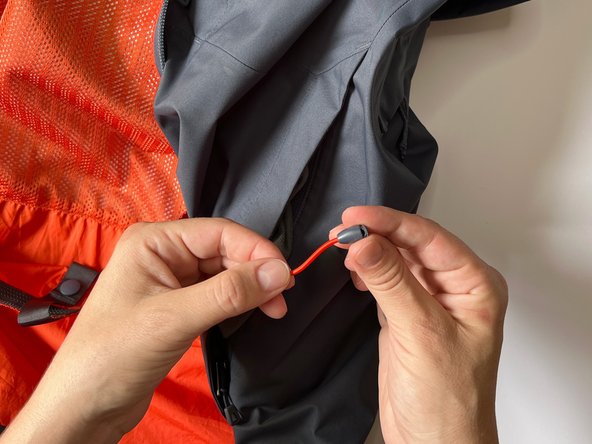
Thread the plastic disc and the end cap base onto the drawcord end.
-
Tie a knot at the end of the drawcord. Pull it tight and snip or singe away any excess.
-
Pull the drawcord so the knot rests inside the end cap base.
-
Replace end cap tip by snapping it into place.
-
-
-
Pull on the ends of the drawcord to make sure they're secured and that the drawcord is functioning properly.
-
Test the drawcord's function at each cord lock.
-
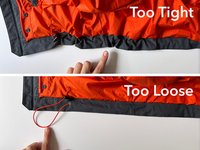
Make a final check on the drawcord length when the cord locks are loosened and the drawcord is laying naturally:
-
Too Tight - Not enough cord. The hemline will bunch.
-
Too Loose - Too much cord. Excess drawcord will either undulate inside the hemline or hang loosely from the cord locks.
-
-
-
VARIATIONS: There are many varieties of drawcords on the vast array of Patagonia items. The techniques and steps outlined in this tutorial can be rearranged or modified to fit the circumstances.
-
MISSING CORD: If the drawcord is missing entirely, use grosgrain loops, eyelets and rivets as context clues. Alternatively, try to find photos of the item on Patagonia.com, WornWear.com, and Google image search.
-
HOOD: Hood drawcords can be more complex with multiple lengths of elastic that can loop around one another. Be careful to examine the placement of drawcords in a hood before removing them.
-