Introduction
This guide contains steps for replacing faulty clickers on the EVGA x17 gaming mouse. Malfunctioning clickers might be due to gunk buildup, broken parts, or faulty wiring. Follow this guide for instructions of how to replace them.
What you need
-
-
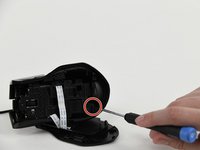
Use a Phillips head screwdriver to remove the 5 screws that secure the bottom panel.
-
-
-
-
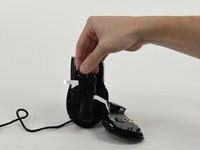
Slowly slide a spudger into and around the bottom of the panel, prying until a "popping" sound is heard.
-


To reassemble your device, follow these instructions in reverse order.

Team

University of Colorado Denver, Team 1-4, Campeau Fall 2023 Member of University of Colorado Denver, Team 1-4, Campeau Fall 2023
UCDENVER-CAMPEAU-F23S1G4
7 Members
6 Guides authored
1 Guide Comment
Tengo un Evga x17 y cuando quitó los sliders, encuentro unas pequeñas capas de plástico que tapan el acceso a los tornillos, ¿qué puedo hacer en ese caso?