Dyson V6 Motorhead Collection Bin Replacement

  1. Dyson V6 Motorhead Collection Bin Replacement, Connection Tubing: step 1, image 1 of 3 Dyson V6 Motorhead Collection Bin Replacement, Connection Tubing: step 1, image 2 of 3 Dyson V6 Motorhead Collection Bin Replacement, Connection Tubing: step 1, image 3 of 3
    • Depress the button releasing an end of the connection tubing.

    • Pull the connection tubing away from the bottom vacuum head.

  2. Dyson V6 Motorhead Collection Bin Replacement: step 2, image 1 of 3 Dyson V6 Motorhead Collection Bin Replacement: step 2, image 2 of 3 Dyson V6 Motorhead Collection Bin Replacement: step 2, image 3 of 3
    • Depress the last button, freeing the connection tubing.

    • Pull connection tubing away from the upper vacuum head.

  3. Dyson V6 Motorhead Collection Bin Replacement, Collection Bin: step 3, image 1 of 2 Dyson V6 Motorhead Collection Bin Replacement, Collection Bin: step 3, image 2 of 2
    • Pull down on the red release tab.

    • When the tab is fully engaged, the bottom of the bin should open.

  4. Dyson V6 Motorhead Collection Bin Replacement: step 4, image 1 of 2 Dyson V6 Motorhead Collection Bin Replacement: step 4, image 2 of 2
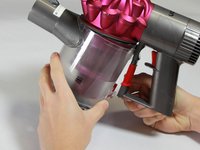
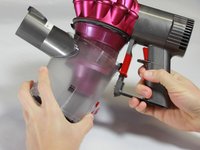
    • Pull down on the release tab a second time, this time the collection bin should release from the upper vacuum head.

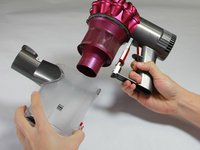
  5. Dyson V6 Motorhead Collection Bin Replacement: step 5, image 1 of 3 Dyson V6 Motorhead Collection Bin Replacement: step 5, image 2 of 3 Dyson V6 Motorhead Collection Bin Replacement: step 5, image 3 of 3
    • Pull the collection bin away from the upper vacuum head.

Conclusion

To reassemble your device, follow these instructions in reverse order.

Addie Hedge

Member since: 01/24/17

710 Reputation

5 Guides authored

Team

Cal Poly, Team 22-6, Maness Winter 2017 Member of Cal Poly, Team 22-6, Maness Winter 2017

CPSU-MANESS-W17S22G6

4 Members

5 Guides authored

0 Comments

Add Comment

View Statistics:

Past 24 Hours: 0

Past 7 Days: 6

Past 30 Days: 12

All Time: 3,190