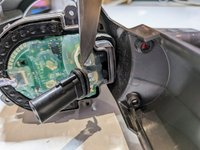
Introduction
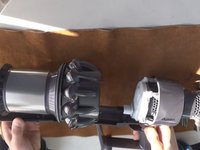
This guide will show you how to replace the trigger in a Dyson V11 Torque Drive vacuum cleaner. Since the trigger is made of plastic is it easily breakable. If the trigger on your Dyson V11 Torque Drive is broken then it will not start vacuuming. Even if the battery is fully charged, the Dyson V11 Torque Drive will not start vacuuming. Once you replace the trigger the Dyson V11 Torque Drive vacuum should be operational agin and it will start vacuuming.
Tools you will need to replace the trigger on the Dyson V11 Torque Drive vacuum are a Phillips #1 screw driver, Phillips #0 screw driver, and a spudger.
What you need
-
-
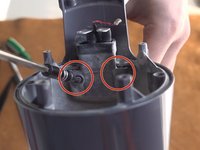
Remove the two Phillips #1 screws from the underside of the battery.
-
-
-
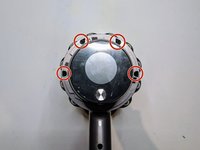
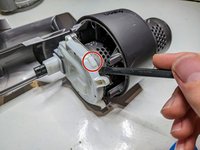
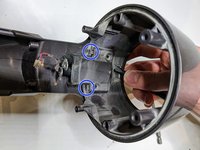
Remove the four screws beside the battery indicator with a Phillips #1 screwdriver.
-
-
-
-
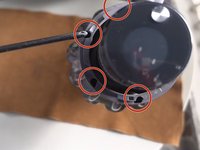
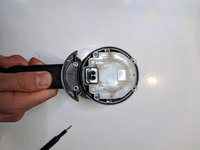
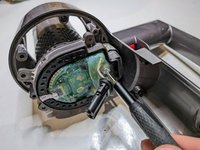
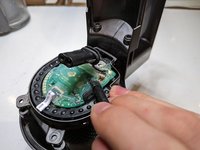
Remove two screws from the protective case covering the circuit board.
-
On some models these screws are Phillips #0, on others Torx #8.
-
-
-
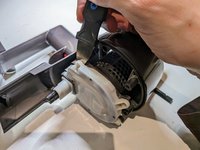
The circuit board casing is very stiff and can be difficult to remove. The key is to use a spudger to pry near the rectangular protrusions, as these cover the plastic clips.
-
It can also help to slide a jimmy under the casing where you just removed the screws from, and pry from there to loosen that side.
-
-
-
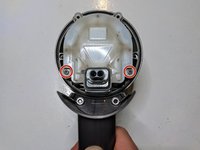
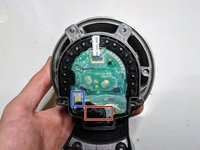
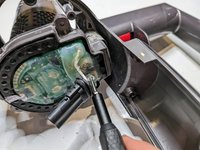
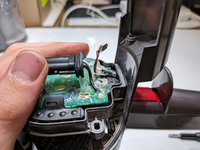
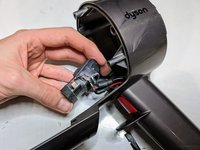
The circuit board may be covered with a great deal of translucent glue. We need to access three things under this covering: two power connections, and the switch cable.
-
Carefully scrape or cut the glue away from the screw heads and power cables.
-
In the same way, free the switch cable and its plug.
-
-
-
Remove the screws holding down the power cables.
-
-
-
Gently disconnect the switch cable plug and lift the cable up from the circuit board so that it doesn't tangle with the black and white wires.
-
-
-
Rotate the ends of the power cables so that they fit through the slot in the lower circuit board casing more easily.
-
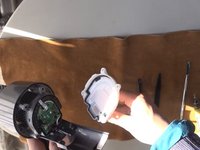
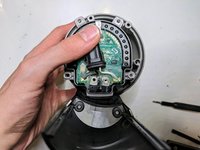
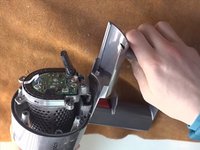
Remove the center part from the outer shell. Ideally, gently push the cables out through the slot, but this may be difficult — you may need to use some force to pull the center part away.
-
-
-
Remove the single screw inside the charging compartment with a Phillips #0 or Torx screwdriver, depending on the screw installed in your model.
-
-
Tool used on this step:Tweezers$4.99
-
Remove two screws from the cable casing.
-
Pry the cable casing up to free the clips. You may need to push on the clips with a screwdriver or tweezers.
-
Slide the casing off the cables.
-
-
-
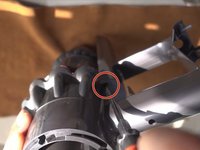
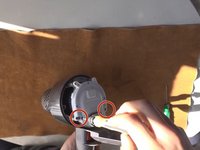
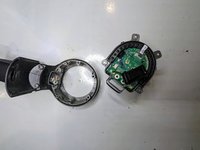
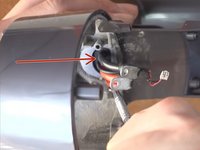
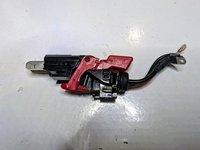
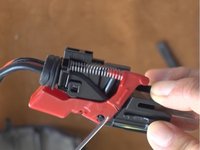
Use a spudger to push the part marked in the image to remove the trigger from the charging compartment.
-


To reassemble your device, follow these instructions in reverse order.
Cancel: I did not complete this guide.
58 other people completed this guide.

Team

York University, Team 1-29, O'Regan Winter 2022 Member of York University, Team 1-29, O'Regan Winter 2022
YORK-O'REGAN-W22S1G29
1 Member
5 Guides authored
25 Guide Comments
Some of the screws in this repair (step 8 and 9) require a T8 Torx bit instead of a Phillips. The Torx screwdriver should be at least 10 cm long and relatively thin to be able to fit into the base of the vacuum. The screwdriver I used from my iFixit essentials kit was too short and too wide to fit into the compartment. That should be added to the guide.
L'assemblage de cet appareil le rend assez compliqué à démonter... surtout la partie avec les câbles de puissance qui vont à la batterie.
Par expérience, en ce qui concerne la gâchette c'est faisable. La gâchette peut se trouver facilement sur internet, ça permet de réparer à pas cher et souvent certaines pièces génériques sont renforcées.
Also applicable to the v10. Some philips are T8 and as one comment already said, they need to be long and thin for some screws - but otherwise a good guide. Step 1 should be remove battery. My dust cover over the circuit board had little retaining clips which made it feel stuck. The small connector attaching the red/white wires lifts out vertically, with a little retaining clip. The final step, I needed a large screw driver to push the trigger part out. I couldn't get the leverage with the shorter spudger.
I chose to buy the full body and replace it after 6 years of use. I hadn't realized how the performance had degraded over time. My early release V11 animal with a screw on battery works better than new and now I have the upgraded display. I am going to deep clean the old body and replace the trigger as a backup but I didn't have a T8 long enough and skinny enough to remove all the screws.
Missing the punch line! This is a good review all until the last step, which is INCOMPLETE and incorrect. The switch assembly must be removed from the arm, and this is much easier to do with a pliers than by pushing on the top. Once the assembly is removed, you must be careful to note the orientation of the broken switch trigger, remove the old, and replace the new trigger, not forgetting to attach the spring.